Installation, Important, Radiant assembly – DCS Series 7 Liberty Collection 30 Inch Built-In Gas Grill Installation and User Guide Manuel d'utilisation
Page 25
Advertising
23
INSTALLATION
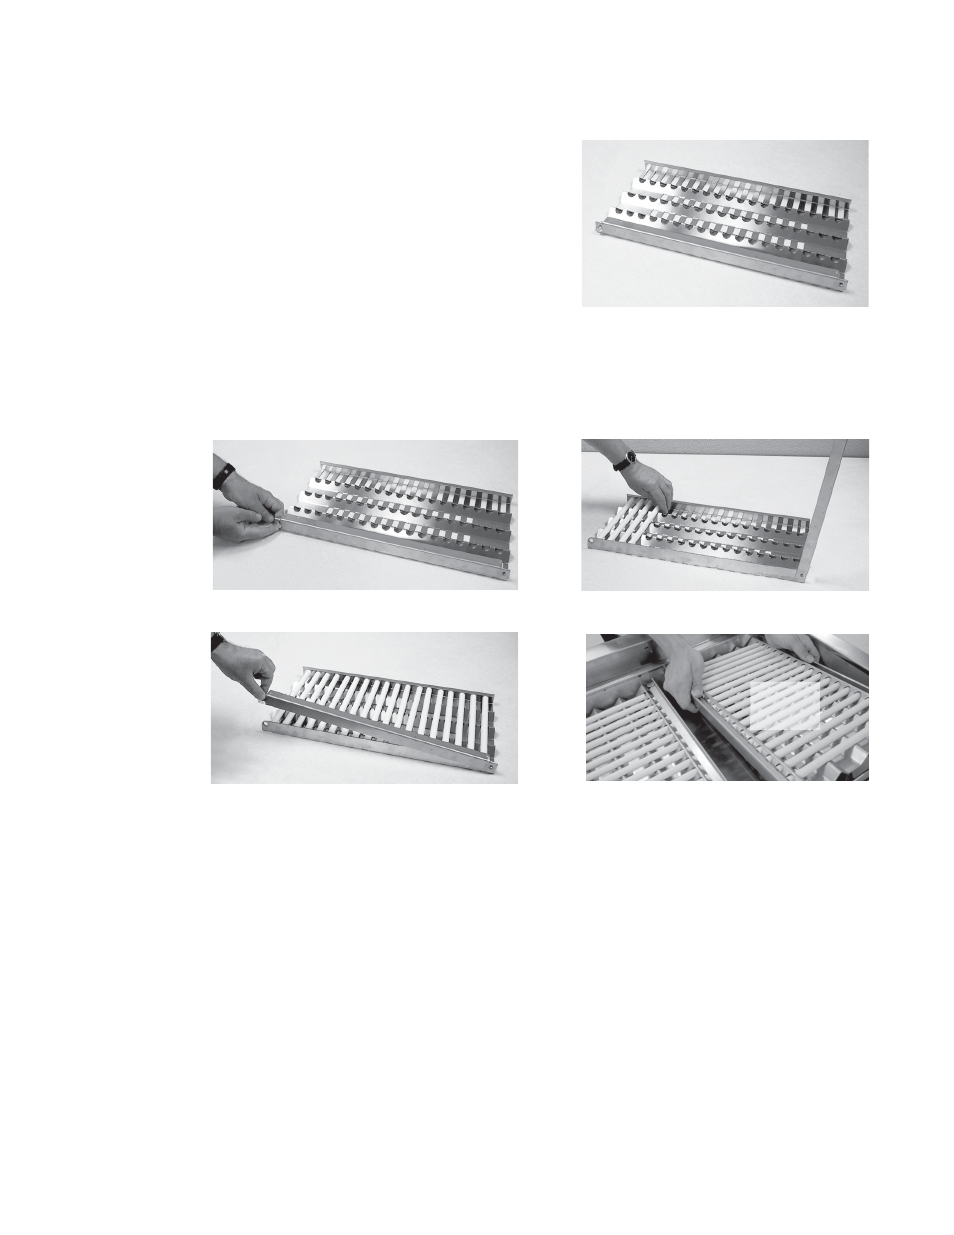
RADIANT ASSEMBLY
RADIANT ASSEMBLY INSTALLATION:
1.
Unpack ceramic rods and remove radiant (Fig.37) from the unit.
2.
Unlock radiant end cap by pushing it up with two fingers
(Fig. 38).
3.
Place 18 ceramic rods on the radiant (Fig. 39).
4.
Lock radiant end cap (Fig. 40).
5.
Place the assembled radiant in the unit (Fig. 41).
IMPORTANT:
Placement of the trays in the grill are critical to ensure even cooking performance. Lock radiant end caps must be in
the middle of the grill. See Figure 41.
Note:
In case a ceramic rod breaks:
a)
Unlock radiant end cap by pushing it up with two fingers (Fig. 38) or pliers may be used.
b)
Replace broken ceramic rod.
c)
Lock radiant end cap.
Fig. 37
Fig. 38
Fig. 39
Fig. 40
Fig. 41
Radiant End
Caps
EN
Advertising
Ce manuel est liée aux produits suivants: