Installation, Warning, Warning: important – DCS Series 7 Liberty Collection 30 Inch Built-In Gas Grill Installation and User Guide Manuel d'utilisation
Page 23: Leak testing - side burner, Burner adjustment - side burner
21
INSTALLATION
LEAK TESTING - SIDE BURNER
WARNING!
Do not smoke while leak testing. Extinguish all open flames.
Make a soap solution of one part liquid detergent, and one part
water. Never test for leaks with an open flame. For LP units, check
with a full cylinder. Make sure all control valves are in the “OFF”
position. Turn the gas supply “ON”. Check all connections from the
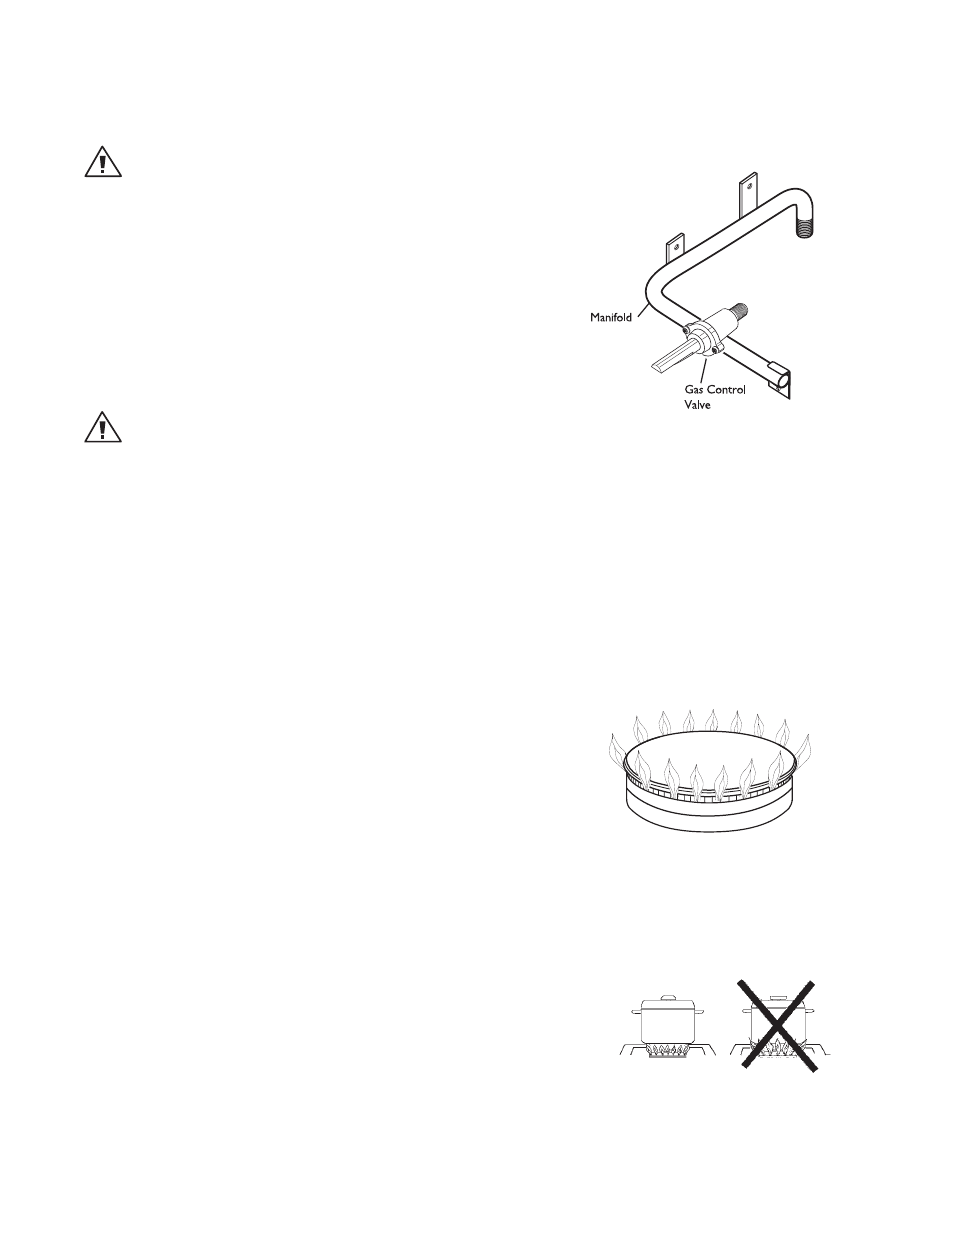
supply line (Fig. 31), or LP cylinder (Fig. 30) up to the manifold pipe
assembly (Fig. 32). Apply the soap solution around the connection
with a spray bottle, brush, or rag. Soap bubbles will appear where
leak is present. If a leak is present, turn off gas supply, tighten any
leaking fittings, turn gas on, and recheck.
WARNING: IMPORTANT!
Inspect the gas supply piping or hose prior to turning the gas “ON”.
If there is evidence of cuts, wear or abrasion, it must be replaced prior to
use. Do not use the side burner if the odor of gas is present. Turn the control knob to “OFF”, then turn off the gas
supply. If using LP, is there gas in the tank? Always keep your face and body as far away from the burner as pos-
sible when lighting.
BURNER ADJUSTMENT - SIDE BURNER
Your new side burner is equipped with burners typical of those used
in restaurants (Fig. 33). These burners are designed for maximum
cleanability and controlability. The burner should never be operated
if the cap is not in place.
BURNER EFFICIENCY AND FLAME CHARACTERISTICS
It is necessary to keep the burner ports and the igniters clean for
proper lighting and efficient performance of the burners. The
burner flame should burn completely around the burner with no ex-
cessive noise or lifting. The flame should be blue in color and stable
with no yellow tips. During initial use, foreign particles in the gas
line, or dust in the air around the appliance may cause an orange
flame. This will disappear with use.
FLAME HEIGHT
The correct height of the flame mainly depends on the size of the
bottom of the cooking utensil, the material of the cooking utensil,
the amount and type of food and the amount of liquid in the utensil.
The following are some basic rules for selecting flame height.
n
For safety reasons the flame must never extend beyond the
bottom of the cooking utensil. Never allow flames to curl up the
side of the pan (see Fig. 34).
n
Utensils which conduct heat slowly (such as glass-ceramic)
should be used with medium to low flames. If you are cooking with
a large amount of liquid, a slightly larger flame can be used.
Fig. 32
Fig. 33
Fig. 34
Cap
PROPER FLAME HEIGHT
EN