Installation, Caution, Getting started – DCS Series 7 Liberty Collection 30 Inch Built-In Gas Grill Installation and User Guide Manuel d'utilisation
Page 13: Important, Cart assembly instructions
11
INSTALLATION
CART ASSEMBLY INSTRUCTIONS
IMPORTANT:
Read all instructions before you begin. Do not jump ahead or skip any step.
CAUTION:
Some parts have sharp edges; care must be taken when handling the various components to
avoid injury. Please read safety information provided in these instructions before beginning
assembly. Wear gloves when handling.
Two or more people should work together to assemble the cart and All-Grill, Double Side
Burner/Sink, or Double Side Burner/Griddle.
NOTE: Avoid using optional side shelf to move cart. Push or pull cart by grasping corners of head.
Getting Started
n
Remove packaging.
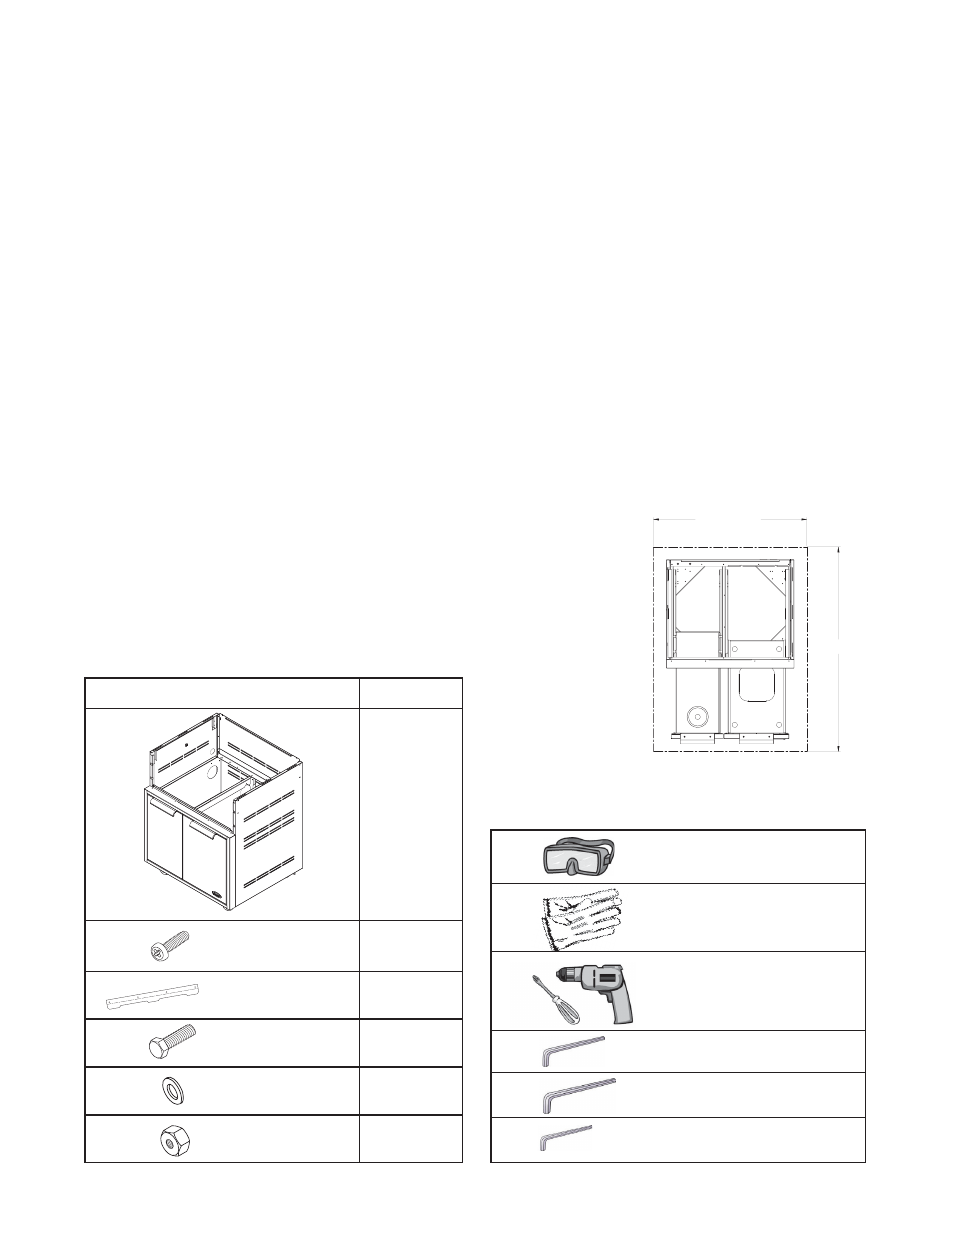
Contents Included:
Your cart is packaged in one box. The box contains your 30” cart and a
universal hardware kit to be used for head installation and may contain
extra hardware for your convenience.
Tools Required:
Contents
Qty.
22.5”
11-1/2”
X
19-3/4”
12-3/16”
X
19-3/4”
24.128”
26.6”
19.08”
2.497”
1
13
2
2
4
2
Machined Phillips
screws
10-24X1/2”
Eye Goggles
Work Gloves
5/32” Allen Wrench
3/16” Allen Wrench
Power Screwdriver or
Variable Speed Drill with
Phillips - tip #2 Attachment
30” Cart
Bracket, Tab
3/32” Allen Wrench
Bolt Hex
1/4-20-1/2”
Washer
.313 x .750
Nut Hex
1/4-20
LOCATING THE CART
For proper use, this product should be installed/positioned on a flat ground or patio. Unevenness such as
bumps, cracks and protrusions should be 1/4” or less. Refer to Fig. 04 for required flat area dimensions.
CAD 30 = 30”
CAD 36 = 36”
CAD 48 = 48”
4 feet
Fig. 04
TOP VIEW (with drawers open)
EN