Multi-Contact MA202 Manuel d'utilisation
Page 8
Advanced Contact Technology
15
16
17
Fabricant/Producer:
Multi-Contact AG
Stockbrunnenrain 8
CH – 4123 Allschwil
Tel.
+41/61/306 55 55
Fax
+41/61/306 55 56
www.multi-contact.com
© b
y Multi-Contact A
G, Switz
erland – MA202 – 03.2015, Inde
x n
, Global Communications – Modifications sous réserv
e / Subject to alterations
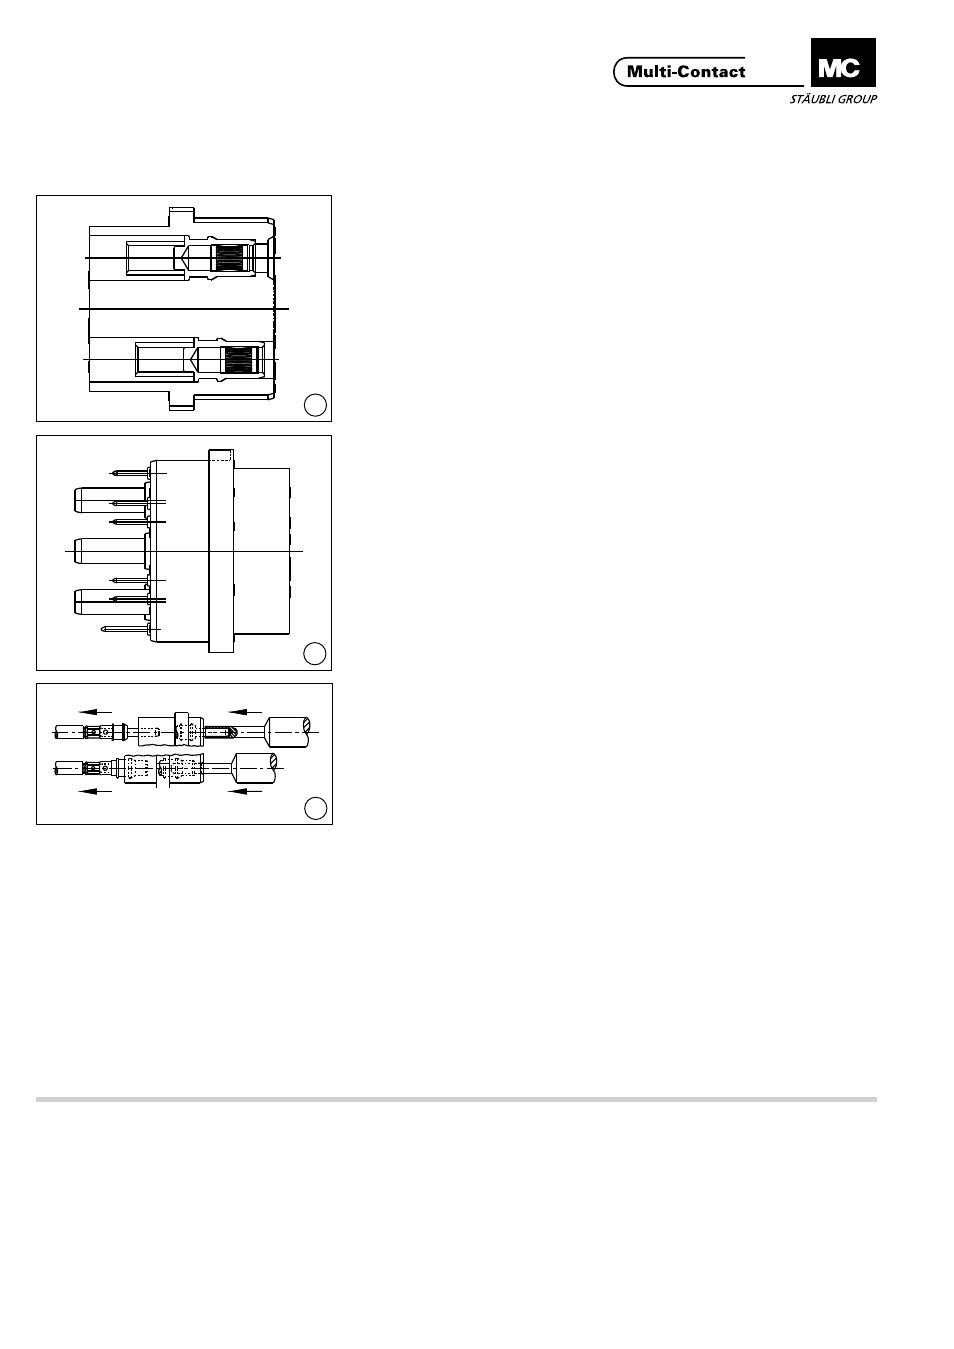
Contrôle du montage
Control of correct assembly
(ill. 15 + 16)
ME1.../ME2...
Sur les inserts mâles ME1��� et ME2���,
tous les contacts de terre (PE) sont
en position avancée par rapport aux
autres broches�
ME3.../ME4...
Sur les inserts mâles ME3��� et ME4���,
seuls les contacts de terre jusqu‘au
Ø 2 mm sont avancés. Les contacts
mâles à partir du Ø 3 mm doivent être
au même niveau que les autres (pas
de broche avancée)�
Pour les douilles à partir du Ø 3 mm,
la douille de terre PE est en position
avancée dans l’isolant� Sur les sup-
ports isolants (p� ex� support hybride)
avec contact de blindage (S), la douille
de blindage est avancée par rapport
aux autres contacts, mais en arrière
par rapport à la douille de terre� Vous
trouverez les détails à ce sujet sur les
plans des produits�
(ill. 15 + 16)
ME1.../ME2...
all types of PE pins are in advanced
position (mating first, braking last)
compared to the other contacts�
ME3.../ME4...
In male inserts ME3��� and ME4���only
PE pin contacts up to Ø 2 mm are in
advanced position� PE contacts of
Ø 3 mm and above are on the same
level as the other pins (no leading
contact)� Regarding female inserts, for
sockets of Ø 3 mm or larger, the PE
socket is in advanced positon�
In contact carriers (e�g� hybrid car-
riers) with a shield contact (S) the
shield contact is in advanced position
compared to the control contacts, but
lagging behind the PE contact�
You will find the relevant details on the
product drawings.
(ill. 17)
Les douilles montées trop en avant
peuvent être ramenées dans leur
position nominale à l‘aide de l‘outil de
démontage (pour douille), (p� 4)�
Lors d‘une réparation, les contacts
seront extraits du support isolant avec
l‘outil de démontage approprié (voir
page 4)�
(ill. 17)
Sockets pressed in too far can be
turned back to their proper seating
position with the socket extraction
tool (page 4)�
By repairs or installation errors, re-
move the contacts from the contact
carrier with the respective extraction
tool (see page 4) and then reinstall
them correctly�