Multi-Contact MA202 Manuel d'utilisation
Page 6
Advanced Contact Technology
6 / 8 www.multi-contact.com
9
10
11
12
Sertissage des contacts
Crimping the contacts
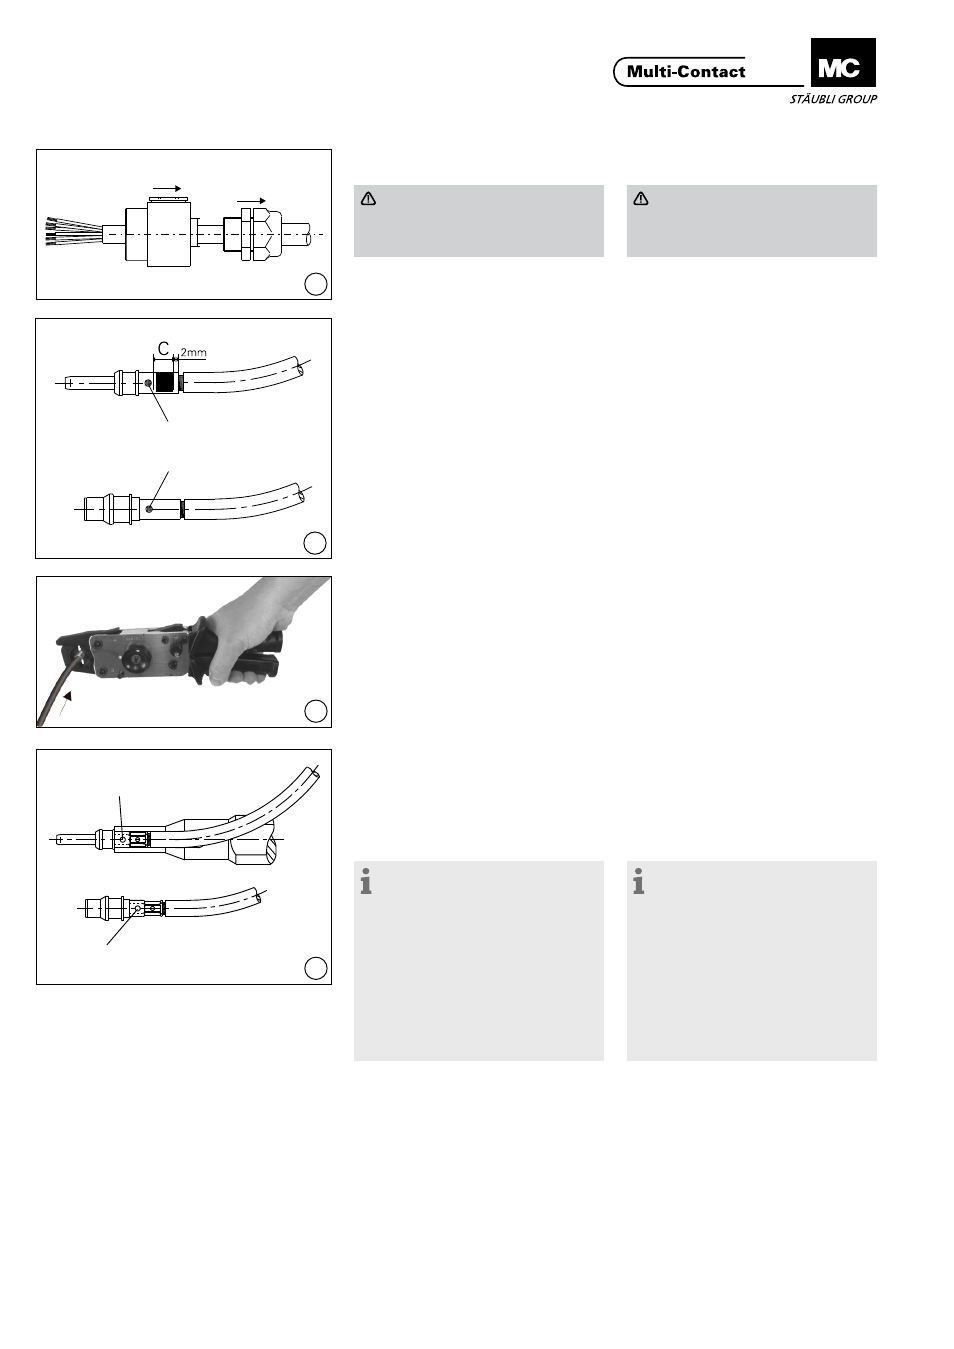
Attention (ill. 9)
Avant de sertir, enfiler le presse-
étoupe et le boîtier arrière sur le
câble�
Attention (ill. 9)
Slip the cable gland and back
section of housing on the cable
before crimping�
(ill. 10)
Veiller à bien respecter la zone de
sertissage (C)�
Introduire le câble dans le fыt а sertir
jusqu‘en butée� Le câble doit être
visible dans l’orifice de contrôle.
(ill. 10)
When inserting the crimping sleeve in
the tool, use crimp zone (C)�
Fully insert lead into the crimping
sleeve� Leads must be visible in the
contole hole�
(ill. 11)
Sertir tout en maintenant le conduc-
teur en position dans le fût (pousser
axialement)�
(ill. 11)
Crimp the wire, pushing it gently into
the sleeve while doing so.
(ill. 12)
Le conducteur doit être visible dans
l‘orifice de contrôle avant et après
sertissage. Vérifier la qualité de sertis-
sage en exerçant une traction sur le
conducteur�
(ill. 12)
Wire must be visible in the control
hole before and after crimping� Check
that the
wire can not be pulled or turned out of
the crimping sleeve (Control !)
Remarque:
Lors de sertissage des contacts à
thermocouple, veiller à:
1- Sertir les câbles avec les contacts
correspondants:
- Contact Chromel avec le
conducteur Chromel
- Contact Alumel avec le conducteur
Alumel
2- Côté raccordement de la douille,
former une boucle avec le conduc-
teur.
Note:
When crimping on thermocouple
pressure contacts, please observe the
following:
1- Fit contacts on the appropriate
cables:
- Chromel contacts on chromel
conductors
- Alumel contacts on alumel conduc
tors
2- When attaching the socket con
tact, leave a small loop of cable.
Orifice de contrôle
Control hole
Orifice de contrôle
Control hole
Orifice de contrôle
Control hole