Ec poignée) – Multi-Contact MA206 Manuel d'utilisation
Page 7
Advanced Contact Technology
www.multi-contact.com
7 / 12
11
12
13
14
25mm
(ill. 11)
Monter la goupille de retenue (9) dans
le boîtier isolant (1 et 2), plus précisé-
ment dans le logement situé entre les
deux taraudages.
(ill. 11)
Press retaining pin (9) into the open-
ing of the insulated housing (1 or 2)
between the threaded inserts.
(ill. 12)
L’étrier de verrouillage pourra indiffé-
remment être monté du côté mâle ou
femelle.
(ill. 12)
Depending on the application, the
locking strap can be mounted on
either the male or female side.
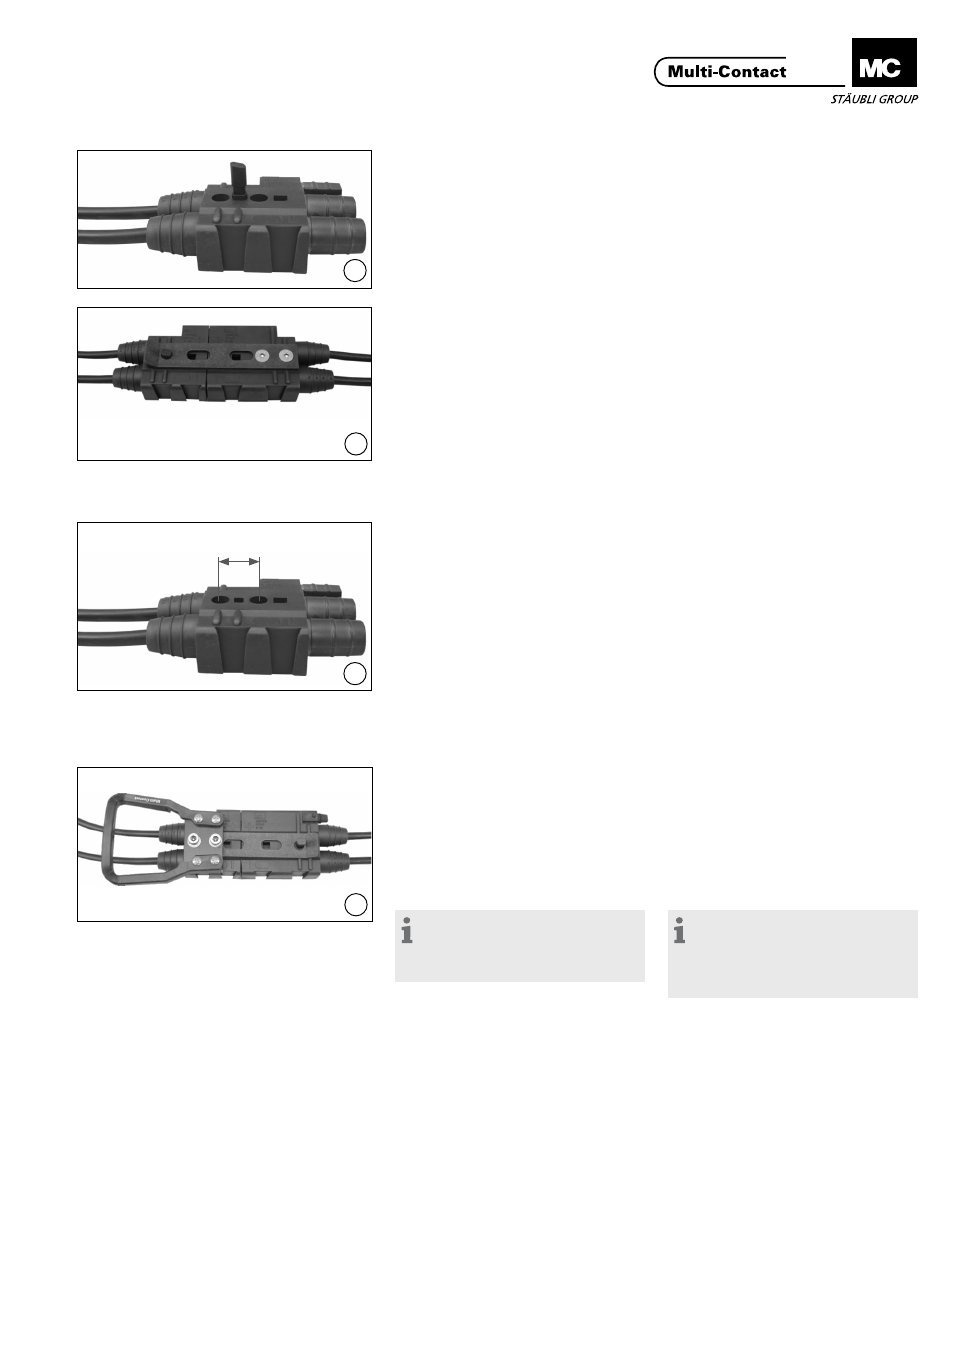
(ill. 13)
Le cas échéant, les boîtiers isolants
pourront être fixés par l’intermédiaire
de deux vis à tête cylindrique (non in-
cluses dans l’équipement de base) sur
un socle avec un entraxe de 25mm.
(ill. 13)
If necessary, the insulated housing
can be fastened to a mounting plate
or similar with two cap head screws
M6 (not included in scope of supply).
Distance between hole centres 25mm.
Mise en place du disposi-
tif de verrouillage et bri-
dage du boîtier isolant.
(avec poignée)
Assembly of locking
device and fastening the
housing
(with handle)
La poignée est livrée sous set:
1 Poignée
1 Etrier de verrouillage
2 Entretoises
2 Vis cylindriques M6
The hand grip is supplied as set:
1 Handle
1 special locking strap
2 Spacer sleeves
2 Cap head screws M6
Remarque:
Si besoin, le connecteur peut être
livré avec poignée. Les entretoises
doivent cependant être remplacées.
Note:
If necessary, the battery connec-
tor can be equipped with a handle.
In this case, the spacers are to be
replaced.