Démontage des contacts principaux, Removing the main contacts – Multi-Contact MA206 Manuel d'utilisation
Page 6
Advanced Contact Technology
6 / 12
www.multi-contact.com
6
7
8
9
10
(ill. 6)
Après la mise en place de la douille, le
cône de montage pourra être retiré du
boîtier isolant à l’aide de la poignée (à
embout fileté) de l’outil de montage.
(ill. 6)
After the socket contact has been
installed, remove the insertion cone
from the insulated housing with the
extraction tool.
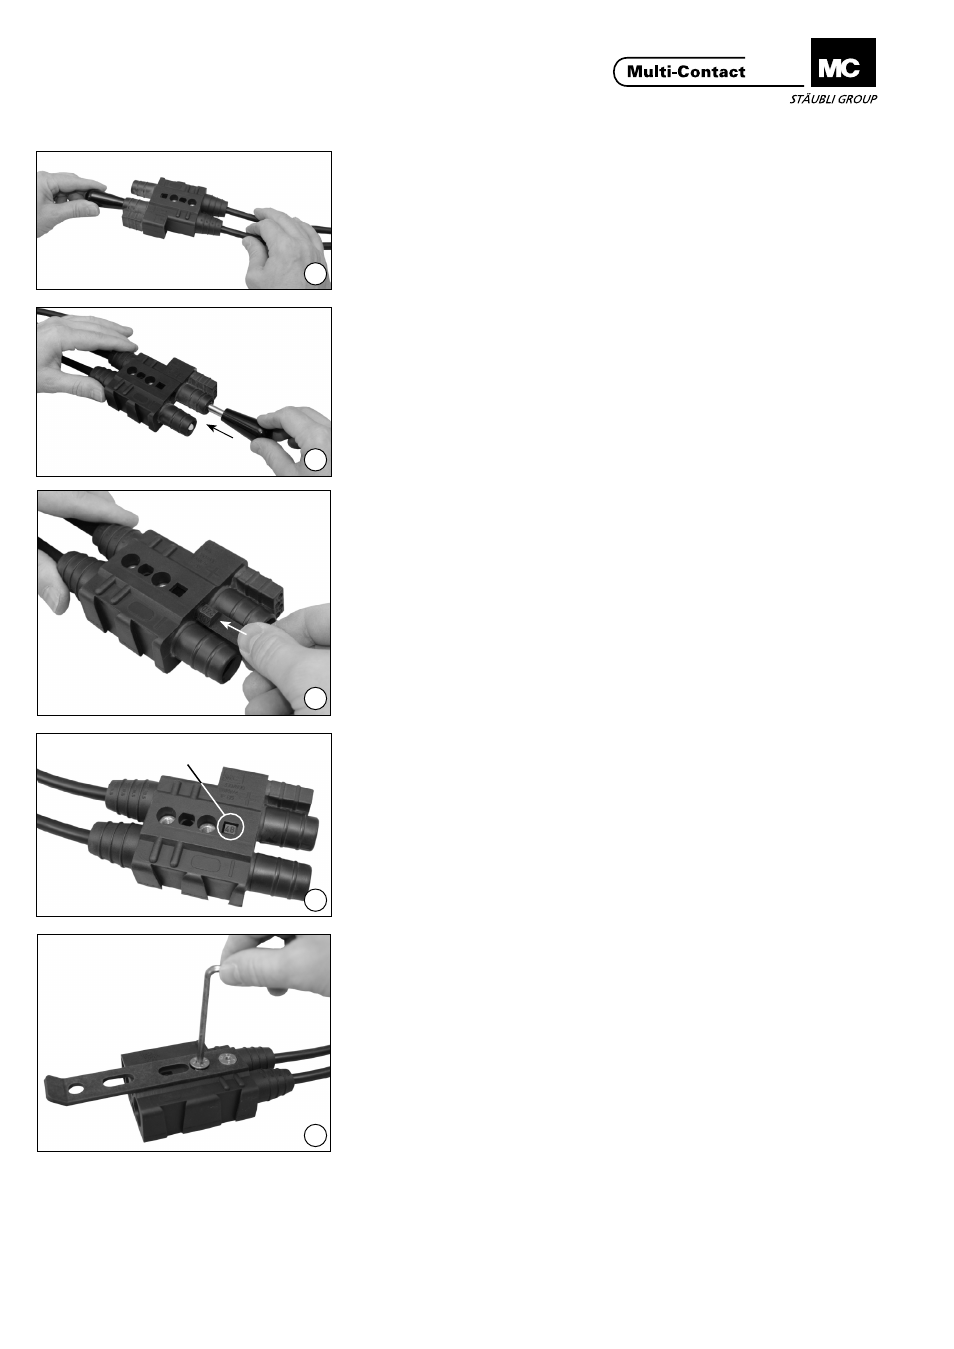
Démontage des contacts
principaux
Démontage des contacts
(ill. 7)
En cas de réparation, les contacts
peuvent être démontés avec l’outil
adéquat en intervenant par la face
d’embrochage.
Removing the main
contacts
Withdrawing the contacts
(ill. 7)
In the event of repair, the contacts
can be forced out of the plugging side
with respective removal tool.
Mise en place des sélecteurs
de codage
(ill. 8)
Insérer les sélecteurs d’application (6
possibilités, A-F) (5) et de tension (6
possibilités, 12V...630V) (6) dans le
boîtier isolant.
Coding pin assembly
(ill. 8)
Press the hex. coding pin for the ap-
plication A-F (5) and the voltage 12V
630V (6) into the insulation housing.
(ill. 9)
Les options de codage choisies appa-
raissent dans une fenêtre de lecture.
(ill. 9)
The selected code appears in the
window.
Mise en place du disposi-
tif de verrouillage et bri-
dage du boîtier isolant.
(sans poignée)
Assembly of locking
device and fastening the
housing
(without handle)
(ill. 10)
Visser l’étrier de verrouillage (7)
sur le boîtier isolant (1 et 2) par
l’intermédiaire de vis à tête fraisée
M6x20.
(ill. 10)
Attach the locking strap to the
insulated housing (1 or 2) by screw-
ing M6x20 screws into the threaded
inserts.
Fenêtre de lecture
Window