Multi-Contact MA255 Manuel d'utilisation
Page 7
Advanced Contact Technology
www.multi-contact.com
7 / 12
12
13
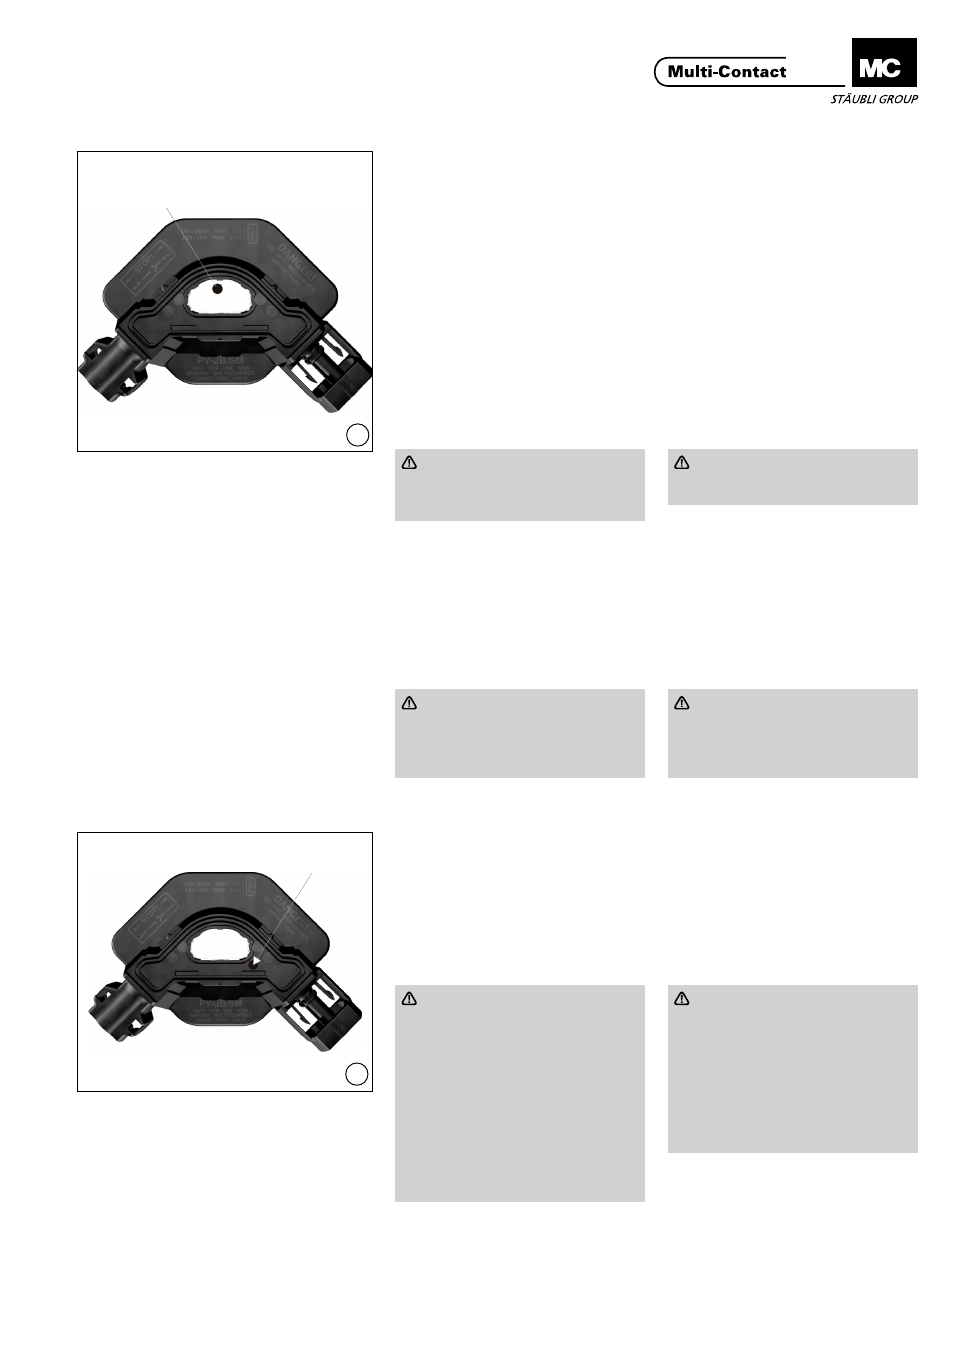
(ill. 12)
Après avoir correctement orienté et
collé le boîtier de jonction au dos du
module PV, introduisez une thermode
de conception spéciale à l’extrémité
d’une machine à souder par refusion
(Hot Bar) ou une pointe de fer à sou-
der de Ø 4 mm à travers l’ouverture
dans la PV-JB/SM et soudez les deux
pattes aux nappes de bus en utilisant
la pression, le temps et la tempéra-
ture appropriés. Pour un soudage et
un assemblage corrects des pattes
de soudage à la barre conductrice, il
est nécessaire de pré-étamer la barre
conductrice (un dépôt d’argent sur
la barre conductrice est suffisant) et
d’appliquer un flux.
(ill. 12)
After properly orienting and bonding
the junction box to the back of the PV
module, reach through the opening in
PV-JB/SM with a specially designed
thermode on the end of a reflow sol-
dering (Hot Bar) machine or
Ø 4 mm soldering iron tip and solder
both solder flaps to the bus ribbons
using the appropriate pressure, time,
and temperature. For proper solder-
ing and adhesion of the solder tabs to
the busbar it is required to pre-tin the
busbar, (silver solder plating on the
busbar is sufficient), and apply a (no
clean) flux.
Prudence
L’utilisation d’une nappe de bus
en aluminium n’est pas recom-
mandée.
Caution
Use with an aluminium bus rib-
bon is not recommended.
Une fois l’opération de soudage termi-
née, éloignez la source de chaleur et
maintenez la pression jusqu’à ce que
la zone de soudage se soit solidifiée.
La soudure devrait être évaluée selon
la norme IPC J-STD-001D ou équiva-
lent�
After the soldering operation is
complete, remove heat and maintain
pressure until the solder area has
solidified.
The solder connection method should
be evaluated according to the stand-
ard IPC J-STD-001D or equivalent.
Attention
Faites particulièrement attention
à ne pas entrer en contact avec
un composant en plastique pen-
dant l’opération de soudage.
Attention
Take special care not to come in
contact with any plastic com-
ponents during the soldering
operation.
Scellement du boîtier de
jonction
Potting of the junction box
(ill. 13)
Remplissez le boîtier de jonction
d’encapsulant jusqu’au bord supérieur
de l’ouverture dans le PV-JB/SM de
façon qu’une petite quantité d’encap-
sulant (env. 1 cc) pénètre dans le trou
de trop-plein.
(ill. 13)
Fill the junction box with potting
material to the top of the opening in
the PV-JB/SM so that a small amount
of pottant (approx. 1 cc) spills in to the
overflow well.
Prudence
NE PAS remplir sinon il y a un
risque d’apparition de bulle d’air
dans l’encapsulant ou une poche
d’air risque de rester emprison-
née dans le boîtier de jonction.
En cas de remplissage manuel,
il est recommandé de remplir le
boîtier de jonction aux 2/3, de
laisser les bulles d’air monter à la
surface pendant env. 10 se-
condes, puis de remplir le volume
restant�
Caution
DO NOT pour abruptly as to crea-
te air pockets in the pottant or to
trap any air inside of the junction
box.
It is recommended if dispensing
manually to fill the junction box
2/3 full, let air bubbles surface for
approx. 10 seconds, then fill the
remaining volume.
Ouverture dans PV-JB/SM
Opening in PV-JB/SM
Trou de trop plein
Overflow well