Plugging and unplugging – Multi-Contact MA275 Manuel d'utilisation
Page 7
Advanced Contact Technology
www.multi-contact.com
7 / 8
18
19
17
16
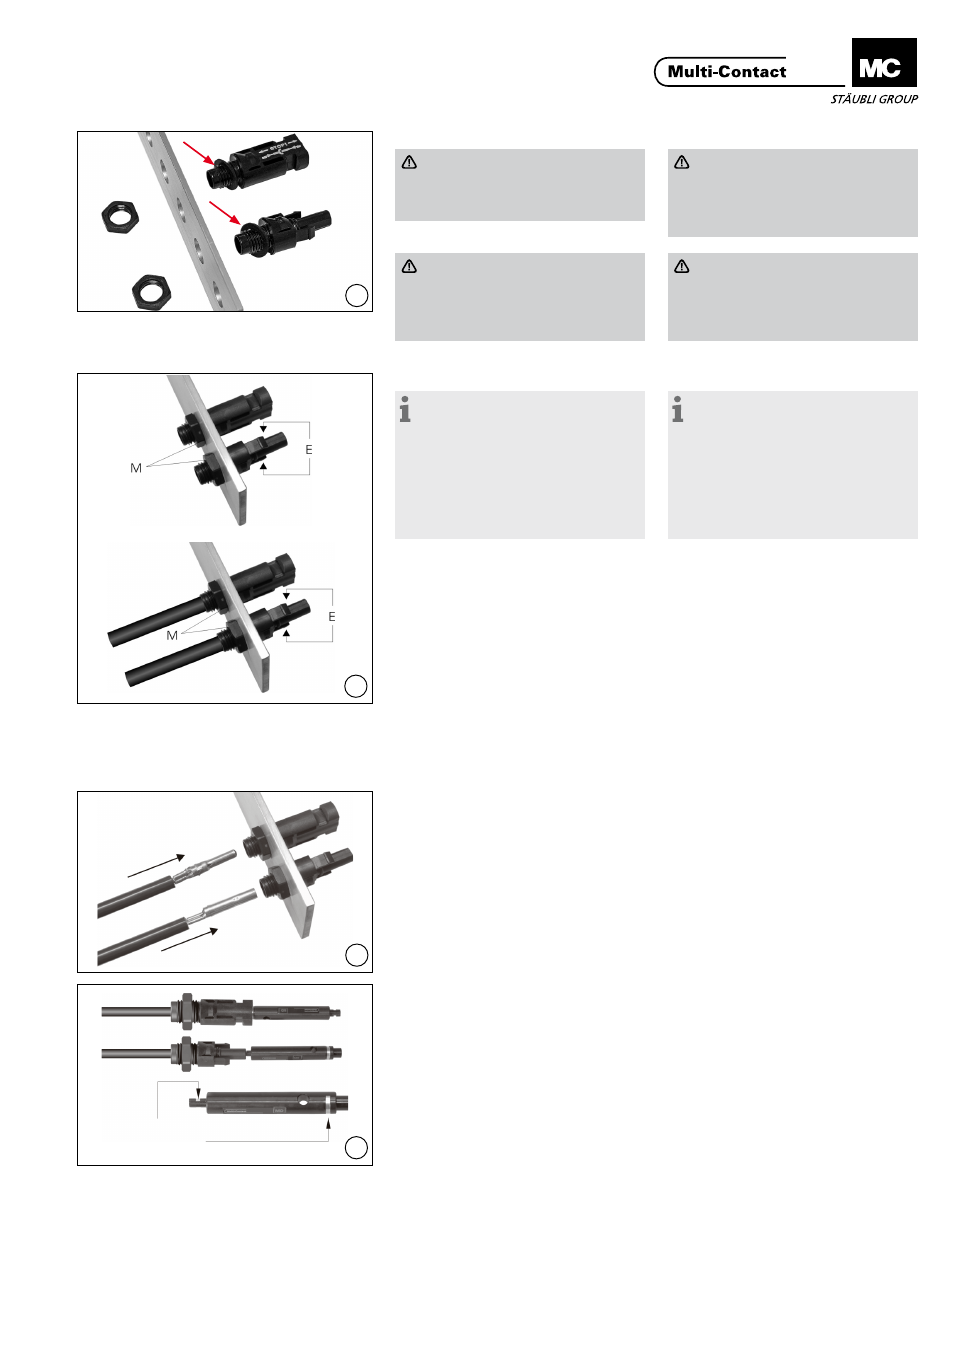
(ill. 16)
Attention:
Avant de passer l‘isolant plas-
tique à travers les trous, le joint
doit se trouver sur la tige filetée.
(ill. 16)
Attention:
Before mounting the plastic
insulations through the bore, the
gasket must be located on the
insulation.
Danger:
Si le joint n‘est pas ajouté ou mal
monté, le respect des indices
de protection IP65 et IP68 est
compromit.
Danger:
In case of lacking gasket or
incorrect mounting, the ingress
protection IP65 and IP68 will be
compromised.
(ill. 17)
Remarque:
Positionner les pièces en plastique
(E) de manière à ce qu‘elles puissent
être connectées et déconnectées.
Visser les écrous (M) et serrer avec
la clé dynamométrique. Les valeurs
typiques 2 Nm
1)
. Le couple de serrage
approprié doit ètre vérifié en fin de
montage.
(ill. 17)
Note:
Position the plastic parts (E) so that
they can be plugged and unplugged.
Screw on the nuts (M) and tighten
them with the torque wrench.
Typical values lie at 2 Nm
1)
. The ap-
propriate torque has to be verified in
the end use according to the respec-
tive housing
1)
Nous vous conseillons de suivre précisément
les procédures de calibrage définies pour chaque
clé dynamométrique!
1)
We recommend precisely following the calibra-
tion procedures defined for each specific torque
wrench used!
En position de montage, le joint
d‘étanchéité doit être à plat sur le côté
extérieur de la surface de montage.
Lors du contrôle visuel après le mon-
tage, il ne doit subsister ni fissure, ni
pliage ou autres perturbations!
In mounting position, the flat gasket
must lie even on the outer side of the
mounting surface.
During a visual check after assembly,
no cracks, foldings or other disturban-
ces should exist!
(ill. 18)
Insérer les contacts sertis dans l‘iso-
lation à l’arrière jusqu‘à ce qu‘ils s‘en-
clenchent. Vérifier l‘enclenchement en
tirant doucement sur le câble (force
de traction max: 20N).
(ill. 18)
Insert the crimped-on contacts into
the insulation from the rear side until
it engages.
Check correct engagement by pulling
lightly on the lead (max. pulling force
20N).
Vérification du montage
Assembly check
(ill. 19)
Insérer l‘extrémité de la broche de test
appropriée dans la douille ou la fiche
aussi loin que possible. Si le connec-
teur est correctement assemblé, une
marque blanche sera visible sur la
broche de test.
(ill. 19)
Insert the appropriate end of the test
pin into the socket or plug as far as
possible.
If the contact is correctly assembled,
the white mark on the test pin must
still be visible.
Marquage blanc
white mark
sans câble
without cable
avec câble
with cable