Multi-Contact MA064 Manuel d'utilisation
Page 6
Advanced Contact Technology
6 / 8
www.multi-contact.com
18
19
20
K
3
1
3
21
22
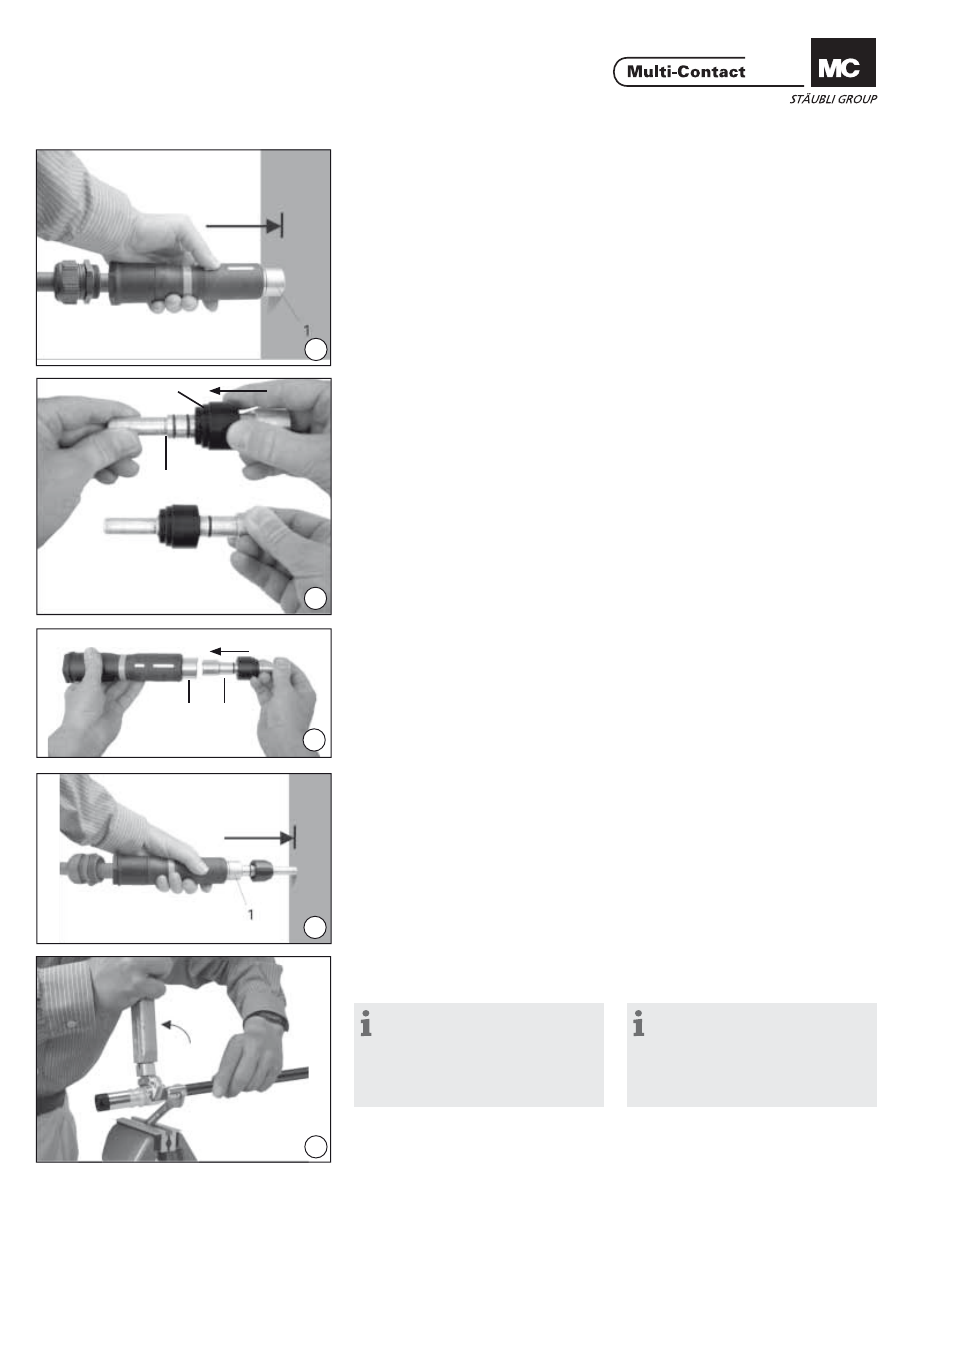
(ill. 18)
Presser l‘ensemble contre un support
rigide jusqu‘à entendre le fourreau 1
s‘encliqueter.
(ill. 18)
Press against a hard surface until
sleeve 1 is heard to engage.
(ill. 19)
Positionner l‘isolant de guidage K
de la broche 3 entre les deux joints
toriques.
(ill. 19)
Push plastic guide K of the pin 3 be-
tween the two O-rings.
(ill. 20)
Engager la broche 3 (par le grand
diamètre) dans le fourreau 1.
(ill. 20)
Push pin 3 into the sleeve 1, thicker
end fi rst.
(ill. 21)
Presser l‘ensemble contre un support
rigide jusqu‘au déverrouillage du
corps de contact (l‘isolant noir se re-
trouve alors en butée sur le fourreau 1).
(ill. 21)
Press against a hard surface until the
contact insert is unlocked or the black
plastic part comes into contact with
the sleeve 1.
(ill. 22)
Dévisser le manchon AxiClamp.
(ill. 22)
Unscrew the AxiClamp sleeve.
Remarque:
Bloquer la clй а fourche adaptée
(voir Tab. 3) dans un étau, position-
ner le corps de contact dans la clé et
le dévisser avec une clй а fourche de
27mm.
Note:
Clamp the respective open-ended
wrench (see Tab. 3) in a vice and
use an open ended wrench A/F27
to open the AxiClamp sleeve of the
contact insert.