Multi-Contact MA064 Manuel d'utilisation
Page 5
Advanced Contact Technology
www.multi-contact.com
5 / 8
13
A
B
14
15
16
~2
17
Tab. 2
(ill. 13)
Dévisser le manchon AxiClamp.
(ill. 13)
Unscrew the AxiClamp sleeve.
Remarque:
Bloquer la clй а fourche adaptée
(voir tab. 2) dans un étau, positionner
le corps de contact dans la clé et le
dévisser avec une clй а fourche de
27mm.
Note:
Clamp the respective open-ended
wrench (see Tab. 2) in a vice and use
an open ended wrench A/F27 to
open the AxiClamp nut of the contact
insert.
(ill. 14)
Tourner le manchon AxiClamp B
jusqu’à ce que la gorge A soit visible.
(ill. 14)
Open the AxiClamp sleeve until the
groove A is visible.
(ill. 15)
Enlever le câble
(ill. 15)
Pull-out the cable
Hinweis:
Montage du corps de contact
KST16BV voir instructions de
montage MA063
www.multi-contact.com
Note:
Installing the contact insert
KST16BV see assembly instructions
MA063
www.multi-contact.com
Démontage du corps de
contact pour KBT16BV
Removing the contact insert
for KBT16BV
(ill.16)
Desserrer le presse-étoupe et engager
le fourreau 1 (par le petit diamètre), en
le tournant légèrement, jusqu‘en bu-
tée dans l‘isolant KBT. Une résistance,
exercée par le joint d‘étanchéité, est
perceptible.
(ill.16)
Unscrew cable gland and insert
sleeve, narrow end fi rst, as far as it
will go into the mating side of the KBT
insulation with a turning movement.
The resistance of the seal can be felt.
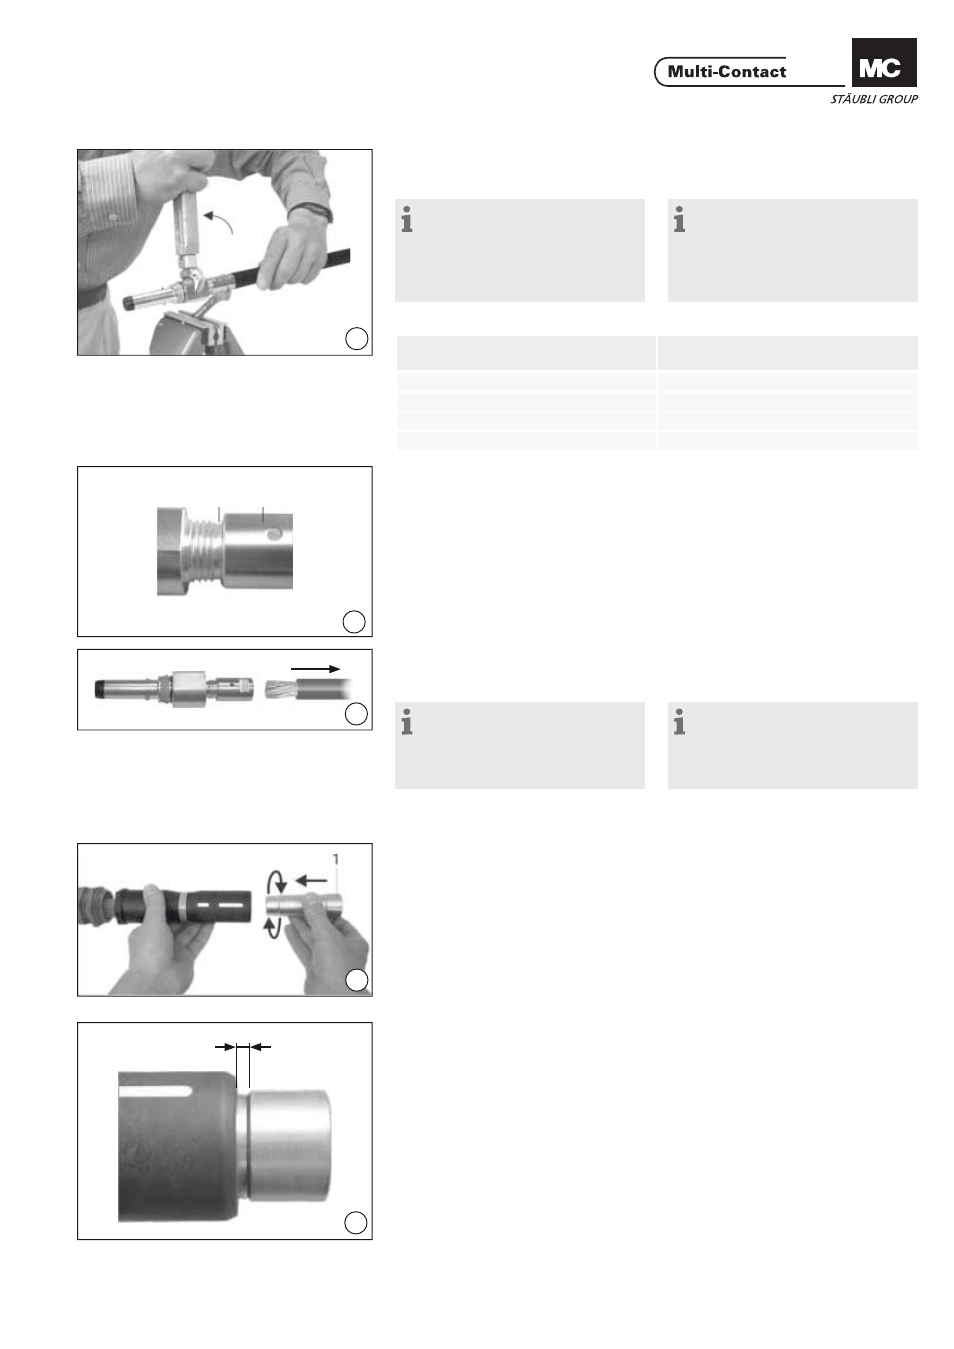
(ill.17)
Un espace de 2mm entre l‘isolant KBT
et l‘épaulement du fourreau
confi rmera que l‘entretoise a passé le
joint.
(ill.17)
A distance of approximately 2 mm be-
tween the insulation and the shoulder
of the sleeve confi rms that the sleeve
has passed through the seal.
Section du conducteur
Conductor cross section
Dimension clé
Key size
50mm² / 70mm²
16mm
95mm² / 120mm²
22mm
150mm² / 185mm²
27mm
240mm²
28mm