Multi-Contact MA025 Manuel d'utilisation
Page 5
Advanced Contact Technology
www.multi-contact.com
5 / 8
13
10
11
12
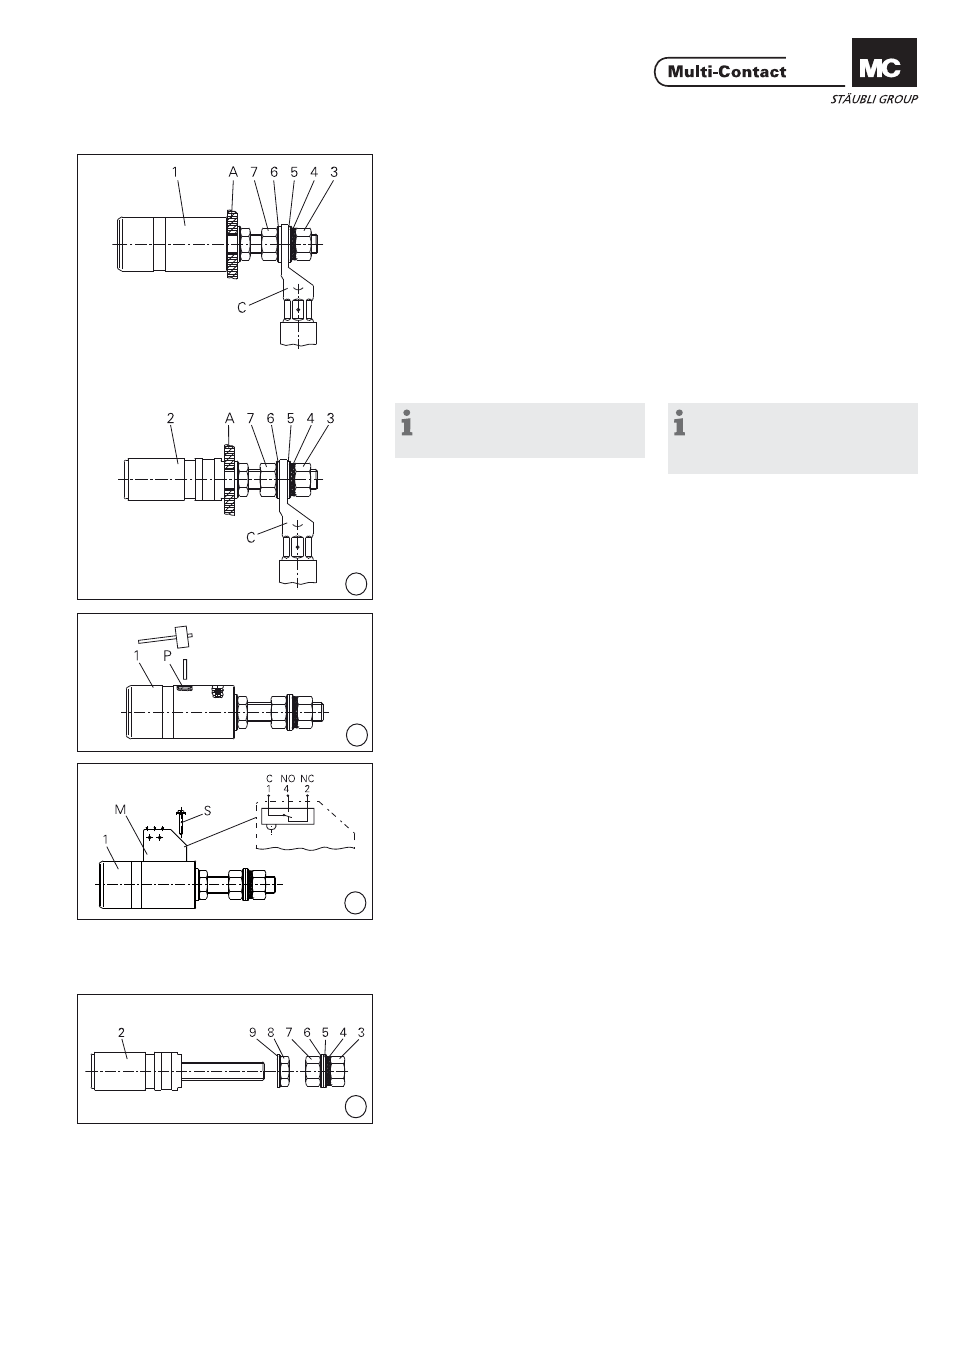
Montage du câble
Cable connection
(ill. 10)
Remonter l‘écrou (7) et la rondelle
(6). Monter la cosse (C), sertie sur
un câble, puis la rondelle plate (5),
la rondelle éventail (4) et l‘écrou (3).
Serrer l‘écrou (3) avec la clé dynamo-
métrique et le contrer avec la clé plate
et l‘écrou (7). Couple de serrage de
l‘écrou: 30Nm.
(ill. 10)
Assemble nut (7) and washer (6) onto
thread of socket (1) or plug (2). Insert
cable lug (C) with cable mounted.
Re-assemble washer (5), lock washer
(4) and nut (3). Tighten nut (3) with the
torque spanner 24 mm A/F and secure
it with the open-end spanner 24mm A/F
and nut (7). Tightening torque: 30Nm.
3.
Montage du micro-rupteur
(IB16BV-NS)
3.
Installation of microswitch
(IB16BV-NS)
Remarque:
Avec le micro-rupteur monté,
l’étanchéité n’est plus garantie.
Note:
With installated microswitch the
watertightness (IP65) cannot be
guaranteed.
(ill. 11)
Casser la membrane de protection du
trou débouchant (P) de la douille (1)
ou de la broche (2) à l‘aide d‘un poin-
çon. Veiller à ce qu‘aucun débris ne se
trouve à l‘intérieur de la douille (1).
(ill. 11)
Break the protection membrane of the
through-hole (P) of the socket (1) with
a punch. Be careful that the socket is
free from the broken material.
(ill. 12)
Fixer le micro-rupteur (M) sur la
douille avec la vis (S). Pour ce faire,
placer correctement le micro-rupteur
dans le logement prévu à cet effet sur
la douille. Il s‘agit d‘un micro-rupteur
inverseur 6A, 250VAC, à trois contacts
2,8x0,5.
(ill. 12)
Fasten microswitch (M) to socket
(1) with screw (S). Firmly insert the
microswitch (M) in the recess (1) on
the socket and fi x in place with the
screw (S). The microswitch contact
is a changeover contact. Type of con-
nection: 3 plug connectors 2.8x0.5,
switching capacity 6A, 250VAC.
4.
Montage du micro-rupteur
(IS16BV-NS)
4.
Installation of microswitch
(IS16BV-NS)
(ill. 13)
Démonter les écrous (3,7,8) et les
rondelles (4,5,6,9) de la broche (2).
(ill. 13)
Remove nuts (3,7,8) and washers
(4,5,6,9) from plug (2).