Multi-Contact MA025 Manuel d'utilisation
Page 3
Advanced Contact Technology
www.multi-contact.com
3 / 8
2
3
1
4
5
6
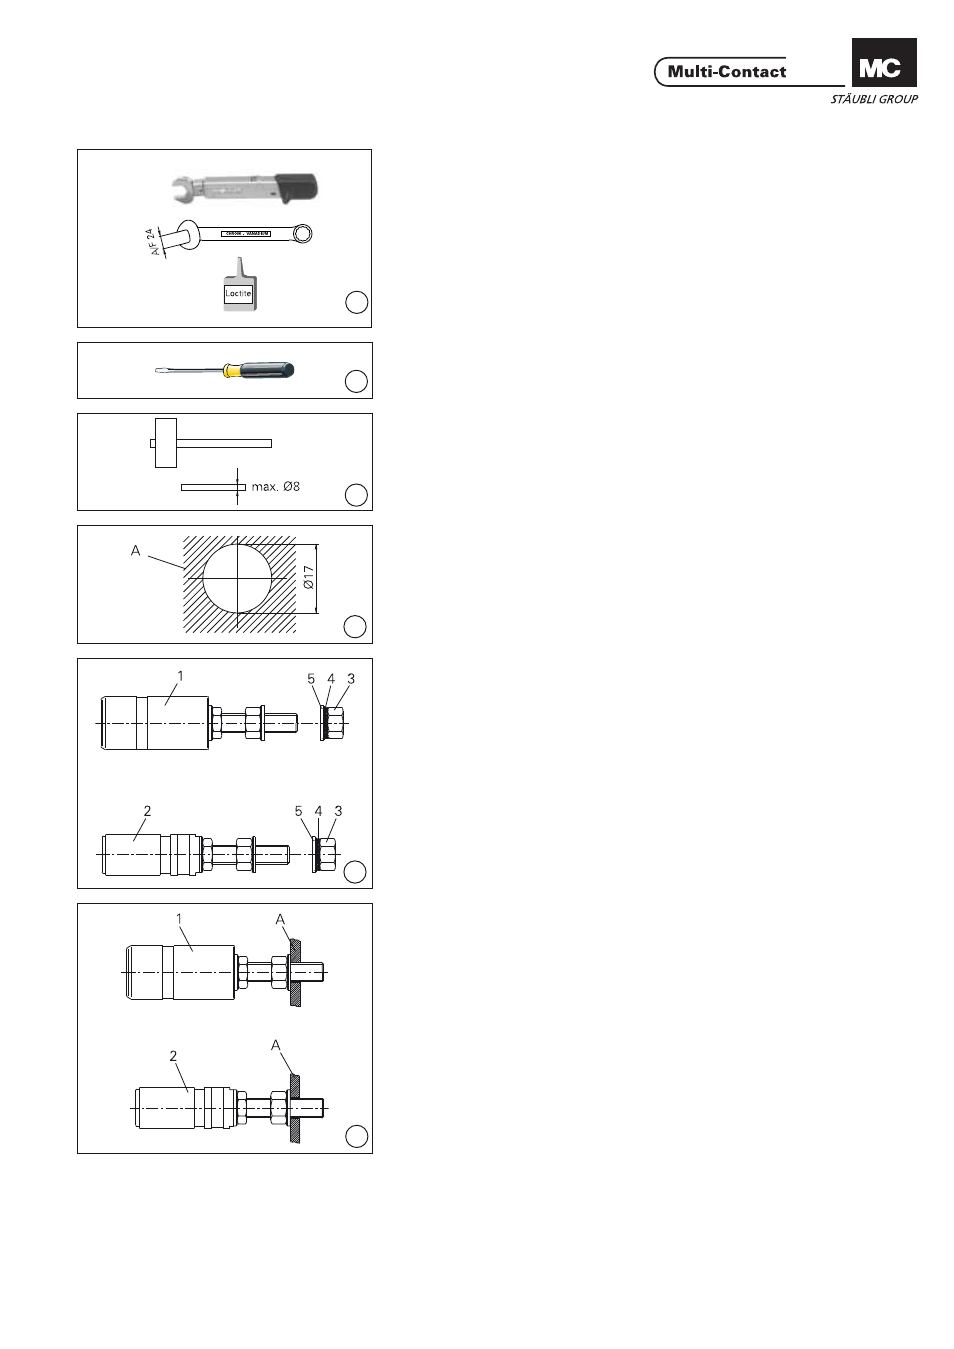
Outillage nécessaire
Tools required
(ill. 1)
1 clé dynamométrique 24mm et 1
clé plate 24mm. Colle pour fi xer les
écrous (p.ex. Loctite 243)
(ill. 1)
1 torque spanner 24mm A/F and 1
open-end spanner 24mm A/F. Glue to
secure nuts (e.g. Loctite 243)
(ill. 2)
Tournevis taille 2 (Seulement néces-
saire au montage d‘un micro-rupteur).
(ill. 2)
Screwdriver size 2 (required only for
microswitch assembly).
(ill. 3)
Marteau et poinçon Ø 8mm (Seule-
ment nécessaire pour le montage du
micro-rupteur).
(ill. 3)
Hammer and punch (max. Ø 8mm)
(required only for microswitch as-
sembly).
1.
Montage du connecteur sur
barre conductrice
1.
Connector assembly into
busbar
(ill. 4)
Percer la barre conductrice A selon le
plan de perçage.
(ill. 4)
Drill busbar A according to drilling
plan.
(ill. 5)
Démonter l‘écrou (3), la rondelle éven-
tail (4) et la rondelle (5) de la douille (1)
ou de la broche (2).
(ill. 5)
Remove nut (3), lock washer (4) and
washer (5) from socket (1) or plug (2).
(ill. 6)
Monter la douille (1) ou la broche (2)
dans la barre conductrice A.
(ill. 6)
Insert socket (1) or plug (2) into
busbar A.