Multi-Contact MA047 Manuel d'utilisation
Page 5
Advanced Contact Technology
www.multi-contact.com
5 / 8
12
13
14
15
(ill. 12)
Remonter la rondelle plate 1 et
l‘écrou 2. Serrer l‘écrou 2 avec la clé
dynamométrique 17mm. Pour contrer
l‘écrou 2, monter et serrer les écrous
3+6 (10Nm). Ensuite contrer
l‘écrou 2 avec l‘écrou (3). Couple de
serrage pour l’écrou 2+3: 10Nm.
(ill. 12)
Assemble washer 1 and nut 2. Assem-
ble nuts 3+6 to counter the twisting
action when tightening nut 2 with the
torque spanner 17mm A/F (10Nm).
Then fi x nut 2 with nut (3). Tightening
torque of nut 2+3: 10Nm.
(ill. 13)
Monter la cosse C, sertie sur un câble,
puis la rondelle plate 4, la rondelle
éventail 5 et l‘écrou 6. Serrer l‘écrou 6
avec la clé dynamométrique et contrer
avec la clé plate et l‘écrou 3. Couple
de serrage de l‘écrou: 10Nm.
(ill. 13)
Insert cable lug C with cable mounted.
Re-assemble washer 4, lock washer
5 and nut 6. Tighten nut 6 with the
torque spanner 17 mm A/F and secure
it with the open-end spanner 17mm
A/F and nut 3. Tightening torque:
10Nm.
3. Montage du micro-rupteur
(MS-S10BV)
3. Installation of microswitch
(MS-S10BV)
(ill. 14)
Remarque:
Avec le micro-rupteur monté,
l’étanchéité (IP65) n’est plus garantie
(ill. 14)
Note:
With installated microswitch the
watertightness (IP65) cannot be
guaranteed.
Casser la membrane de protection
du trou débouchant P de la broche à
l‘aide d‘un poinçon. Veiller à ce qu‘au-
cun débris ne se trouve à l‘intérieur de
la broche.
Break the protection membrane of
the through-hole P of the plug with a
punch. Be careful that the plug is free
from the broken material.
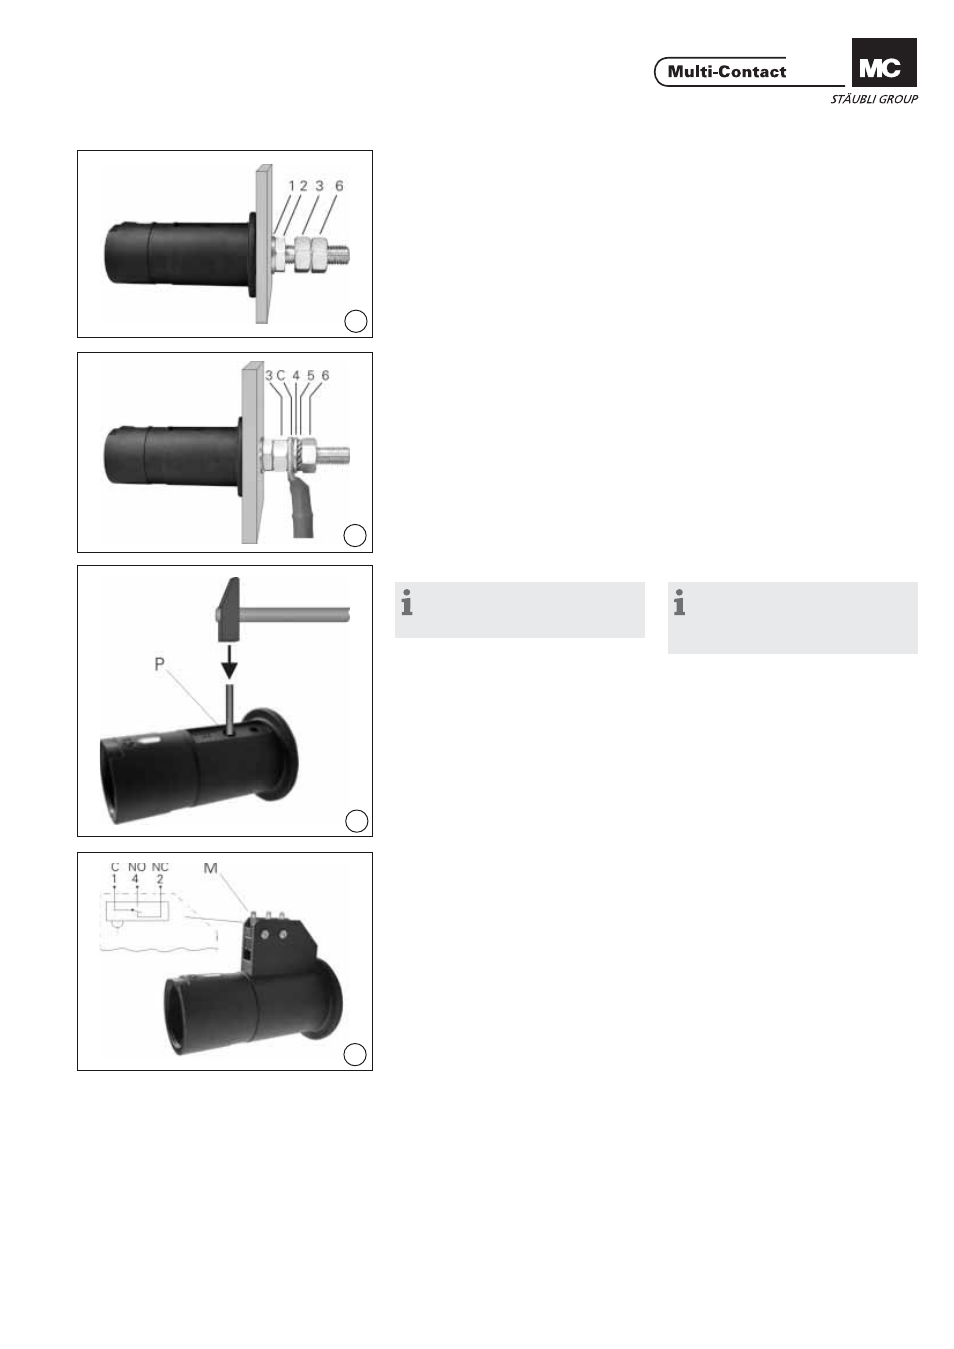
(ill. 15)
Fixer le micro-rupteur M sur la broche
avec la vis M3 et la rondelle fournies.
Il s‘agit d‘un micro-rupteur inverseur
6A, 250VAC, à trois contacts 2,8x0,5.
(ill. 15)
Fasten microswitch M top lug with
the delivered screw M3 + washer. The
microswitch contact is a changeover
contact. Type of connection: 3 plug
connectors 2.8x0.5, switching capac-
ity 6A, 250VAC.