Multi-Contact MA047 Manuel d'utilisation
Page 4
Advanced Contact Technology
4 / 8
www.multi-contact.com
10
8
7
9
11
(ill. 7)
Remonter la rondelle plate 4, la
rondelle éventail 5 et l‘écrou 6. Serrer
l‘écrou 6 avec la clé dynamométrique
17mm et contrer avec la clé plate
17mm et l‘écrou 3. Couple de serrage
10Nm.
(ill. 7)
Reassemble washer 4, lock washer
5 and nut 6. Tighten nut 6 with the
torque spanner 17mm A/F and secure
it with open-end spanner 17mm A/F
and nut 3. Tightening torque 10Nm.
2. Montage sur panneau
frontal
2. Assembly in front panel
Remarque:
Le panneau doit être en matière
isolante. Il convient de veiller à ce
que tout autre élément rapporté
sur le panneau soit monté à une
distance suffi sante des connecteurs
cylindriques, barres conductrices et
cosses.
Note:
The front panel material should
be non-conductive. We draw your
attention to the fact that when
mounting further elements to the
front panel suffi cient distance is
maintained between the conductors,
cable lugs and busbars etc.
(ill. 8)
Percer le panneau frontal A.
(ill. 8)
Drill front panel A.
(ill. 9)
Démonter tous les écrous, les ron-
delles et la rondelle éventail.
(ill. 9)
Remove all nuts, the washers and
the lock washer.
(ill. 10)
Coller le joint D.
(ill. 10)
Stik on the seal D.
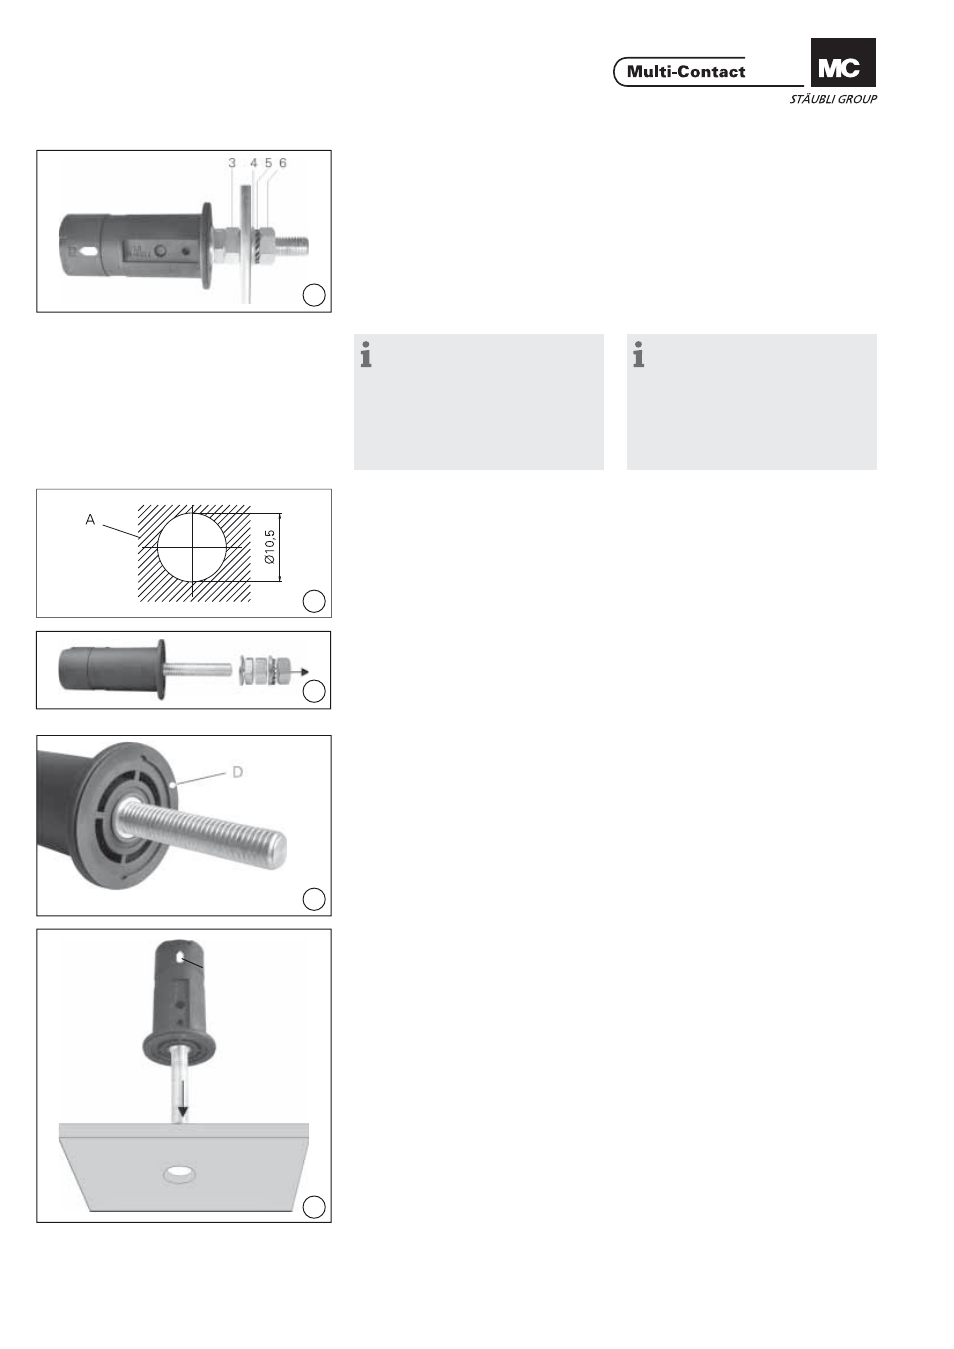
(ill. 11)
Monter la broche sur le panneau et
l‘aligner de telle façon que le mar-
quage blanc soit bien visible au cours
de l‘embrochage.
(ill. 11)
Insert plug into front panel and align
plug so that the white marking is vis-
ible during plugging.
Marquage blanc
White marking