Multi-Contact MA046 Manuel d'utilisation
Page 5
Advanced Contact Technology
www.multi-contact.com
5 / 8
15
13
14
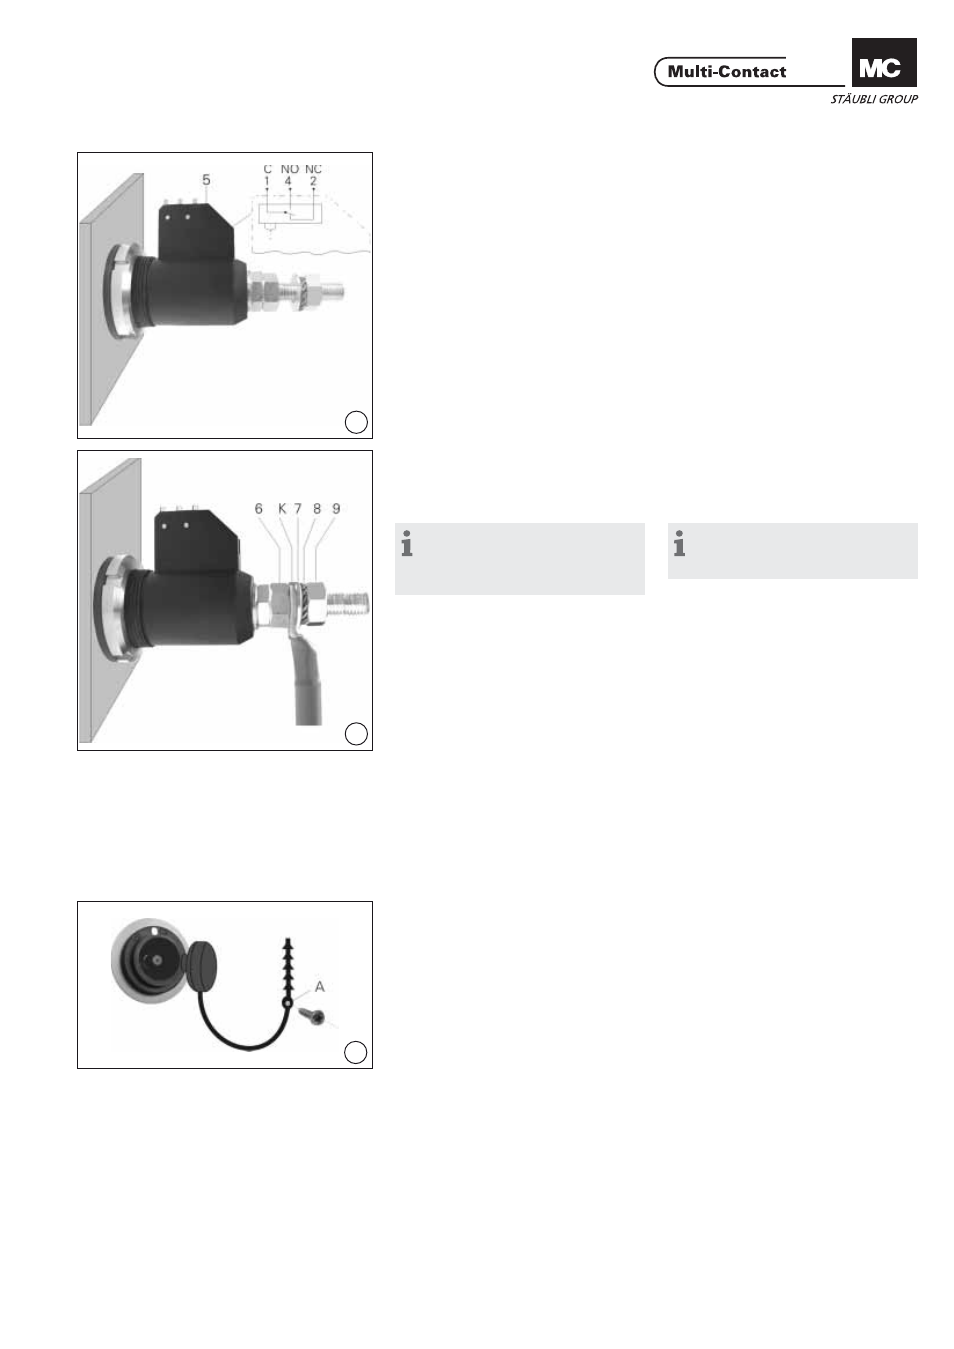
(ill. 13)
Fixer le micro-rupteur 5 sur la broche
avec une vis M3 et la rondelle éventail.
Il s‘agit d‘un micro-rupteur inverseur
6A, 250VAC, à trois contacts 2,8x0,5.
(ill. 13)
Fasten microswitch 5 to plug with
the M3 screw and washer. The
microswitch contact is a changeo-
ver contact. Type of connection: 3
plug connectors 2.8x0.5, switching
capacit y 6A, 250VAC.
Contrôle du micro-rupteur
Functional check of
microswitch
Le micro-rupteur doit s‘enclencher
avant même que le verrouillage ne
soit réalisé. Il indiquera ainsi que le
contact est établi.
By switching immediately prior to
engagement of the interlock, the
microswitch indicates that the plug
connection is made.
Remarque:
Le verrouillage n’est défi nitive-
ment réalisé qu’après embrochage
complet des deux connecteurs.
Note:
Correct interlocking is achieved
only after engagement.
4. Raccordement du câble
4. Cable connection
(ill. 14)
Démonter l‘écrou 9, la rondelle 7 et la
rondelle éventail 8.
(ill. 14)
Remove nut 9, washer 7, and lock
washer 8.
Engager la cosse K avec le câble serti
sur l‘embout fi leté. Remonter l‘écrou 9,
la rondelle 7 et la rondelle éventail 8.
Serrer la cosse avec l‘écrou 9 et la clé
dynamométrique 17mm et le contre-
écrou 6 avec la clй а fourche 17mm.
Couple de serrage: 10Nm.
Slip cable lug K with preassembled
cable onto the thread. Reinstall nut 9,
washer 7 and lock washer 8. Tighten
nut 9 with the torque spanner
17mm A/F and secure it with nut 6
and the open-end spanner 17mm A/F.
Tightening torque 10Nm.
Bouchon de protection
Protective cap
(ill. 15)
Le bouchon de protection est emman-
ché jusqu‘en butée par l‘avant sur la
broche. La cordelette de fi xation peut
être vissée au niveau de l‘oeillet ou
enfi lée autour du connecteur.
(ill. 15)
The sealing cap is pushed into the
plug from the front as far as it will go.
The fi xing cord can be screwed to the
eyelet (A) or looped round the plug.