Multi-Contact MA046 Manuel d'utilisation
Page 4
Advanced Contact Technology
4 / 8
www.multi-contact.com
10
11
12
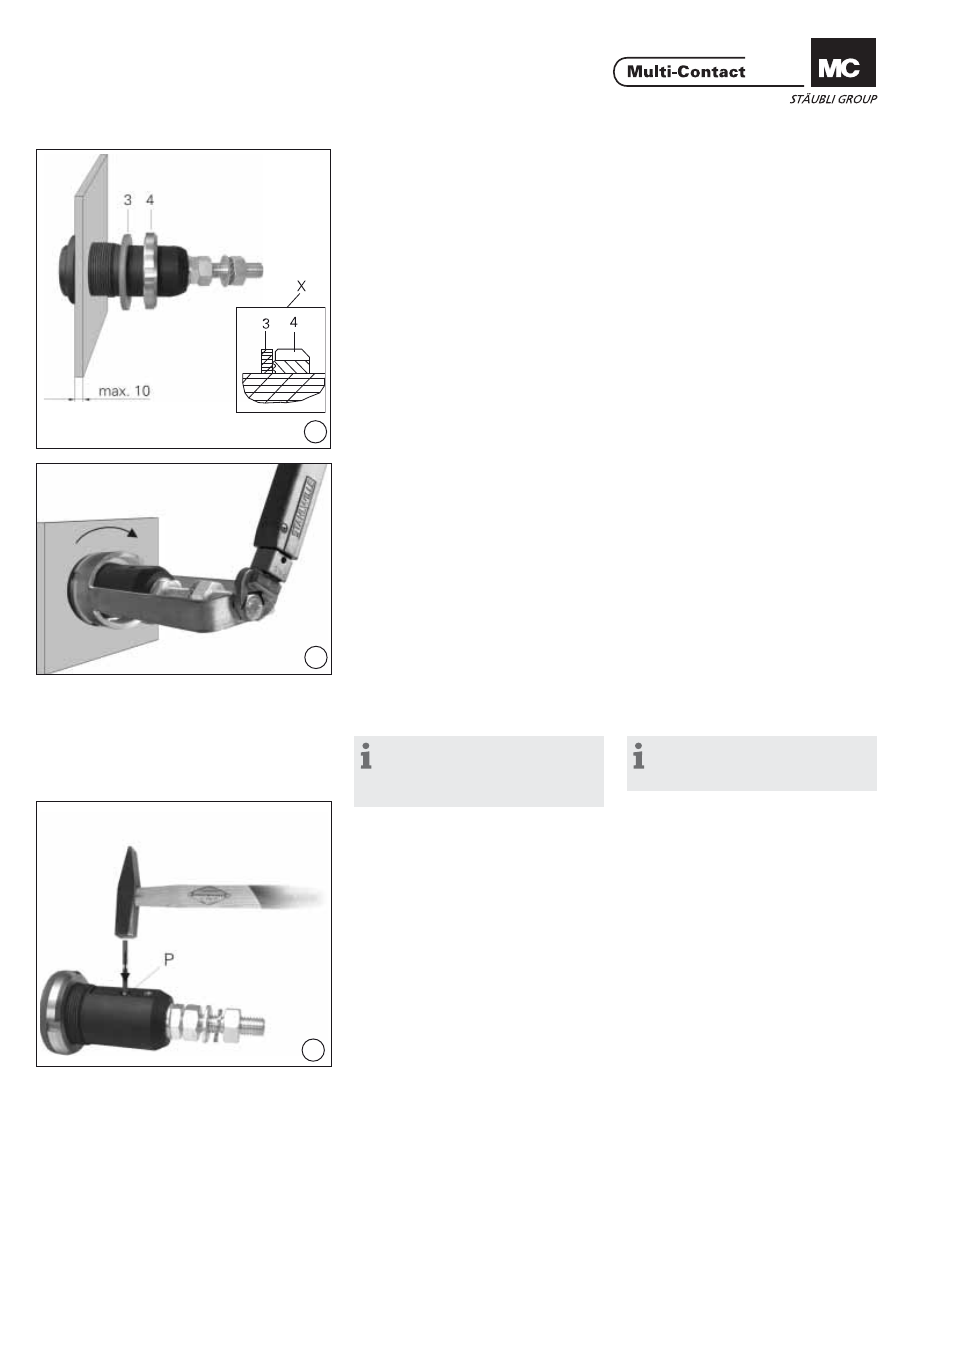
(ill. 10)
Monter la bague en PUR 3 et l‘écrou
cylindrique 4. Veiller à orienter les stries
de l‘écrou cylindrique vers la bague en
PUR (voir le dessin de détail X).
(ill. 10)
Mount the PUR ring 3 and the ring
nut 4. Arrange the grooves of the ring
nut toward the PUR-ring (see detail
drawing X).
(ill. 11)
Serrer l‘écrou cylindrique avec la clй а
pipe et la clé dynamométrique. Couple
de serrage: 10Nm.
(ill. 11)
Tighten the ring nut with MC-socket
wrench and with torque spanner.
Tightening torque: 10Nm.
2. Montage du couvercle de
protection
2. Protective cover assembly
Remarque:
Voir également la notice de
montage MA036,
www.multi-contact.com
Note:
See also the assembly instructions
MA036, www.multi-contact.com
3. Montage du micro-rupteur
3. Installation of microswitch
(ill. 12)
Casser la membrane de protection
du trou débouchant P de la broche à
l‘aide d‘un poinçon. Veiller à ce qu‘au-
cun débris ne se trouve à l‘intérieur de
la broche.
Avant de fi xer le micro-rupteur, la prise
à encastrer doit être montée dans le
panneau (voir ill. 6 jusqu’à ill. 11).
(ill. 12)
Break the protection membrane of
the through-hole P of the plug with a
punch. Be careful that the plug is free
from the broken material.
Before fastening the microswitch, the
panel receptacle has to be assembled
into the front panel (see ill. 6 to ill. 11).