11 installing the ovens into the cabinet, 1 reinstalling the oven door, 11 installing the ovens into the cabi- net – Bosch 500 Series 30 Inch Double Speed Combination Electric Wall Oven Installation Instructions Manuel d'utilisation
Page 19
Installing the ovens into the cabinet
en-us
19
4.
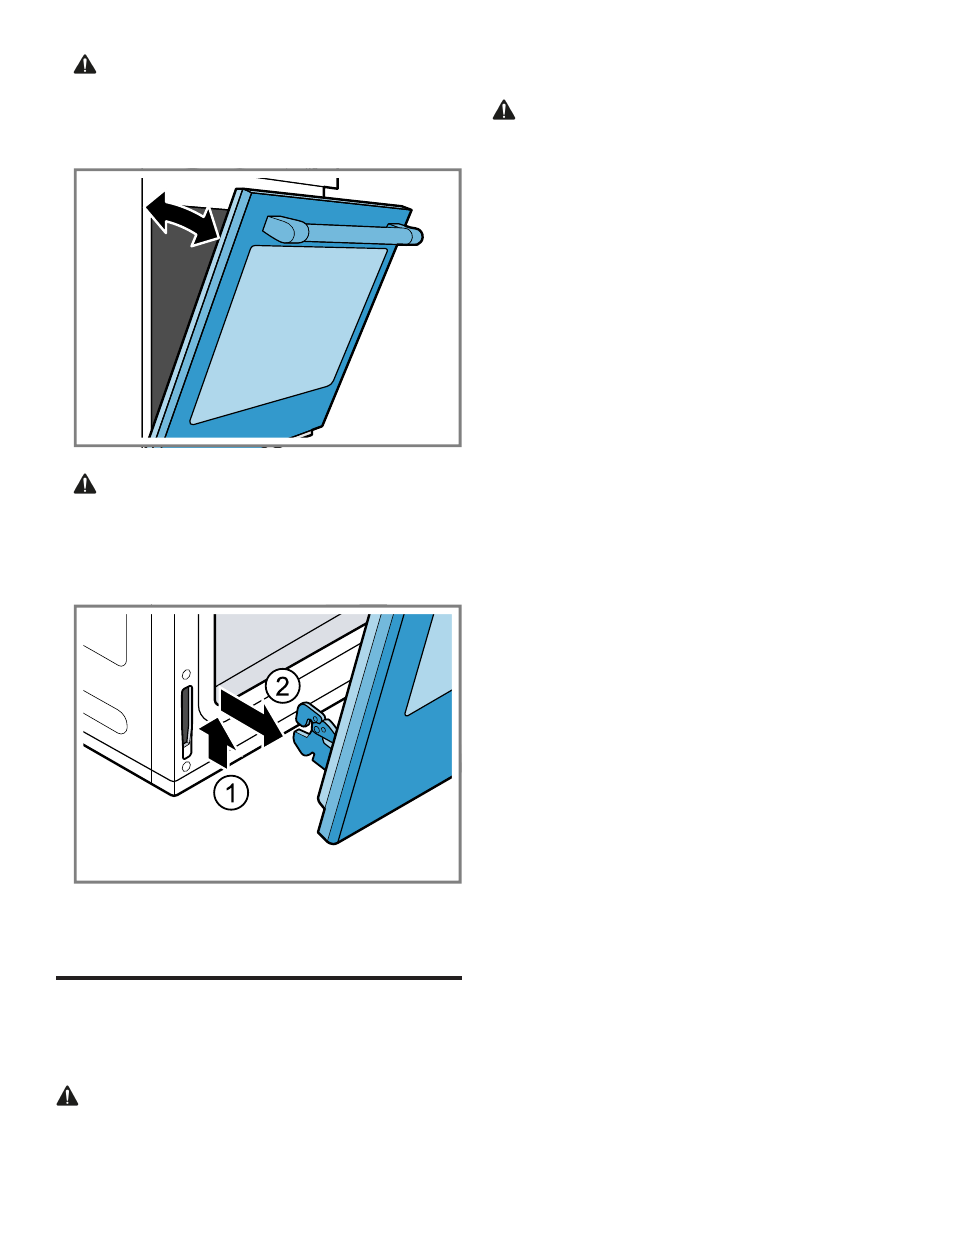
CAUTION Follow the instructions below to prevent
the latch from slamming shut and pinching or cutting
your hand.
Close the oven door until it catches on the hinge stop
levers, locking the hinges at the proper angle for door
removal.
a
The door will be open about 7" (18 cm) at the top.
5.
CAUTION The door is heavy.
▶
Do not grip the door by the handle.
▶
Use both hands to firmly grip it by the sides.
Maintaining the door angle, lift the door straight up ap-
proximately 3/4" (2 cm) to unhook the hinges from the
slots and then pull it out towards you until the hinges
are clear of the oven housing.
6.
Place the door in a convenient and stable location.
Do not lay the door on its handle. This could cause
dents or scratches.
Installing the ovens into the cabinet
11 Installing the ovens into the cabi-
net
Installing the ovens into the cabinet
Follow these instructions to install your appliance in the
cabinet.
CAUTION
It is recommended to wear protective clothing during the
lifting process.
▶
Wear gloves and long sleeves to protect hands and
forearms from abrasion and potential scratches.
▶
Take off watches and jewelry.
▶
Wear work shoes for foot protection.
CAUTION
DO NOT attempt to lift the unit by holding the oven's upper
heating element.
Three people or proper equipment are needed to safely lift
the combination oven into the cabinet opening.
Requirements
¡
You have verified the cabinet dimensions and electrical
connections.
¡
You have removed the oven door.
"Removing the oven door from bottom hinge conven-
¡
You have read the lifting recommendations
.
1.
Position the unit on its packaging base close to and in
front of the cabinet opening.
2.
Lift or slide the unit into the cabinet cutout. Do not allow
the unit base to contact the flooring.
3.
Guide the unit straight back into the cabinet cutout.
Push the unit straight in until the oven trim is about
2" (5 cm) from being flush with cabinet wall.
4.
Check that the electrical conduit cable is not crimped
between the oven and the cabinet back wall. If neces-
sary, guide the electric conduit cable into the wall of the
cabinet access hole so it does not prevent the unit from
being pushed all the way into the cabinet opening.
5.
Check that the oven is straight and level.
6.
Push the unit all the way back into the cabinet cutout
until the front edge of the unit is flush with the front of
the cabinet.
7.
Install the supplied screws through the tap holes in the
trim.
Refer to the enclosed SCREW INSTALLATION leaflet.
11.1 Reinstalling the oven door
1.
Hold the door firmly in both hands. Grip it on either side,
not by the handle.
2.
Tilt the door back slightly towards you at an angle that
would open the door about 7" (18 cm) at the top.