Multi-Contact MA225 Manuel d'utilisation
Page 4
Advanced Contact Technology
4 / 8
www.multi-contact.com
7
5
6
Montage des contacts pilotes
Assembly of pilot contacts
(ill.5)
Percer la membrane de protection des
trous (marqués a et b) avec le foret
Ø 6,4 mm..
(ill.5)
Drill the protection membrane of the
holes (marked with a and b) with a
Ø 6,4 mm drill.
(ill.6)
Dénuder le câble et l‘introduire dans
le fыt а sertir du contact-pilote (3)� Le
câble doit être visible par l‘orifice de
contrôle avant et après sertissage�
Sertir avec la pince à sertir et l‘insert
(ill� 2)�
Réglage de la pince à sertir (sélecteur):
1,5 mm²= Sel. No.6 (AWG16)
1,0 mm²= Sel. No.5 (AWG18)
0,75 mm²= Sel. No.5 (AWG18)
0,5 mm²= Sel. No.4 (AWG20)
(ill.6)
Strip the cable and insert cable into
the crimping sleeve of the pilot
c ontact (3). Wires must be visible in
the sight hole before and after crimp-
ing�
Crimp with crimping pliers and insert
(ill� 2)
Crimping plier (selector):
1,5 mm²= Sel. No.6 (AWG16)
1,0 mm²= Sel. No.5 (AWG18)
0,75 mm²= Sel. No.5 (AWG18)
0,5 mm²= Sel. No.4 (AWG20)
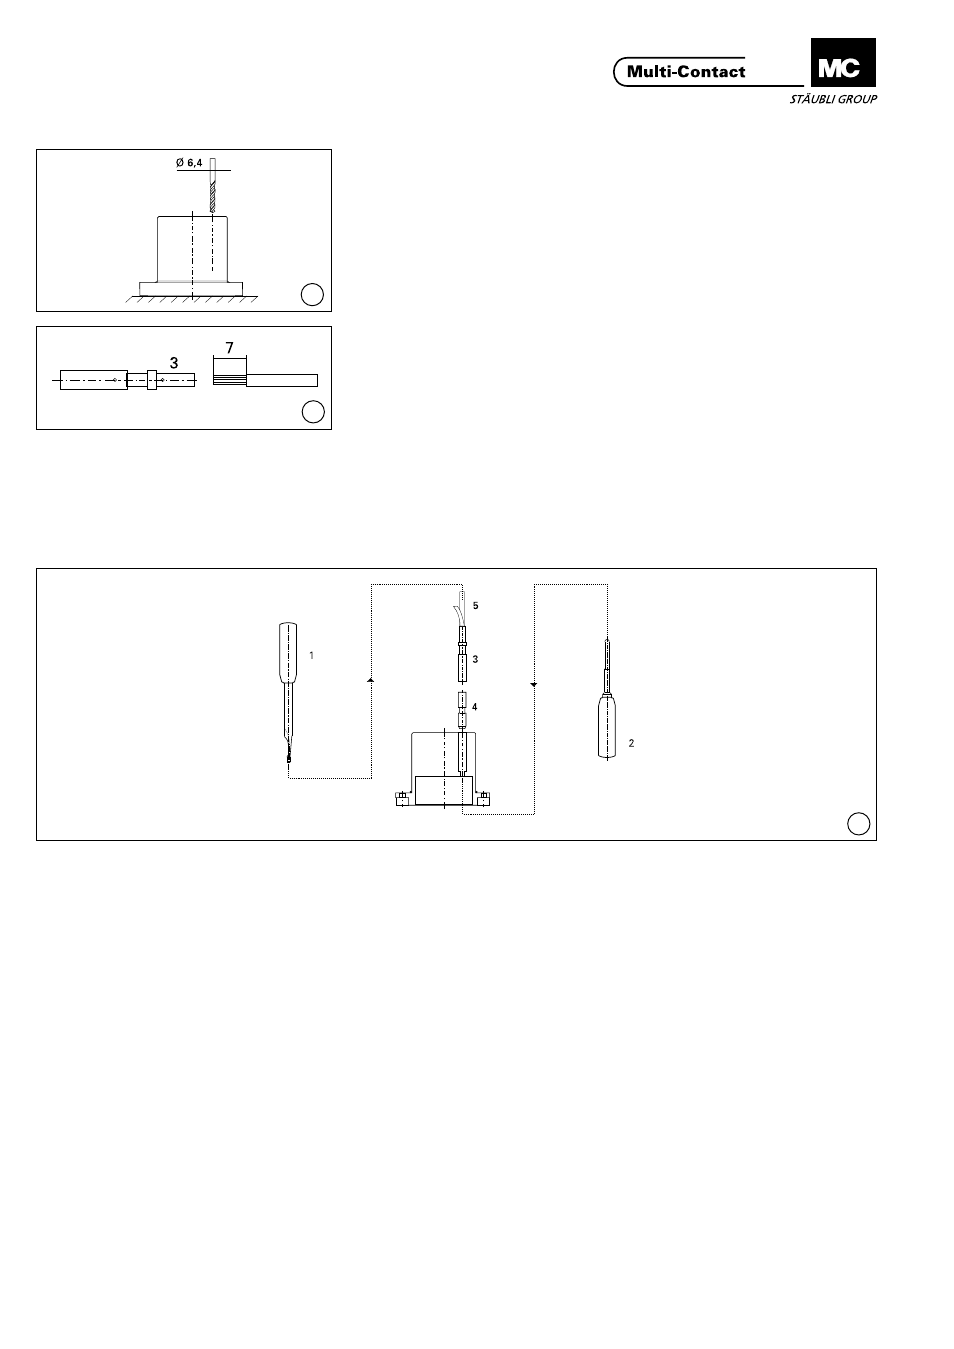
(ill. 7)
Monter les logements pour contacts
pilotes (4) par la face arrière dans
les orifices correspondants. Insérer
ensuite (jusqu‘en butée) les contacts
pilotes (3) dans leur logement respec-
tif par la face arrière en se servant de
l‘outil (1)� Le montage peut être facilité
en plongeant les contacts dans du
„White spirit“ ou de l‘alcool indus-
triel� Les contacts montés trop en
avant peuvent être ramenés dans leur
position nominale à l‘aide de l‘outil de
démontage (2)�
(ill. 7)
Press pilot contact supports (4) from
connection side into the drilled holes�
Press contacts (3) from connection
side into pilot contact supports (4)
with the Insertion tool (1) until they
snap into place� To facilitate installa-
tion immerse the contacts in spirits or
industrial alcohol. If the contacts have
been pressed in too far, their position
should be corrected with the socket
extraction tool (2)�