Multi-Contact MA077 Manuel d'utilisation
Page 3
Advanced Contact Technology
www.multi-contact.com
3 / 4
2
2
4
6
3
1
5
La pince à sertir hydraulique est un
outil avec des matrices interchangea-
bles pour le sertissage des fûts à sertir
de connecteurs.
The crimping tool is a hydraulic hand
press with interchangeable crimp
inserts for crimping crimp sleeves of
connectors.
Choisir les matrices appropriées selon
Tab. 1, page 1/4
Select the appropriate insert accord-
ing to Tab. 1, page 1/4
Préparation du câble
Mounting the inserts
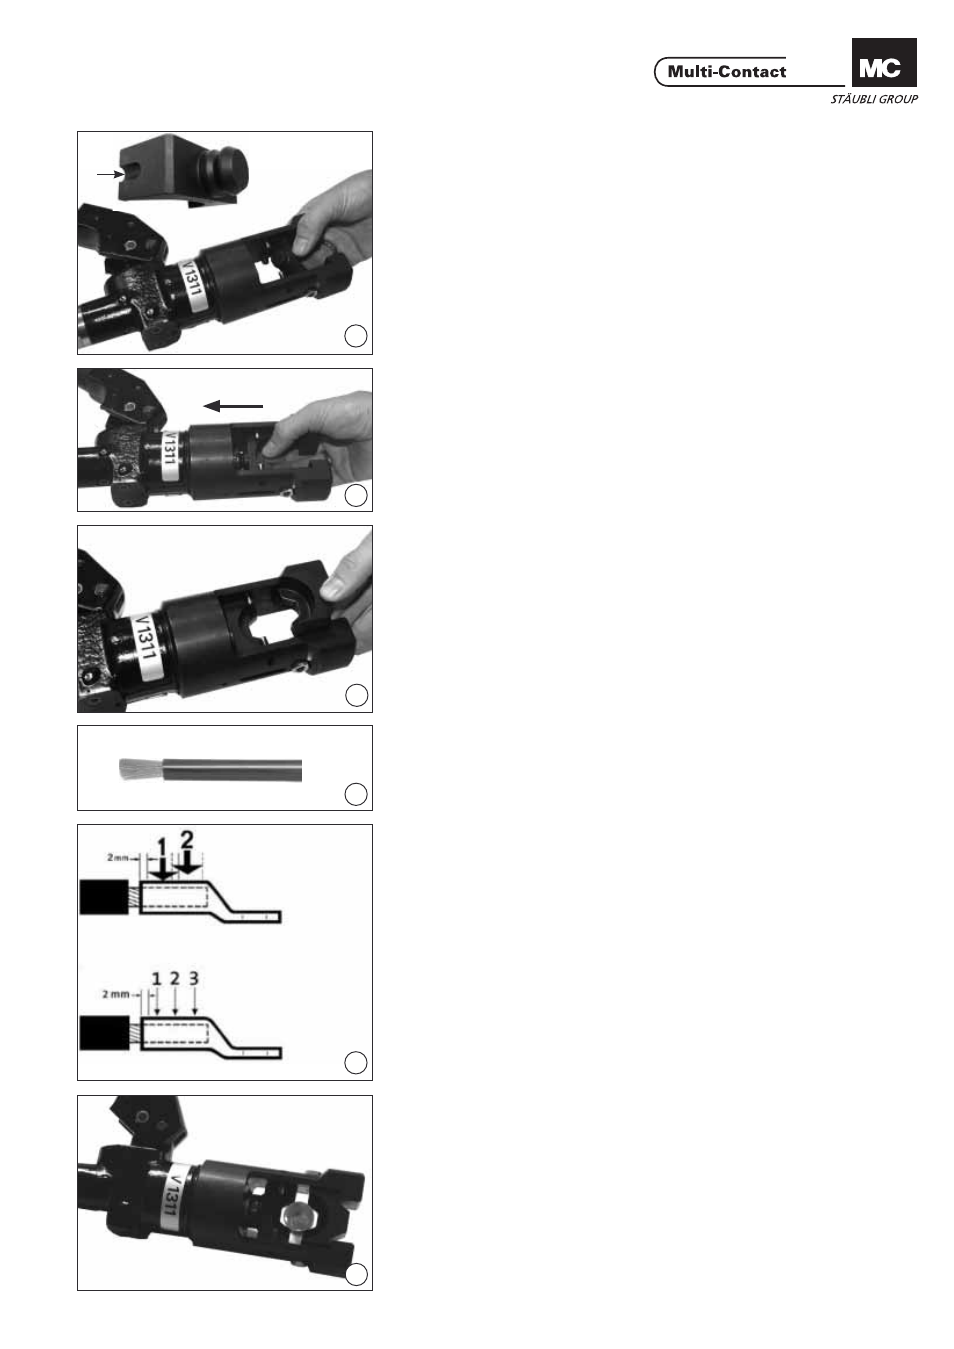
(ill. 1)
Positionner la matrice A latérale-
ment avec la rainure N au niveau des
billes de guidage. Touner ensuite la
matrice avec le tenon vers la position
d’enclenchement.
(ill. 1)
Position crimping insert A laterally
against the guide balls with slot N.
Then rotate insert into engagement
position with spigot.
(ill. 2)
Pousser dans la position d‘enclenche-
ment avec le tenon en avant. Un clic
audible confi rme l‘enclenchement
correct.
(ill. 2)
Push into the engagement position
with the spigot at the front.
An audible
click confi rms the correct engage-
ment.
(ill. 3)
Mettre la matrice B en bonne position,
l‘introduire latéralement et vaincre la
résistance des billes en exerçant une
légère pression Un clic audible confi r-
me l‘enclenchement correct.
(ill. 3)
Place crimping insert B in appropriate
position, insert from side and over-
come resistance of balls with light
pressure. An audible click confi rms
the correct engagement.
Préparation du câble
Cable preparation
(ill. 4)
Dénuder le câble. La longueur dépend
des prescriptions liées au fыt а sertir.
Voir les instructions de montage des
produits MC.
(ill. 4)
Strip cable insulation over the length
specifi ed for the respective crimping
sleeve. See MC products assembly
instructions.
Sertir le câble
Cable crimping
(ill. 5)
Respecter la position du sertissage
indiquée sur l‘illustration. Distance du
fыt а sertir min. 2mm. La positon est
variable selon le nombre de sertissage
à réaliser (un ou deux).
(ill. 5)
Position the crimp as shown in the
illustration. Distance from edge of
crimping sleeve min. 2mm. The posi-
tion depends on whether crimping
has to be done twice or thrice.
(ill. 6)
Insérer le fыt а sertir dans la pince et
fermer la pince par plusieurs mouve-
ments de levier jusqu‘à ce que les ma-
trices de sertissage soient en contract
avec le fыt а sertir et l‘immobilisent.
Le fыt а sertir ne doit pas se déformer
(voir ill. 9).
(ill. 6)
Insert crimping sleeve in the pliers and
close the pliers with several move-
ments of the lever until the crimping
inserts engage with the crimping
sleeve and fi x it. This operation must
not deform the crimping sleeve. The
crimping inserts can be reset if neces-
sary (see ill. 9).
N