Multi-Contact MA069 Manuel d'utilisation
Page 5
Advanced Contact Technology
www.multi-contact.com
5 / 8
11
12
13
14
(ill. 11)
Introduire le câble avec tous les fi ls
dans le fыt а sertir.
(ill. 11)
Insert all strands of the wire into the
crimping sleeve.
(ill. 12)
Sertir le fыt а sertir par plusieurs com-
pressions de la pince en maintenant le
câble dans le fыt а sertir. Le sertissage
n‘est terminé que quand la pince se
déverrouille toute seule en faisant un
clic audible.
(ill. 12)
By repeatedly closing the arms of
the pliers, press the crimping sleeve
while at the same time holding the
wire place in the crimping sleeve. The
crimping operation is not completed
until the pliers unlock automatically
with a clicking sound.
(ill. 13)
Pour ramener les matrices de sertis-
sage en arrière, tourner le levier H
dans le sens d’une montre et fermer la
pince en même temps. Cette opéra-
tion peut aussi être effectuée pendant
le sertissage.
(ill. 13)
The crimping insert is reset by turning
the lever H clockwise and at the same
time closing the pliers. This operation
can also be carried out during
crimping.
Remarque:
Le déverrouillage n’est pas pos-
sible juste avant la fi n du sertissage.
Note:
Shortly before the end of the
crimping operation, unlocking is no
longer possible.
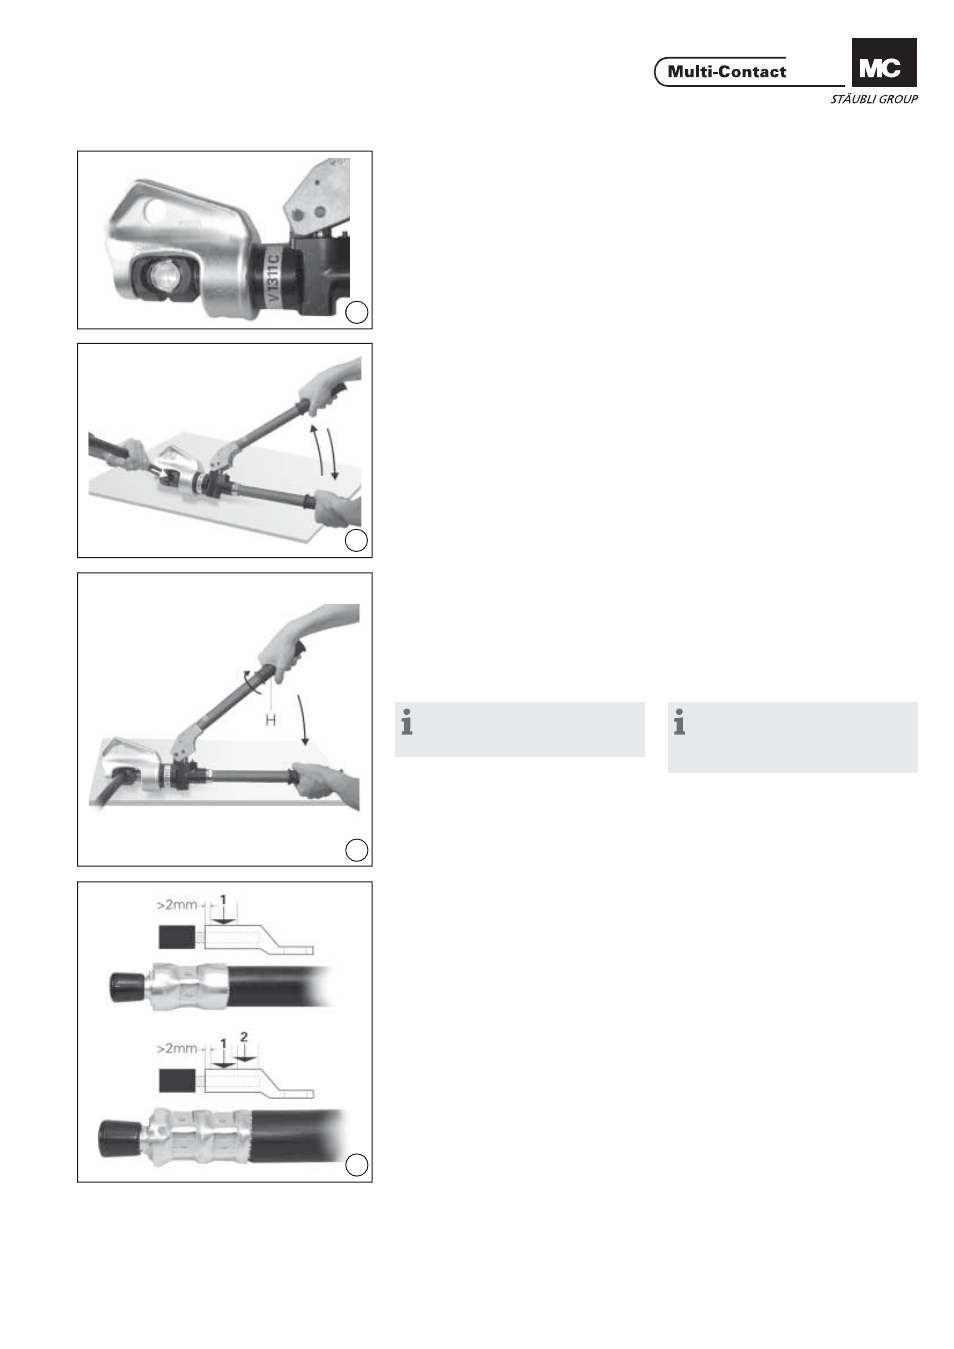
(ill. 14)
MC recommande de sertir 3 fois par
emplacement de sertissage, c‘est-à-
dire de tourner le fыt а sertir de 60°
après chaque sertissage, ce qui donne
6 empreintes de sertissage par empla-
cement de sertissage. L‘ill. 14 montre
de tels emplacements de sertissage
simples ou doubles avec chaque fois 3
sertissages.
(ill. 14)
MC recommends crimping 3 times
per crimping point, i.e. rotating the
crimp sleeve by 60° after each crimp-
ing operation so as to give 6 crimp die
impressions at each crimping point.
ill. 14 shows such single or double
crimping points with 3 crimps each.