Multi-Contact MA048 Manuel d'utilisation
Page 4
Advanced Contact Technology
4 / 8
www.multi-contact.com
7
8
9
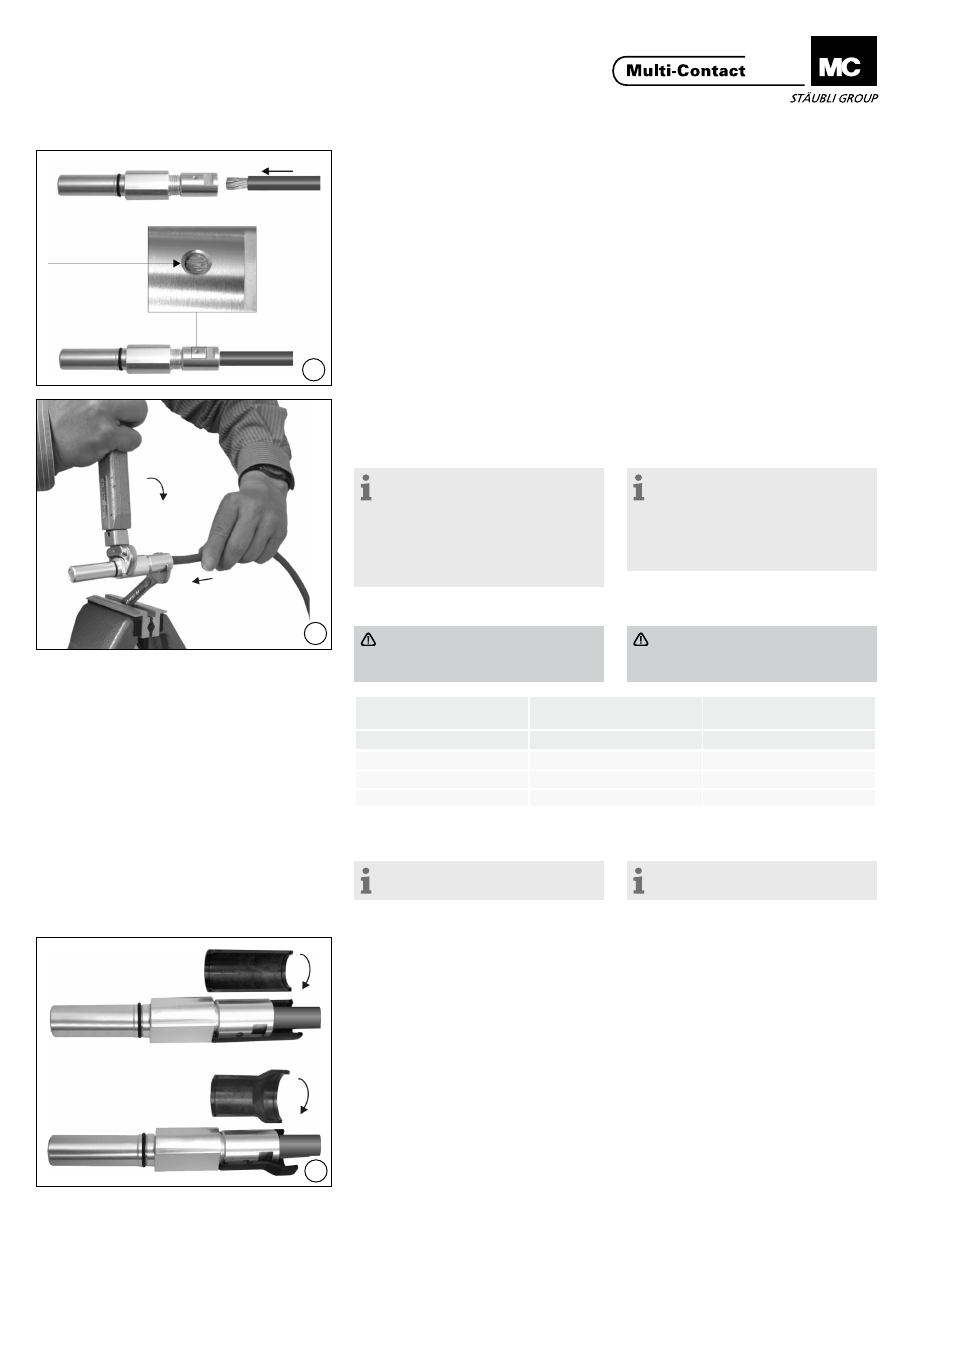
(ill. 7)
Introduire le câble dans le manchon
AxiClamp jusqu‘à ce que l’isolation
arrive en butée sur le manchon� Le
câble doit être visible dans l’orifice de
contrôle�
(ill. 7)
Firmly push lead into the AxiClamp
sleeve until the lead insulation comes
up against the AxiClamp sleeve and
the individual wire strands can be
seen in the sight hole�
(ill. 8)
Serrer l‘écrou avec une clé dynamo-
métrique 19 mm en contrant avec la
clй а fourche
1)
�
Remarque:
Bloquer la clй а fourche dans un
étau, positionner le manchon avec le
câble inséré dans la clé et serrer avec
la clé dynamométrique en veillant à
respecter les couples de serrage pré-
conisés dans le tableau ci-dessous .
(ill. 8)
Screw up the AxiClamp with the
torque wrench A/F19 and counter-
tighten with open-ended wrench
1)
�
Note:
Clamp the open-ended wrench in
a vice, fit the Axi-Clamp with the in-
serted lead into the clamped wrench,
and tighten with the torque wrench.
(See table below for correct torque).
Attention
Tout en serrant, exercer une pres-
sion sur le câble �
Attention
Keep lead pressed into sleeve
while tightening�
1)
selon la liste ci-dessus�
1)
according to the list below�
Remarque:
Ne pas souder ou braser le câble!
Note:
Do not solder or weld the câble!
(ill. 9)
Assembler les demi-coquilles com-
posant l‘entretoise sur le manchon
AxiClamp� Si la bague de verrouillage
est utilisée, elle doit être montée
maintenant, voir instructions de mon-
tage MA049.
(ill. 9)
Push together the halfshells of dis-
tance tube over the AxiClamp sleeve�
When the locking ring is used then it
must be installed now, see assembly
instruction MA049.
Section du conducteur
Conductor cross section
Couple de serrage
Tightening torque
Dimension Clé
Key size
mm²
Nm
mm
...AX 6 / 10 / 16
9
9
...AX 25 / 35
24
12
...AX 50 / 70
45
16
Orifice de
contrôle
Sight hole
pour
for K...T10BV/M25...
pour
for K...T10BV/M32...