Multi-Contact MA003 Manuel d'utilisation
Page 4
Advanced Contact Technology
4 / 8
www.multi-contact.com
10
9
12
11
8
7
Préparation du câble
Cable preparation
(ill. 7)
Glisser le manchon 4 respectivement
7 sur le câble.
Remarque: pour faciliter le montage,
utiliser du talc. En cas de basses tem-
pératures, plonger le manchon dans
l‘eau chaude.
(ill. 7)
Push the sleeve 4 or 7 resp. onto the
cable.
Tip: The cable slides easir with
talcu m powder. By low temperatures
immers e the sleeve in warm water.
(ill. 8)
Dénuder le câble sur une longueur L,
voir Tab. 2
(ill. 8)
Strip cable insulation to length L, see
Tab. 2
Sertissage des contacts
Crimping the contacts
(ill. 9)
Introduire le câble dans le fыt а sertir
de l‘insert femelle 3 respectivement
l‘insert mâle 5. Le câble doit être
visible dans l‘orifi ce de contrôle A.
(ill. 9)
Insert cable into the crimping sleeve
of socket insert 3 or plug insert 5 resp.
cable must be visible in the sight hole
A.
(ill. 10)
Sertir à l‘aide de la pince à sertir et la
matrice correspondante (voir Tab. 1)
Respecter la zone à sertir!
(ill. 10)
Crimp the cable with the crimping pli-
ers and the correct insert (see Tab. 1)
Crimp only in the crimping zone!
Remarque:
Ne pas souder ou braser le câble!
Note:
Do not solder or weld the cable!
Montage de la douille
Socket mounting
(ill. 11)
Glisser le manchon 4 sur l‘insert
femelle 3 jusqu‘à ce qu‘il s‘enclenche
dans la gorge B.
(ill. 11)
Push the sleeve 4 over the socket
insert 3 until it engages into groove B.
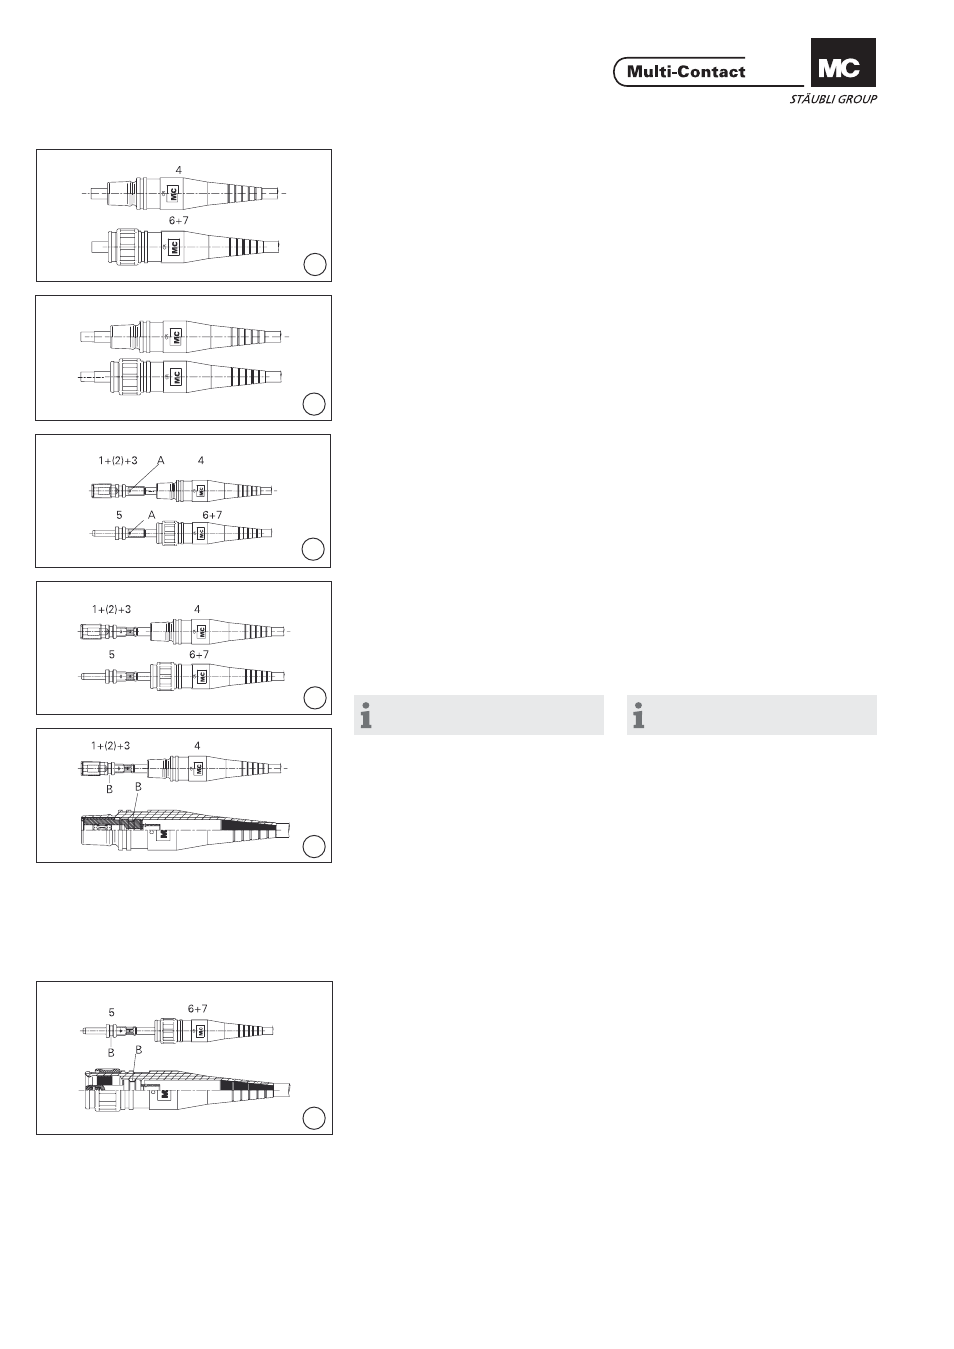
Montage de la broche
Plug mounting
(ill. 12)
Glisser le manchon 7 sur l‘insert mâle
5 jusqu‘à ce qu‘il s‘enclenche dans la
gorge B.
(ill. 12)
Push the sleeve 7 over the plug insert
5 until it engages into groove B.