Multi-Contact MA067 Manuel d'utilisation
Page 3
Advanced Contact Technology
www.multi-contact.com
3 / 4
1
3
2
4
6
5
55
22
22
7
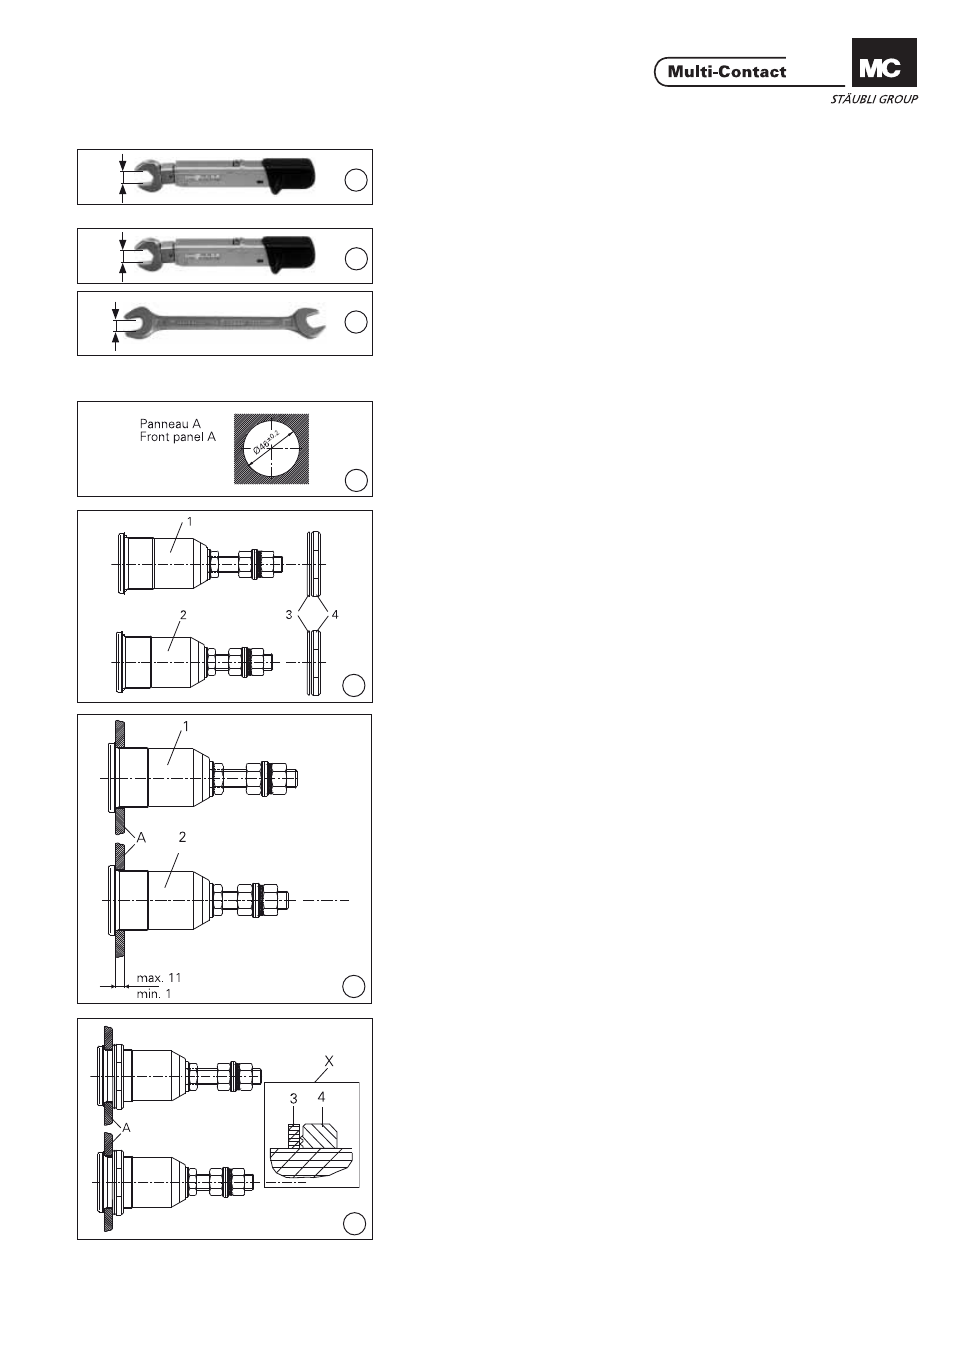
Outillage nécessaire
Tools required
(ill. 1)
Clé dynamométrique 55mm, 250Nm
(ill. 1)
Torque spanner 55mm A/F, 250Nm
(ill. 2)
Clé dynamométrique 22mm, 20Nm
(ill. 2)
Torque spanner 22mm A/F, 20Nm
(ill. 3)
Clй а fourche 22mm
(ill. 3)
Open-end spanner 22mm A/F
1. Montage du connecteur
1. Connector assembly
(ill. 4)
Percer le panneau A selon le plan de
perçage.
(ill. 4)
Drill front panel A according to drilling
plan.
(ill. 5)
Démonter l‘écrou à 6 pans (4) et la ba-
gue en PUR de la douille (1) ou de la
broche (2). Glisser la bague de couleur
(si disponible) sur la broche/douille.
(ill. 5)
Remove ring nut (4) and PUR ring (3)
from socket (1) or plug (2). If present
slip the colour ring onto the
socket/plug.
(ill. 6)
Introduire la douille (1) ou la broche (2)
dans le panneau (A).
(ill. 6)
Insert socket (1) or plug (2) into front
panel (A).
(ill. 7)
Monter la bague en PUR (3) et l‘écrou
à 6 pans (4). Veiller à orienter les stries
de l‘écrou à 6 pans vers la bague en
PUR (voir le dessin de detail X). Serrer
l‘écrou à 6 pans avec la clй а pipe et la
clé dynamométrique 55mm.
Couple de serrage: 250Nm.
(ill. 7)
Mount the PUR ring (3) and the ring
nut (4). Arrange the grooves of the
ring nut toward the PUR-ring (see
detail drawing X). Tighten the ring
nut with MC-socket wrench and with
torque spanner 55mm A/F .
Tightening torque: 250Nm.