Multi-Contact MA037 Manuel d'utilisation
Page 4
Advanced Contact Technology
8
9
10
11
© b
y
Multi-Contact A
G, Switz
erland – MA037 – 05.2013, Inde
x b
, Global Communications – Modi
fi
cations sous réserv
e / Subject to alterations
Fabricant/Producer:
Multi-Contact AG
Stockbrunnenrain 8
CH – 4123 Allschwil
Tel.
+41/61/306 55 55
Fax
+41/61/306 55 56
www.multi-contact.com
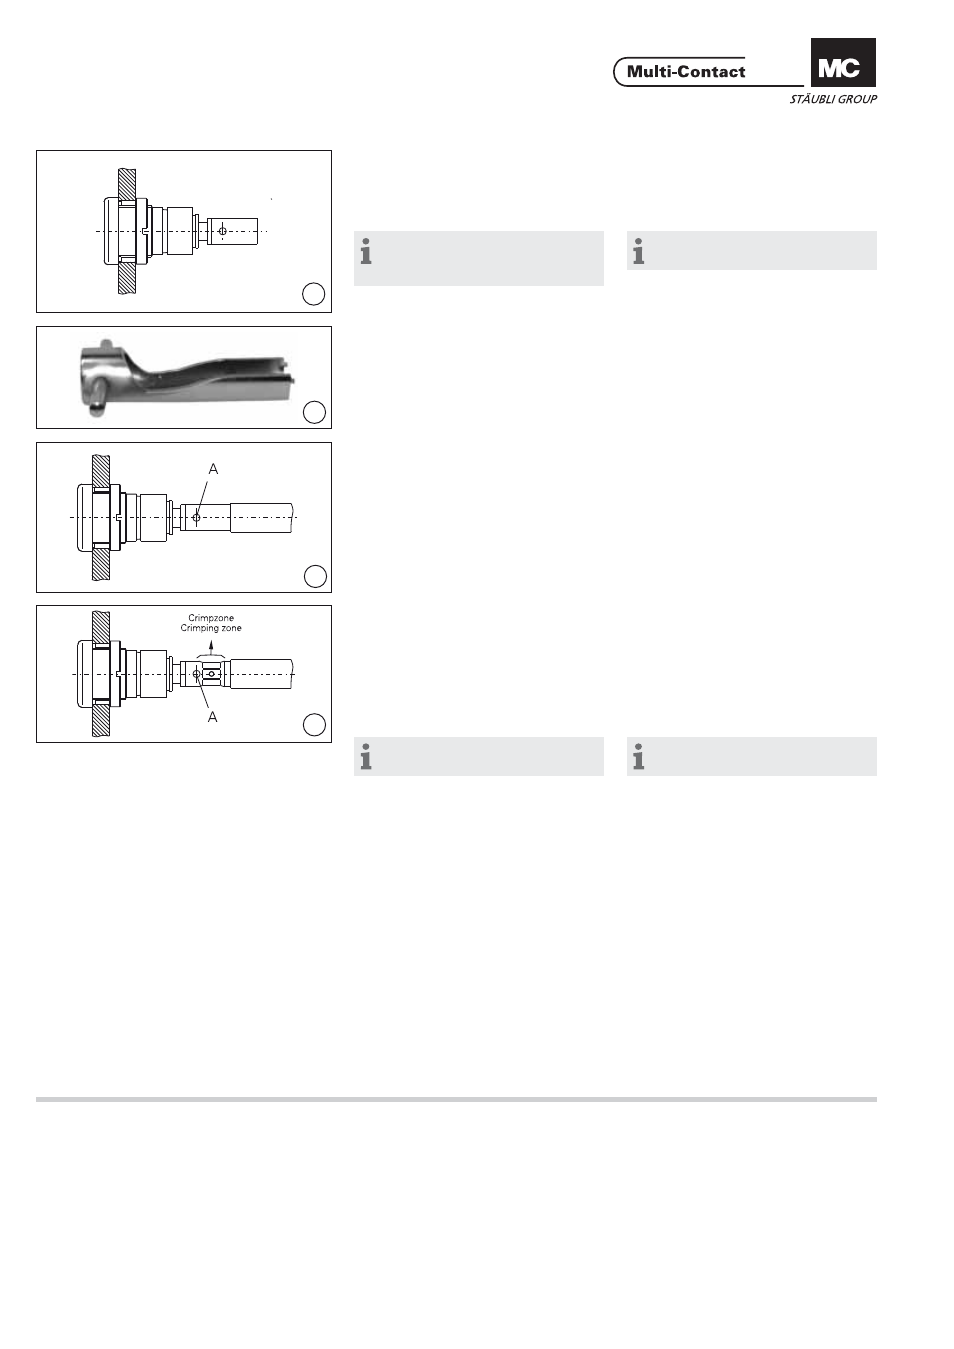
(ill. 8)
Monter l‘écrou M18x1 manuellement
et serrer avec la clé de montage SS6
(max. 3 Nm).
(ill. 8)
Screw-on the nut M18x1 and tighten
with the help of the socket spanner
SS6. (max. 3Nm).
Remarque:
Adaptateur pour clé
dynamométrique (ill. 4).
Note:
Adapter for torque wrench (ill. 4).
(ill. 9)
Recommandation si le câble est serti:
Utiliser la clé de montage SS6 modi-
fi ée (non fournie par MC).
(ill. 9)
Recommendation for crimped cables:
change socket spanner SS6 (can not
be ordered from MC).
(ill. 10)
Introduire le câble dans le fыt а sertir.
Le câble doit être visible dans l‘orifi ce
de contrôle A).
(ill. 10)
Insert cable into crimping sleeve up to
the stop. Cable must be visible in the
sight hole A.
(ill. 11)
Sertir à l‘aide de la pince à sertir
M-PZ13 et de la bonne matrice (voir
ill. 1). Ne sertir qu‘au niveau de la
zone de sertissage! Après sertissage
le câble doit toujours être visible dans
l‘orifi ce de contrôle A.
(ill. 11)
Crimp the cable with the crimping
pliers M-PZ13 and the correct insert
(see ill. 1). Crimp only in the crimping
zone! After crimping the cable must
always be visible in the sight hole A.
Remarque:
Ne pas souder ou braser le câble!
Note:
Do not solder or weld the cable!