Standard window installation continued, Caution, Excessive weight hazard – Friedrich Kuhl Series 6000 BTU Window Air Conditioner Installation and Operation Manual Manuel d'utilisation
Page 30
30
31
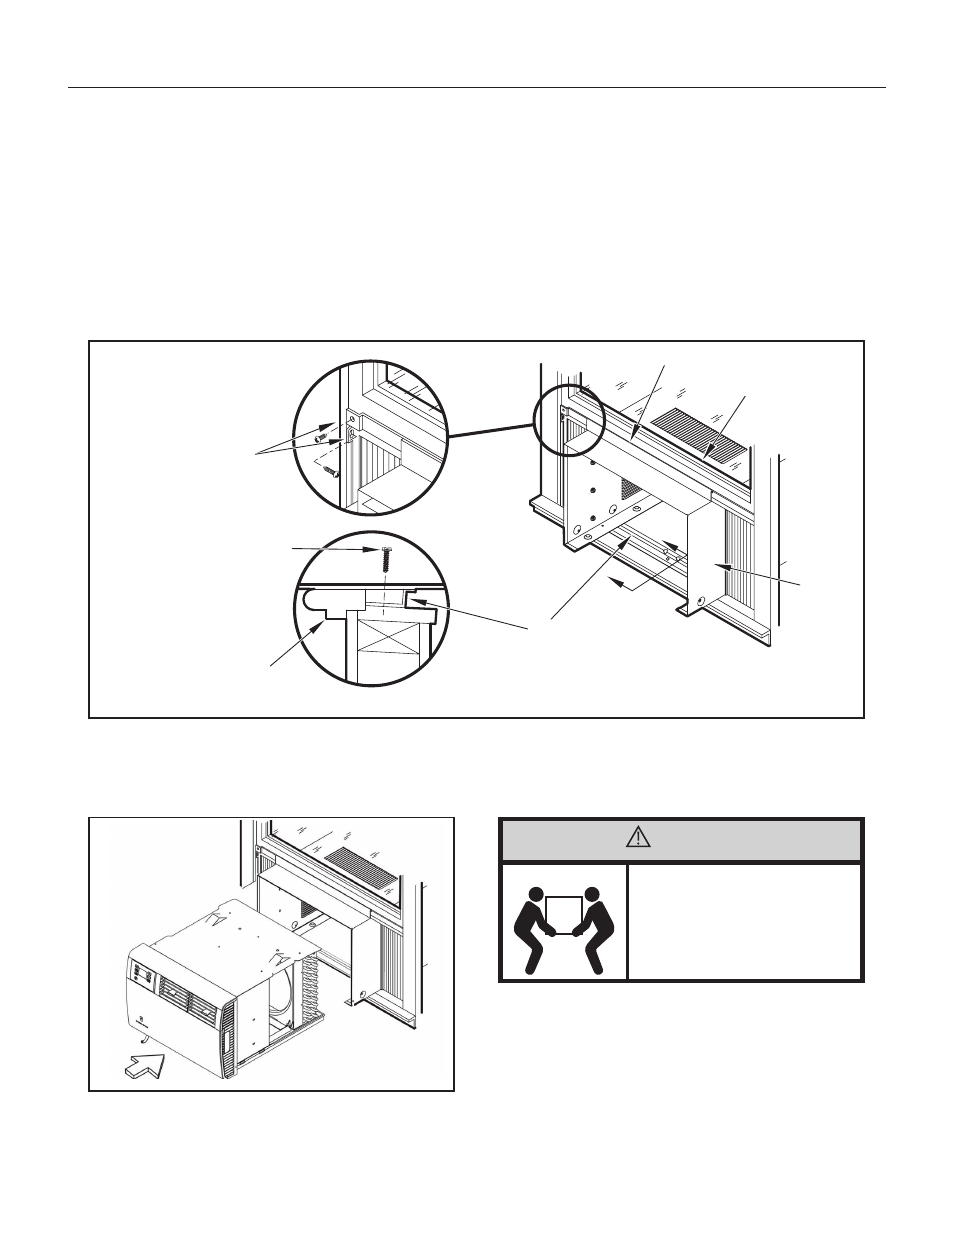
SECTION A-A
A
A
SECURE CURTAINS THROUGH
REMAINING HOLES USING
EITHER
1
/
2
" SCREWS (ITEM E:
BLUE BAG) OR 1
1
/
4
" SCREWS
(ITEM F: GREY BAG).
SHELL SUPPORT CHANNEL
WINDOW SASH
SLEEVE
SILL
CHANNEL
SECURE SILL CHANNEL TO
WINDOW STOOL USING (1) 1
1
/
4
"
SCREW (ITEM F: GREY BAG).
WINDOW STOOL
Standard Window Installation continued
STEP 5.2.
Once unit is removed from sleeve, secure sleeve to window stool through screw hole in the bottom center of sill channel using 1 supplied 1 ¼"
screw (F in parts list) (see Figure 60 A-A).
In Step 5, the window curtains were secured using 1 supplied screw per curtain (2 screws total). For a more permanent application, you may
secure each curtain with an additional screw through the remaining screw hole, insuring each window curtain is secured to window jamb and
sash with 2 screws each (4 screws total). Two sizes of screws (E and F in parts list) have been provided to accommodate varying window
types
(see Figure 60).
NOTE:
Securing the curtains using both screw hole locations may not work in certain window types. For those applications, use only 1 screw per curtain
and
install the appropriate security lock as recommended by window manufacturer.
Figure 60
CAUTION
Excessive Weight Hazard
Use two or more people when installing your
air conditioner.
Failure to do so can result in back or other
injury.
NOTE:
WHEN REMOVING UNIT FROM SLEEVE AND CARRYING
OR HANDLING UNIT, OBTAIN ASSISTANCE OR HELP
AS NECESSARY TO SUPPORT UNIT FROM BOTTOM
(BASEPAN), MAINTAINING CLEARANCE FROM ALL
OBSTACLES.
Figure 61
STEP 5.3.
Inspect unit prior to inserting back into sleeve. Manually rotate fan to see that it turns freely. Make sure electrical cord is positioned in the front of
unit and out of the way when inserting it back into the sleeve.
Insert unit back into sleeve by positioning onto bottom rails of sleeve and pushing back into place. Obtain assistance as needed (see Figure 61).