Multi-Contact MA070 Manuel d'utilisation
Page 4
Advanced Contact Technology
4 / 8
www.multi-contact.com
8
7
6
Tab. 3
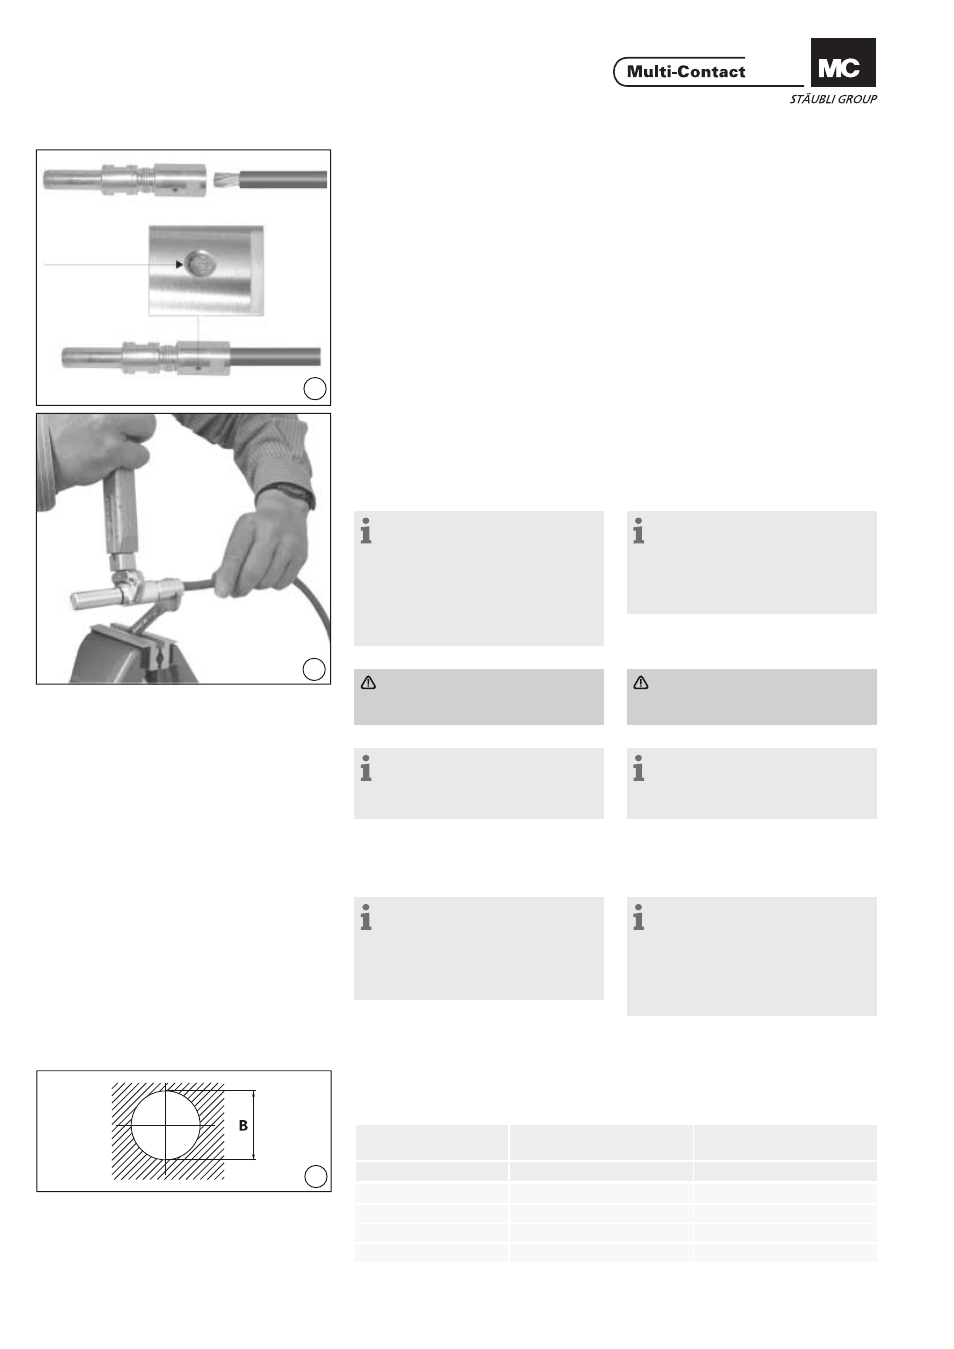
(ill. 6)
Introduire le câble dans le manchon
AxiClamp jusqu‘à ce que l’isola-tion
arrive en butée sur le manchon. Le
câble doit être visible dans l’orifi ce de
contrôle.
(ill. 6)
Firmly push lead into the AxiClamp
sleeve until the lead insulation comes
up against the AxiClamp sleeve and
the individual wire strands can be
seen in the sight hole.
(ill. 7)
Serrer l‘écrou avec une clé dynamo-
métrique en contrant avec la clй а
fourche (voir Tab. 1, page 3).
(ill. 7)
Screw up the AxiClamp with the
torque wrench and counter-tighten
with open-ended wrench
(see Tab. 1, page 3).
Remarque:
bloquer la clй а fourche dans un
étau, positionner le manchon avec le
câble inséré dans la clé et serrer avec
la clé dynamométrique en veillant
à respecter les couples de serrage
préconisés dans le tableau
(Tab. 1, page 3).
Note:
Clamp the open-ended wrench in
a vice, fi t the Axi-Clamp with the in-
serted lead into the clamped wrench,
and tighten with the torque wrench.
(See Tab. 1, page 3).
Important!
Tout en serrant, exercer une pres-
sion sur le câble .
Important!
Keep lead pressed into sleeve
while tightening.
Remarque:
Après l’assemblage du câble, les
brins en cuivre doivent être visibles
dans l’orifi ce de contrôle !
Note:
After cable assembly the copper
conductors must be visible in the
sight hole !
Recommandation de
montage
Installation recommendation
Remarque:
Le panneau doit être en matière
isolante. Il convient de veiller à ce
que tout autre élément rapporté sur
le panneau soit monté à une distance
suffi sante des connecteurs.
Note:
The front panel material should be
bonconductive. We draw your atten-
tion to the fact that when mounting
further elements to the front panel
suffi cient distance is maintained
between the connector.
Montage sur panneau
Assembly in panel
(ill. 8)
Percer le panneau selon Tab. 3:
(ill. 8)
Drill panel according to Tab. 3:
Type
Type
Epaisseur max. du panneau
Max. panel thickness
Ø du perçage
Drill Ø
mm²
A (mm)
B (mm)
...AX25 - 35
10
14.1
...AX50 - 70
14
18.1
...AX95 - 120
14
22.1
...AX150 - 185
14
28.1
+0.1
0
Orifi ce de
contrôle
Sight hole