Multi-Contact MA040 Manuel d'utilisation
Page 3
Advanced Contact Technology
www.multi-contact.com
3 / 4
1
2
3
4
10
Outillage nécessaire
Tools required
(ill. 1)
Clé dynamométrique 10mm, 3 Nm,
pour écrou M6. Clй а fourche 10mm
pour écrou M6.
(ill. 1)
Torque spanner A/F10, 3 Nm, for nut M6
Open-end spanner A/F10 for nut M6.
Remarque:
Le matériel de fi xation n’est pas
livré. Les pieces désignées en ill. 2
peuvent être commandées chez MC:
Note:
The fi xing material is not included
in delivery. The following parts as in
ill. 2 can be ordered from MC:
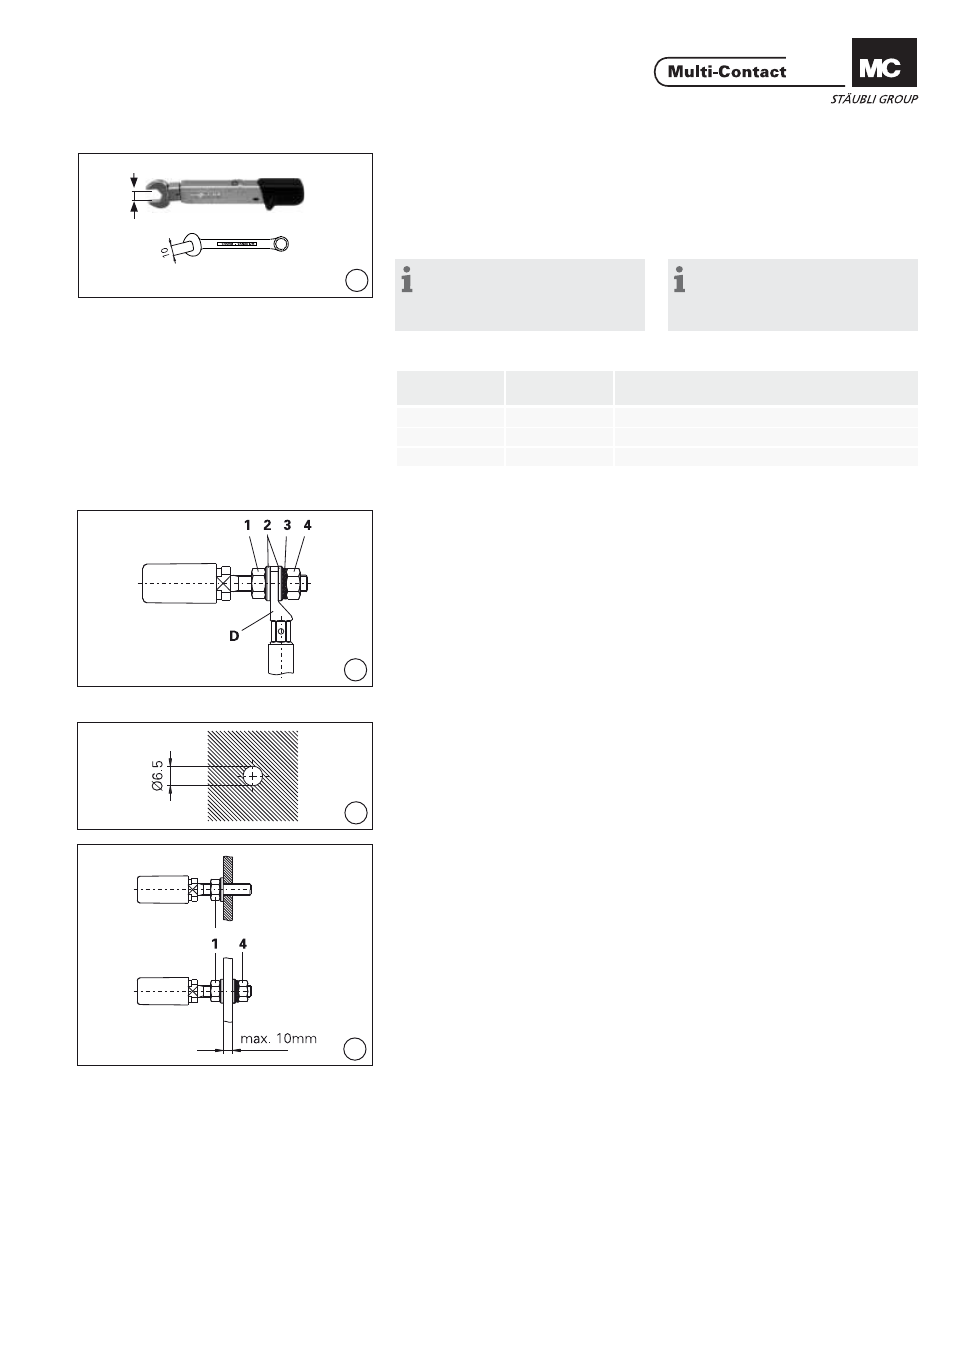
Raccordement d‘une cosse à
sertir
Connection with cable lug
(ill. 2)
Engager la cosse D sertie sur câble
sur l‘embout fi leté. Remonter les
rondelles 2, la rondelle éventail 3 et
l‘écrou 4. Serrer l‘écrou 4 avec la clé
dynamométrique 10mm et contrer
avec l‘écrou 1 et la clй а fourche
10mm. Couple de serrage 3Nm.
(ill. 2)
Slip cable lug D with preassembled
cable onto the thread. Install washers
2 lock washer 3 and nut 4. Tighten
nut 4 with the torque spanner 10mm
A/F and secure it with nut 1 and the
open-end spanner 10mm A/F. Tighten-
ing torque 3Nm.
Raccordement sur barre de
distribution
Connection on busbar
(ill. 3)
Percer la barre selon le plan de per-
çage.
(ill. 3)
Drill busbar according to drilling plan.
(ill. 4)
Monter la douille de sécurité sur le
barre de distribution. Serrer l‘écrou 4
avec la clé dynamométrique 10mm et
contrer avec l‘écrou 1 et la clй а fourche
10mm. Couple de serrage 3Nm.
(ill. 4)
Install safety socket onto busbar.
Tighten nut 4 with the torque span-
ner 10mm A/F and secure with nut 1
and the open-end spanner 10mm A/F.
Tightening torque 3Nm.
No.
No.
No. de Cde
Order No.
Désignation
Designation
1, 4
08.0104
Ecrou / Nut
2
08.0304
Rondelle / Washer
3
08.0704
Rondelle éventail / Serrated lock washer