10 mounting oven to the wall, 9 oven installation – Viking 30 Inch Over-the-Range Microwave Oven Installation Instructions Manuel d'utilisation
Page 8
7
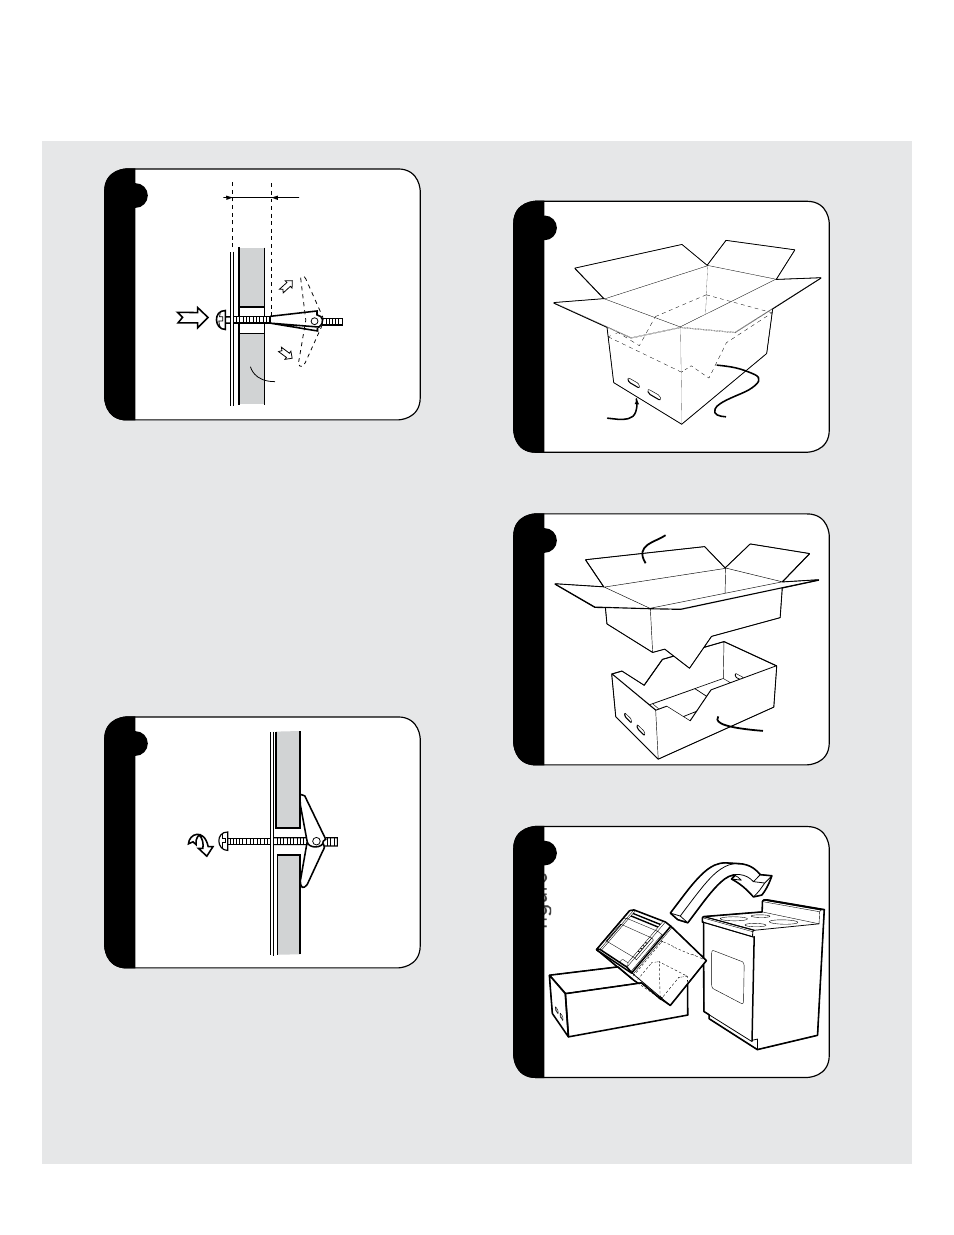
10 Mounting Oven to the Wall
Utilization of the carton may make installation easier.
figur
e
figur
e
~
Top Side
Cutting Line
1) MOUNTING OVEN TO THE WALL
: Place carton upside
down.
figur
e
figur
e
+
(A)
(B)
2) MOUNTING OVEN TO THE WALL
: Using cutting line
around the carton, cut into two pieces (A) and (B).
,
figur
e
3) MOUNTING OVEN TO THE WALL
: Position oven to assist
in mounting to the wall.
figur
e
figur
e
(
Wall
Space more
than wall
thickness
2) MOUNTING PLATE:
Position the Mounting Plate with
the Toggle Bolts attached at the wall location and insert
Toggle Nuts and Bolts through the holes in the wall with
the Toggle Nuts closed. Use Wood Screws
1
to attach the
Mounting Plate to studs.
nOtE:
Before insertion, be sure you leave a space more
than the thickness of the wall between the Mounting
Plate and the end of each of the Toggle Nuts (in the
closed position). If you do not leave enough space, the
Toggle Nut will not be able to open on the other side
of the wall. Also, once a Toggle Nut opens, it cannot be
withdrawn from the hole; therefore make sure all of the
Toggles are in the correct position before insertion.
figur
e
figur
e
)
3) MOUNTING PLATE:
Align the Mounting Plate carefully
and hold in position while tightening Toggle Bolts. Pull
Toggle Bolt toward you and turn clockwise to tighten.
9 Oven Installation