7 preparation of the oven, 8 ventilation system, A) recirculating – Viking 30 Inch Over-the-Range Microwave Oven Installation Instructions Manuel d'utilisation
Page 5: B) horizontal exhaust, Figur e figur e
4
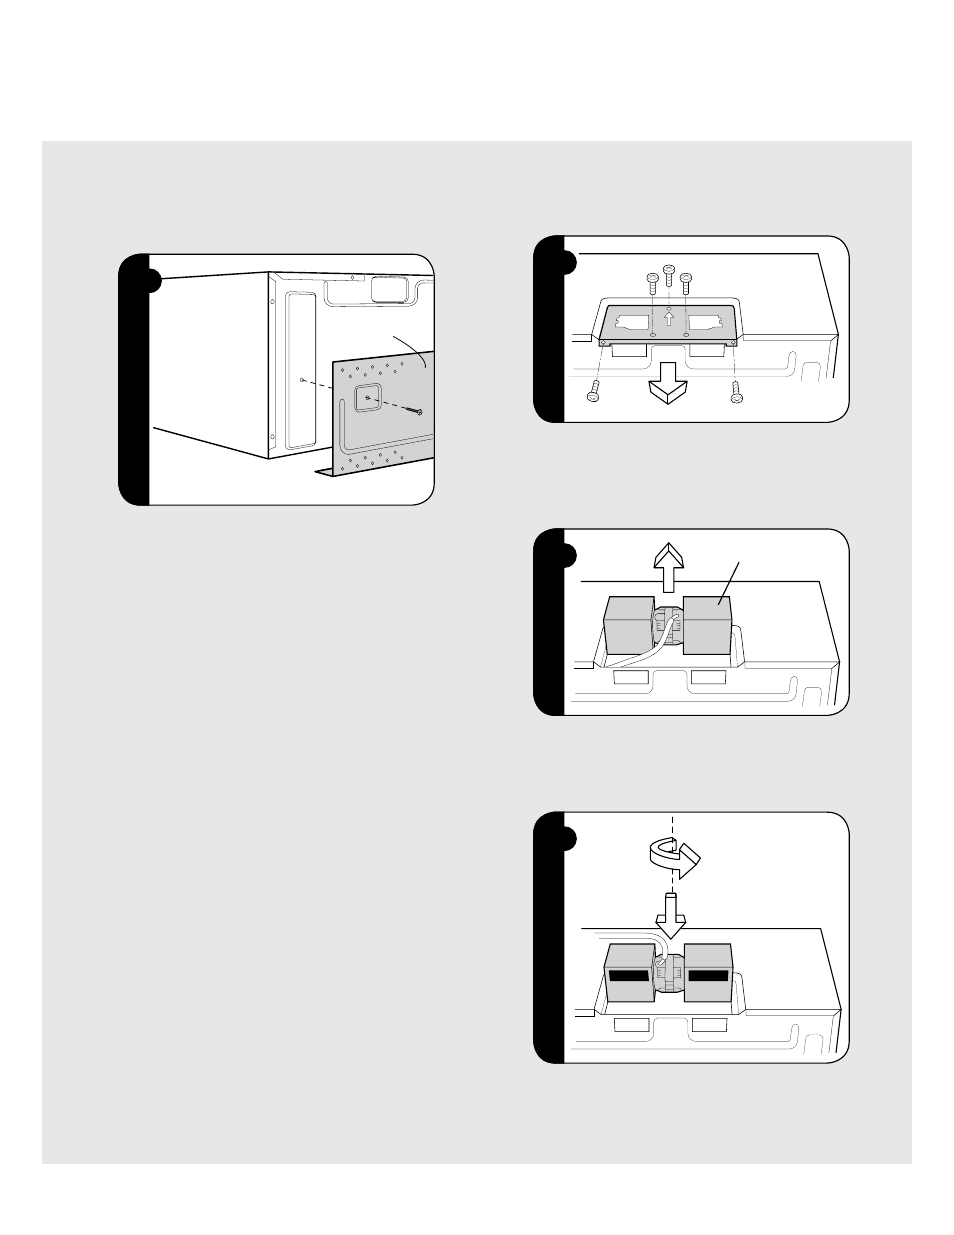
7 Preparation of the Oven
Separate mounting plate from oven by removing two
screws. See illustration below. Save these screws for use
in section
Mounting Oven to Wall
, figure
/
.
Mounting
Plate
Back of Microwave
figur
e
figur
e
4
8 Ventilation System
(Preparing Oven for Installation)
This Built-in Microwave Hood is designed for adaptation
to three types of hood ventilation systems. Select the
type required for your installation.
rEcirculating
— non-vented, ductless.
Follow installation procedure (A). Recirculating requires
the use of the Charcoal Filter, which has already been
installed in the oven.
hOrizOntal Exhaust
— outside ventilation.
Follow installation procedure (B).
VErtical Exhaust
— outside ventilation.
Follow installation procedure (C).
(A) Recirculating:
Non-Vented, Ductless
Operation
• The unit is shipped assembled for recirculating.
• The Exhaust Damper Assembly
7
is NOT REqUIRED
for recirculating operation.
(B) Horizontal Exhaust:
Outside
Ventilation
figur
e
figur
e
5
1) HORIZONTAL EXHAUST:
Remove 2 screws from back
edge and 3 screws from the top center of Fan Cover Bracket.
Save 2 screws to be used later and discard remaining 3.
Remove Fan Cover Bracket by sliding it in the opposite
direction of the arrow on the Fan Cover Bracket.
figur
e
figur
e
6
Hood Fan Unit
2) HORIZONTAL EXHAUST:
Lift Hood Fan Unit carefully
and slip wires out of cavity.
• cautiOn:
Do not pull or stretch hood fan wiring.
figur
e
figur
e
7
(A) Rotate 180˚
(B)
3) HORIZONTAL EXHAUST:
Rotate the Hood Fan Unit
180˚ so that the fan blade openings are facing the back of
the oven. See figure
7
(A). Replace Hood Fan Unit into the
oven. Be careful not to pinch the wire and the Hood Fan
Unit. See figure
7
(B).