Operating mode, The seamless mode, Chapter 5 : operating mode – Analog Way Smart Fade - SMF251A Manuel d'utilisation
Page 13
SMART FADE™ Chapter 5 : OPERATING MODE
PAGE 13
Chapter 5 : OPERATING MODE
The SMART FADE
™
can be used in three different synchronization modes.
• The SEAMLESS MODE, allows to switch seamlessly between the "referenced" COMPUTER input and the others video
inputs. All the video inputs are scaled to the same format as the "referenced" COMPUTER format.
NOTE: The switching between video and video, or between computer and computer, or between video and the "no
referenced" computer, will be operate with a black transition.
• The SCALER MODE allows to select an output format corresponding to your application. All video inputs are scaled to
the selected format. The switching between all the inputs will be operate with a black transition.
• The SCALER FOLLOW MODE allows to synchronized the output frame rate onto the selected input frame rate (50 Hz
or 59.94 Hz). This mode allows to improve the motion picture. The switching between all the inputs will be operate with
a black transition.
5-1. THE SEAMLESS MODE
• SETTINGS
c We recommend to reset the SMART FADE
™
to all of its default values, with the LCD menu # 6-5, before
proceeding.
d Select the output Sync. type which corresponds to your display device (LCD menu # 2-1).
e Select the "referenced" COMPUTER with the LCD MENU #2-2 (reference sync).
NOTE: Select reference sync = COMPUTER 1, if you want to do SEAMLESS transition between the
COMPUTER 1 input and all the others video inputs.
• SEAMLESS SWITCHING OPERATION
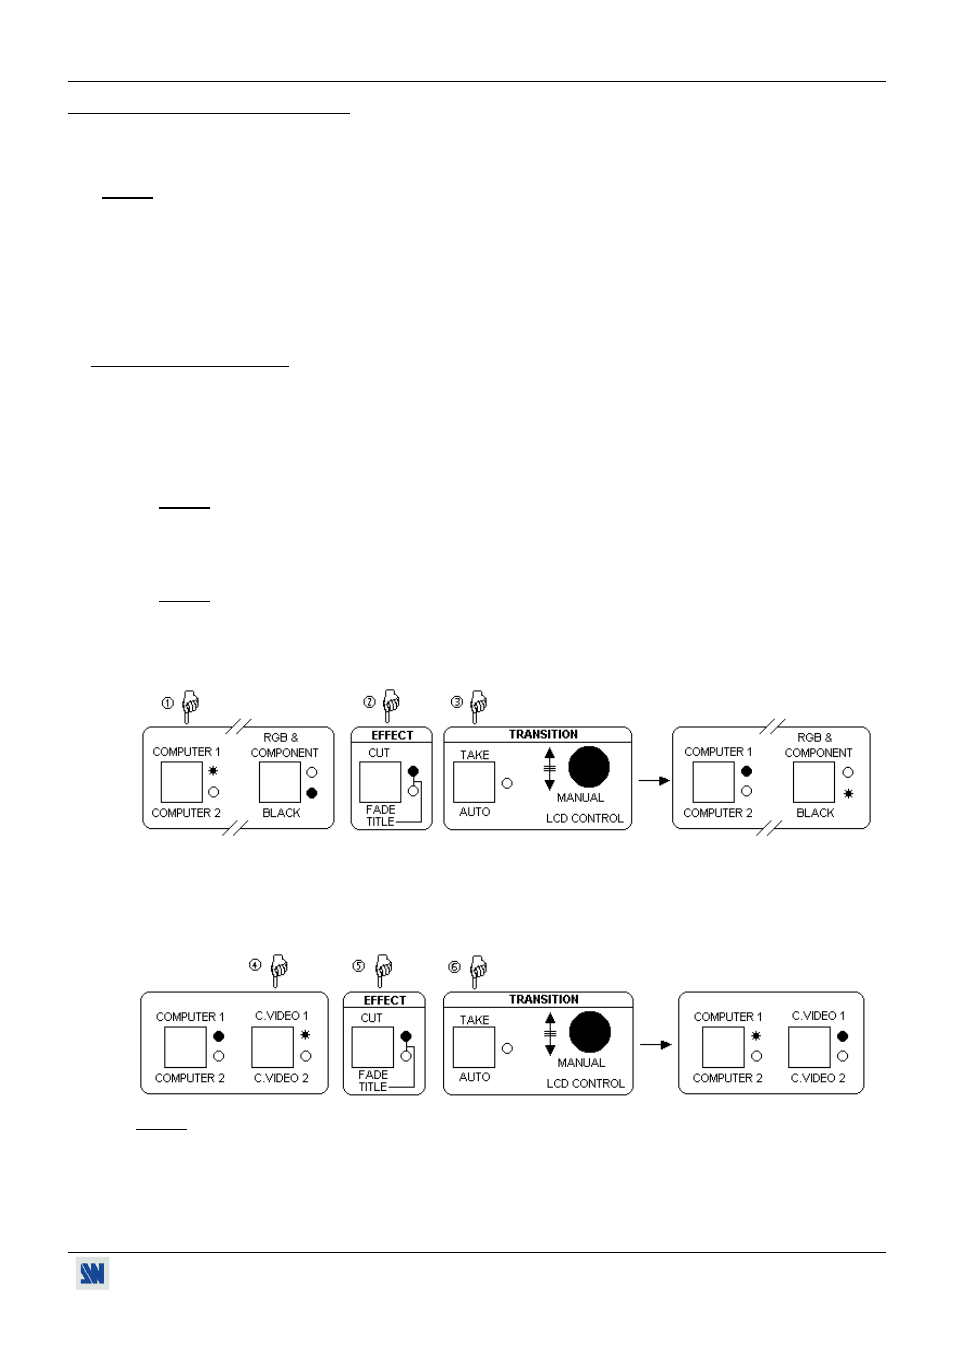
c Pre-select the COMPUTER 1 input with the front panel selection key (LED is blinking).
NOTE: If your referenced COMPUTER is COMPUTER 2, select COMPUTER 2 with the front panel selection
key (press twice the selection key)
d Set the EFFECT key to CUT. (CUT LED is ON).
e Press the TAKE KEY to display the COMPUTER 1 onto the OUTPUT (the COMPUTER 1 LED is ON).
f Pre-select a video input (C.VIDEO 1, C.VIDEO 2, S.VIDEO 1, S.VIDEO 2, or RGB & COMPONENT) with
the front panel selection keys (the corresponding LED is blinking).
g Set the EFFECT key to CUT. (the CUT LED is ON).
h Press the TAKE key to display the video onto the output in with a CUT transition.
NOTE: = LED ON
= LED BLINKING
= LED OFF