2 gas requirements, 3 connecting the gas supply, 1 checking the gas line for leaks – Thermador Professional Series Gas Rangetop Installation Instructions Manuel d'utilisation
Page 14: 2 propane gas connection
en-us
Gas requirements and connections
14
¡
If desired, for altitudes above 2,000 ft (610 m) elevation
above sea level, adjustments can be made to the
rangetop burners with an adjustment kit. If flame perfor-
mance is satisfactory, adjustment will not be required.
¡
See Customer Service information about service, parts,
and accessories.
7.2 Gas requirements
Natural gas requirements:
¡
Inlet connection: ½" NPT internal (min. ¾" diameter flex
line)
¡
Supply pressure: 7" min. to 14" max. water column
(17.4 to 34.9 mbar)
¡
Manifold pressure: 5" water column (12.5 mbar)
Propane gas requirements:
¡
Inlet connection: ½" NPT internal (minimum ¾" diame-
ter flex line)
¡
Supply pressure: 11" min. to 14" max. water column
(27.4 mbar to 34.9 mbar)
¡
Manifold pressure: 10" water column (24.9 mbar)
7.3 Connecting the gas supply
1.
Make sure the gas supply is turned off at the manual
shut-off valve before connecting the appliance.
2.
Use a ¾" (19 mm) flex line to connect between the gas
supply and the appliance gas inlet. The gas supply line
connection is located at the lower right portion. The ap-
pliance gas inlet connection is ½" (12.7 mm) NPT.
‒
Use caution to avoid crimping the ¾" (19 mm) flex
line when making bends. Suggested length of flex
line is 48" (1219 mm); however, please check local
codes for your area's requirements before installa-
tion.
{
A
B
A
¾" (19 mm) external threads
½" (12.7 mm) internal threads
B
¾" (19 mm) flex line
3.
Use pipe sealing compound or Teflon® tape on the pipe
threads. DO NOT apply sealing compound or tape to
flare fittings. Take care not to apply excessive pressure
when tightening the fittings.
4.
Leak testing of the appliance shall be in accordance
with the following instructions:
‒
Turn on gas and check supply line connections for
leaks using a soap and water solution.
‒
Bubbles forming indicate a gas leak. Repair all leaks
immediately.
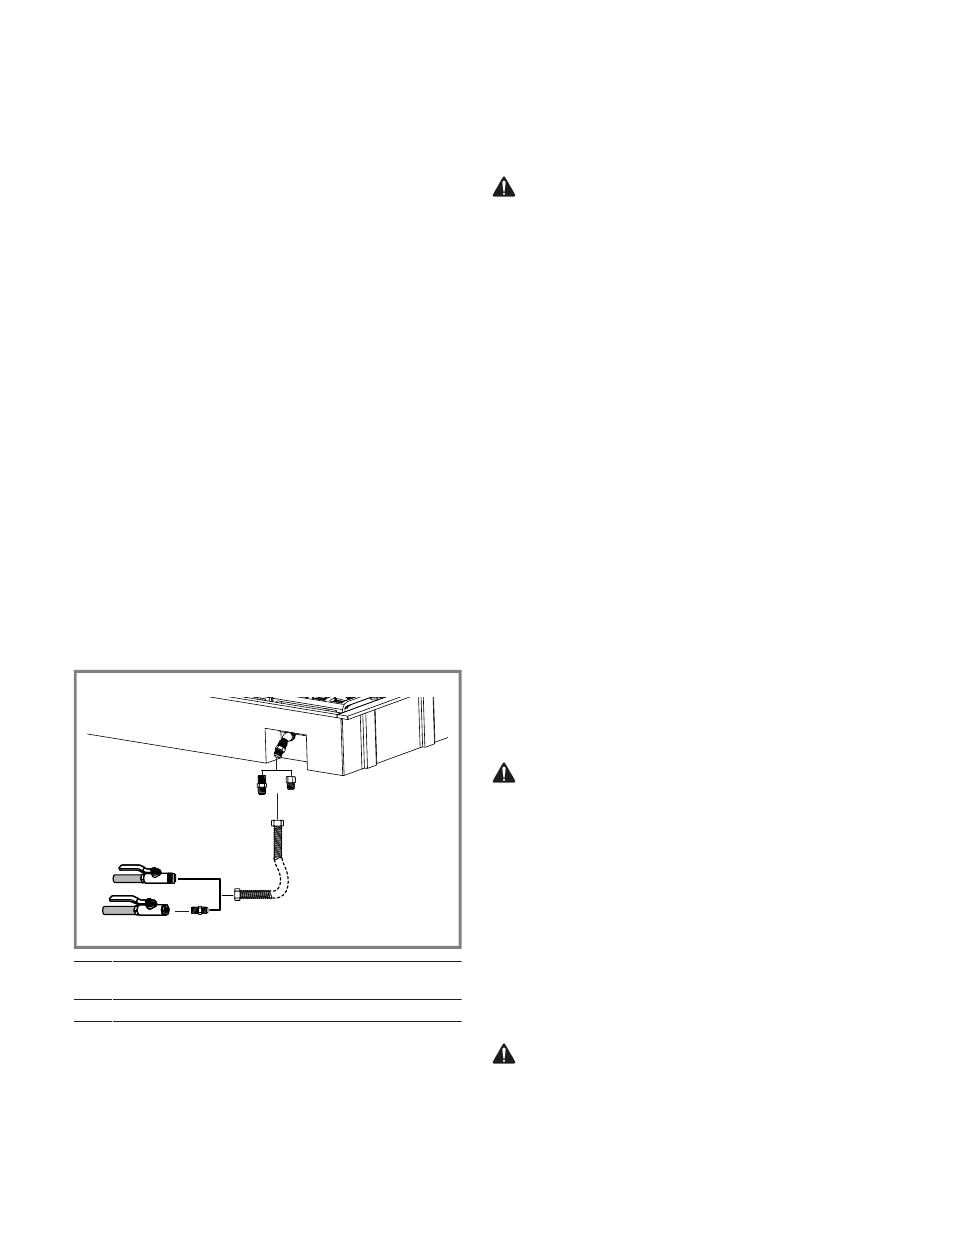
Checking the gas line for leaks
Leak testing must be conducted by the installer according
to the following instructions.
WARNING
DO NOT use a flame of any kind to check for gas leaks.
1.
Turn on gas.
2.
Apply a non-corrosive leak detection fluid to all joints
and fittings in the gas connection between the shut-off
valve and the appliance. Also check gas fittings and
joints in the appliance if the connections may have been
disturbed during installation.
a
Bubbles appearing around fittings and connections indi-
cate a leak.
3.
If a leak appears, turn off the supply line gas shut-off
valve and tighten the connections.
4.
Retest for leaks by turning on the supply line gas shut-
off valve.
a
When the leak check is complete and no bubbles ap-
pear, the test is complete.
5.
Wipe off all soap solution or detection fluid residue.
a
Do not continue the installation until all leaks are elimi-
nated.
Propane gas connection
Your appliance is shipped by the factory to operate on nat-
ural gas. It must be converted for use with propane gas.
Verify the type of gas being used at the installation site
matches the type of gas used by the appliance.
If the location site requires conversion from natural gas to
propane (LP), contact the dealer where the appliance was
purchased or contact Thermador to purchase a conversion
kit. Obey all instructions in this kit for correct conversion of
the gas regulator and settings for the gas valves. Field
conversion must be done by qualified service personnel
only.
WARNING
When using a gas conversion kit:
▶
The gas conversion kit shall be installed by a qualified
service personnel in accordance with the manufac-
turer’s instructions and all applicable codes and require-
ments of the authority having jurisdiction.
▶
If the information in the instructions is not followed ex-
actly, a fire, explosion or production of carbon monoxide
may result causing property damage, personal injury or
loss of life.
▶
The qualified service personnel is responsible for the
proper installation of the gas conversion kit.
▶
The installation is not proper and complete until the op-
eration of the converted appliance is checked as speci-
fied in the manufacturer’s instructions supplied with the
gas conversion kit.
CAUTION
The appliance must be isolated from the gas supply piping
system by closing its individual manual shutoff valve dur-
ing any pressure testing of the gas supply piping system at
test pressures equal to or less than ½ psi (3.5 kPa).