Replace oven door(s) – KITCHENAID 27 Inch Single Convection Electric Wall Oven Owner's Manual Manuel d'utilisation
Page 19
19
6.
After
the
bottom
vent
shield
is
installed.
�
Align
the
bottom
vent
trim
tab
(B)
with
the
oven
frame
(A)
as
shown.
�
Using
one
#8-18
x
3/8"
(9.5
mm)
screw
(C)
on
each
side
of
the
trim
tab
(B),
align the top of the bottom trim tab (B) to
the Hinge receiver (D) as shown.
�
Fasten
the
bottom
vent
trim
securely
to
the
oven
frame
(A).
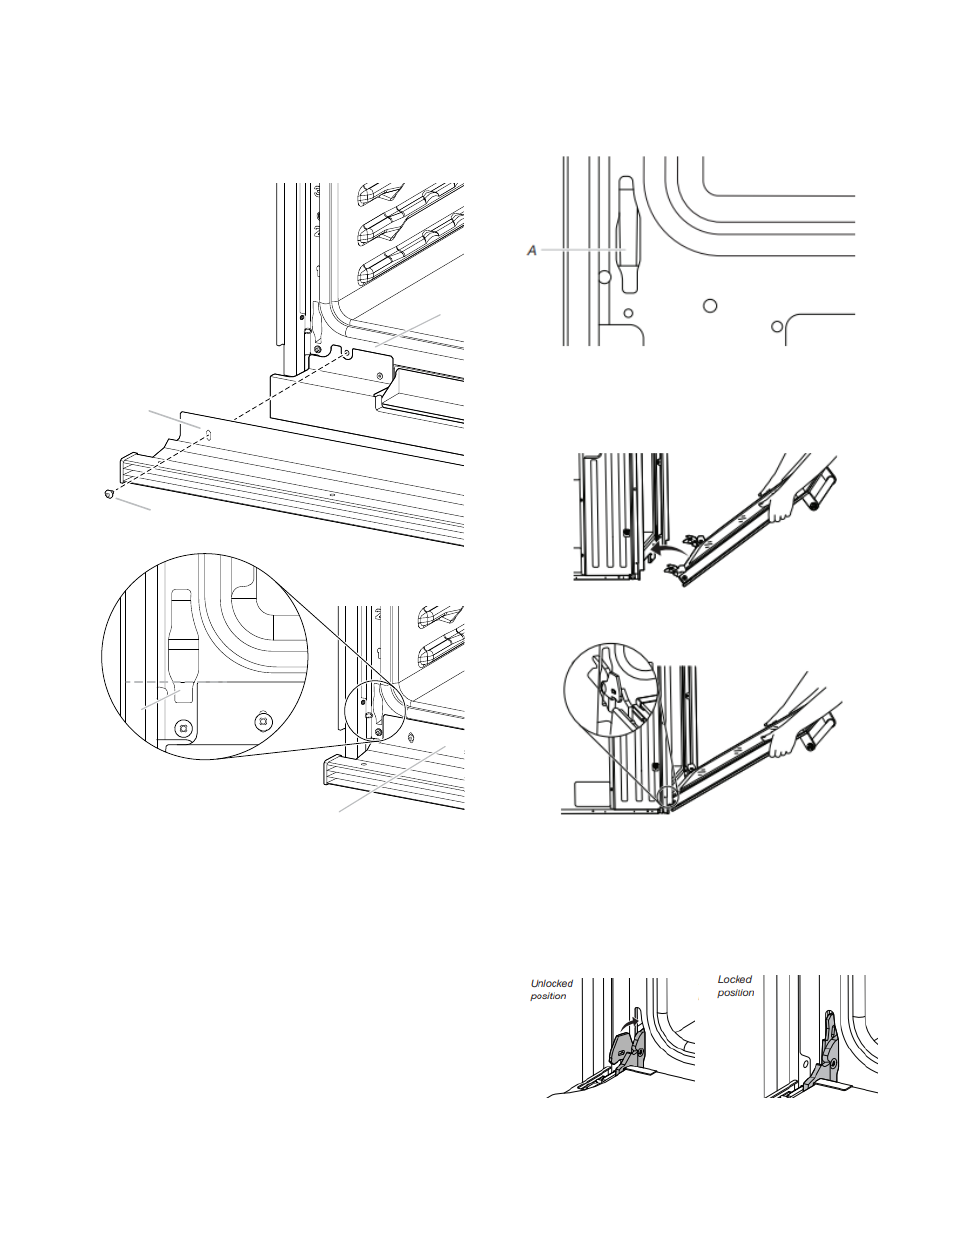
A. Oven frame
B. Trim tab
C.
#8-18 x 3/8" (9.5 mm)
screw
D.
Hinge receiver
7.
Replace the oven racks.
8.
Replace the oven door. See the “Replace Oven Door(s)”
section.
9.
Check that the door is free to open and close. If it is not,
repeat the removal and installation procedures. See the
“Prepare Built-In Oven” section.
10.
Repeat for lower oven door.
IMPORTANT:
For proper oven operation, check that the gap
between bottom of the door and bottom vent trim is at least
1/4" (6.4 mm).
11.
Reconnect power.
12.
The display panel will light and boot up.
13.
If the display panel does not light, reference the Warranty.
Replace Oven Door(s)
1.
Using two hands, grasp side edges of door at the midpoint.
Face the oven cavity.
2.
Locate the slots on each side of the oven cavity for the door
hinge locks.
A. Slot in the oven cavity for door hinge lock
3.
Using 2 hands, grasp the edges of the oven door. At a 45°
angle, insert the hinges at the same time, and push the oven
door into the oven cavity slot to replace. You may need to
gently shift the door from side to side as you push.
4.
Make sure the door hinge notch is engaged on the bottom
of the oven cavity slot.
IMPORTANT:
Do not close the door at this step or damage
may occur to the door hinge.
5.
Lower the oven door to the fully open position. If the oven door
does not open to a full 90°, repeat steps 1 through 3.
6.
Locate the oven door hinge locks in the corners of the oven
door, and rotate the hinge locks toward the oven cavity to the
locked position.
7.
After the door hinges have been locked, gently swing the door
upward to close. The door should not be forced closed.
A
C
B
D
B