GE Zoneline Insulated Steel Wall Case - 16 Inch Depth Installation Instructions Manuel d'utilisation
Page 3
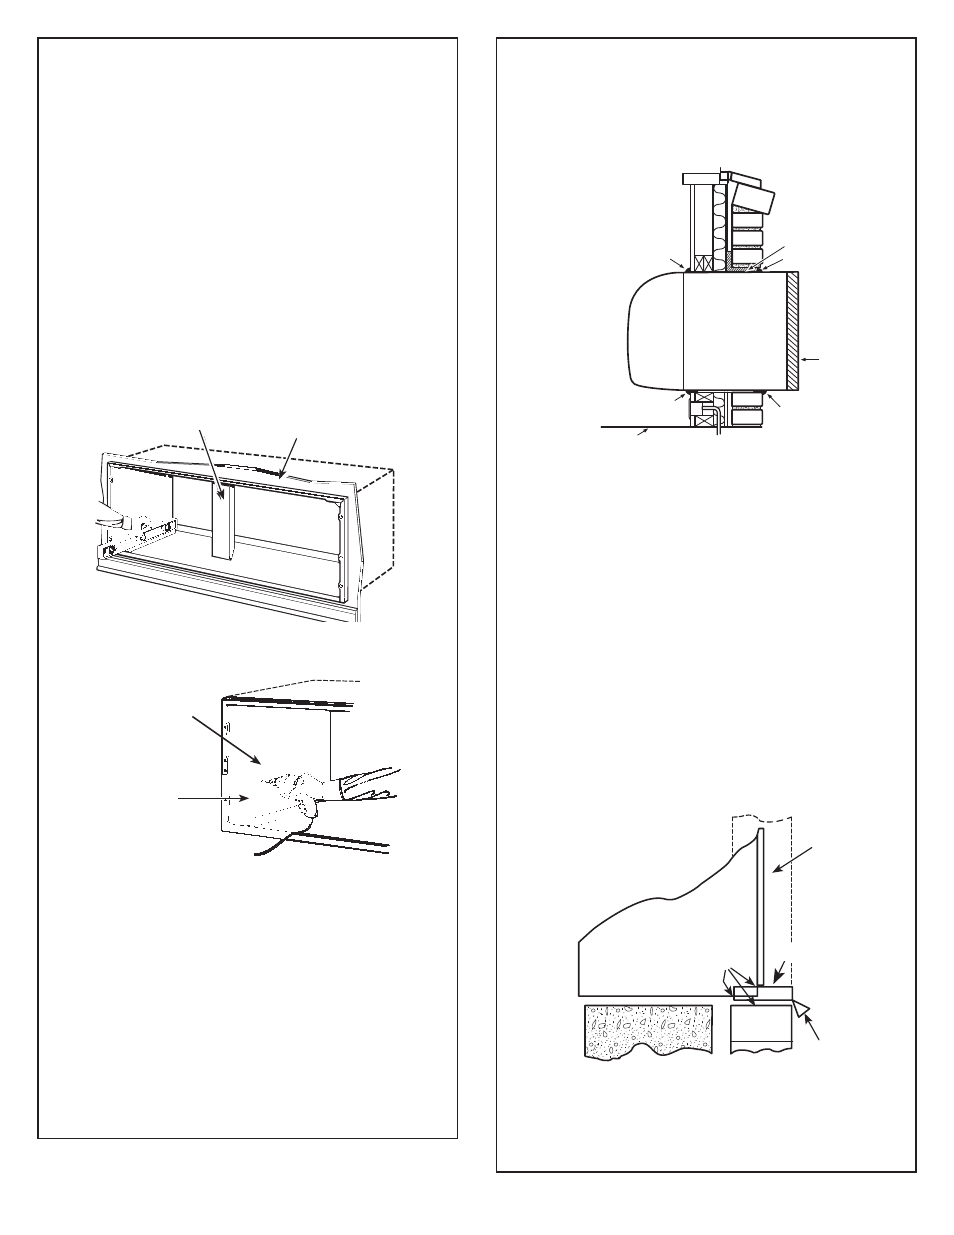
STEP 3
Installation of the case in the wall opening
1.
Position the case into the wall. Refer to chart on
page 1 for roomside projection. The rear (outside)
edge of the case should extend at least 1/4
s
beyond
the outside wall to be able to caulk properly and
prevent sealing the drain holes in the rear flange
of the case, and to facilitate easy installation of
an accessory drain, if desired. (If it is desired to have
the rear grille flush on the outside, a drip rail must
be installed under the case and caulking applied
between the drip rail and case.) See instructions in
Step 4.
IMPORTANT:
Install case level from side to side and from front to
rear. Using a level, allowable tilt to the outside is
maximum of 1/4” bubble. Never allow case to tilt to
the inside.
2.
Firmly secure the case to the wall structure.
Do not drill any holes in the bottom of the case.
3.
Caulk the entire opening on the outside between
the case and the building exterior.
4.
Caulk the entire opening on the inside between
the case and the building interior.
Use lintel, when required, to support brick and block
above the case.
NOTE:
Do not drill any holes in the case for electrical
connections. See the Zoneline Air Conditioner Owner’s
Manual for instructions on how to connect the
electrical supply.
STEP 4
Weatherproofing
Weatherproof gaps between the exterior and interior
walls and the case with caulking or equivalent
weatherproofing material.
NOTE:
* It is critical to caulk around perimeter of wall case
on all four sides on the outside and the roomside
where it joins the building to prevent air and water
infiltration.
For installation in extra thick walls
1.
If the case is being installed in a thick wall where
WKHFDVHLVUHFHVVHGPRUHWKDQ
,
s
an extended
wall case will be required with depths as called
out in the table in Step 1.
2.
If the case is being installed in a wall where the
UHFHVVLV
s
or less, and an extended wall case is
not used, flashing must be installed under the case
and extend up 2
s
on each side. The flashing must
include a drip rail as illustrated in the figure below.
NOTE:
** It is critical to caulk around perimeter of
flashing and drip rail where it joins the building
and case to prevent air and water infiltration.
3
Inside wall
Stiffener
Caulk*
Steel lintel
Caulk*
Outdoor
grille
Room
cabinet
Caulk*
Case
Caulk*
Finished floor or top of carpet
Outdoor
grille
Drip rail
Case
Caulk**
Flashing
Secure case through
side and/or top only
2” min. from
case bottom