Multi-Contact MA119 Manuel d'utilisation
Page 5
Advanced Contact Technology
www.multi-contact.com
5 / 8
11
12
13
14
15
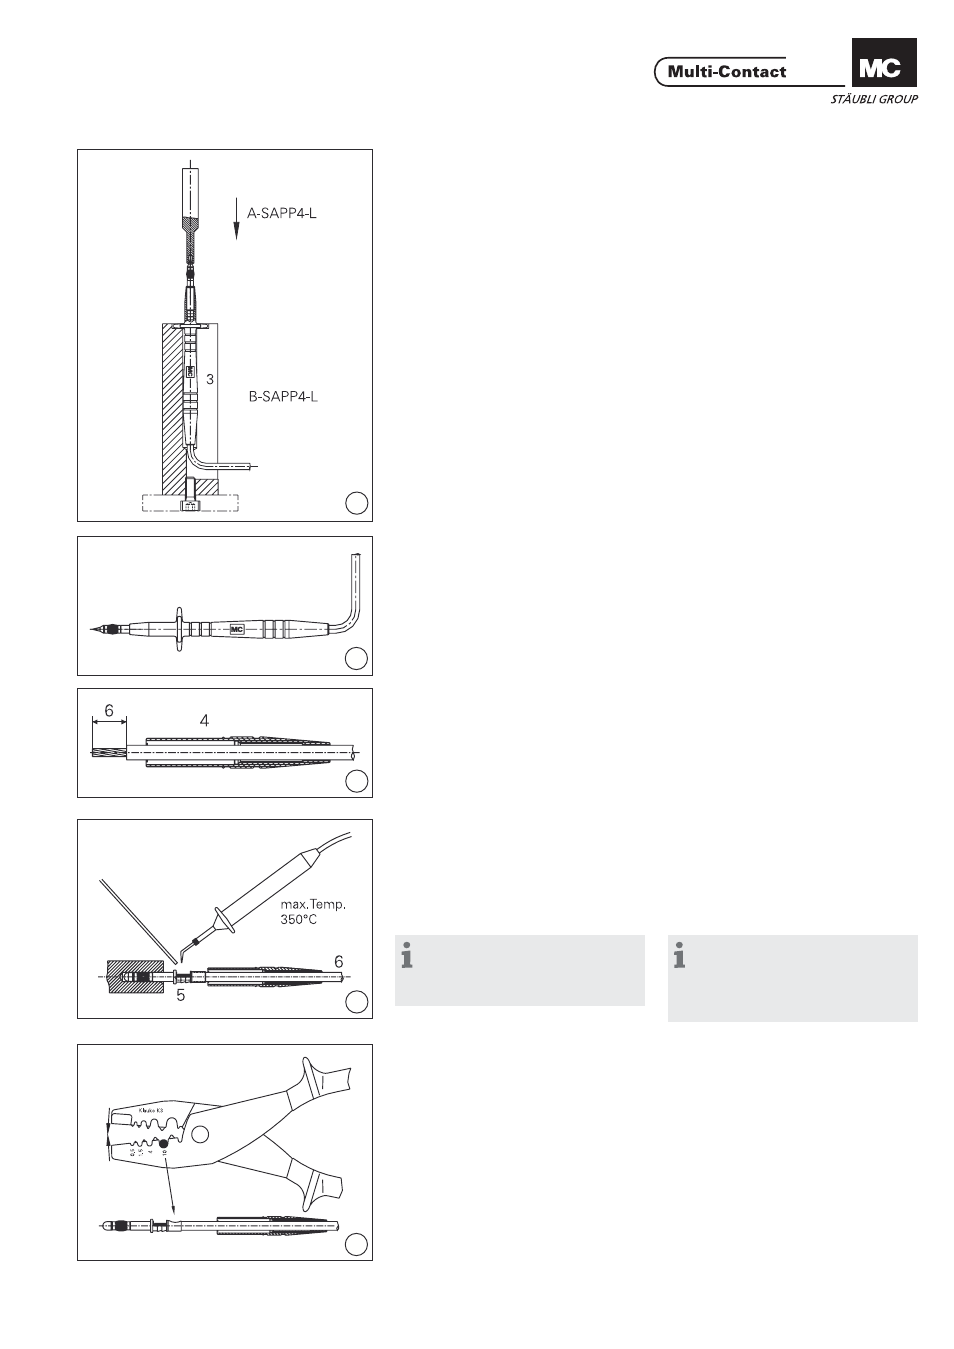
(ill. 11)
Mettre l’isolant 3 avec la fi che soudée
dans l’outil B-SAPP4-L et positionner
l‘outil de montage A-SAPP4-L en
face de la fi che avec câble et presser
lenteme nt la fi che jusqu‘au point
d‘arrêt, à l‘aide d‘une petite presse.
(ill. 11)
Place insulator 3 with soldered plug
into the auxiliary tool B-SAPP4-L and
align auxiliary tool A-SAPP4-L with
plug and insulator and slowly press-in
plug to the end position with the help
of a bench drilling machine or lever
press.
(ill. 12)
L‘extrémité SAPP4-L est prête.
(ill. 12)
The SAPP4-L cable end is ready.
(ill. 13)
Enfi ler l‘isolant 4 sur l‘autre extrémité
du câble et avec la pince à dénuder,
dénuder le câble sur la longueur
L= 6mm.
(ill. 13)
Slide the insulator 4 onto the free
cable end and strip cable to length
L= 6mm with cable stripper.
(ill. 14)
Souder le câble 6 dans la fi che 5. Tem-
pérature de soudure max.: 350°C.
La fi che et la zone de soudure doivent
être exemptes de coulures liées à la
soudure.
(ill. 14)
Solder cable 6 in plug 5. Max. solder
temperature: 350°C.
Plug and solder area should be free
from excess solder.
Remarque:
Utiliser un bloc avec un perçage
Ø 4,2mm pour maintenir la fi che 5
lors de la soudure.
Note:
For soldering purposes a block
with a drilled hole Ø 4,2mm should
be used to hold the plug 5 in posi-
tion.
(ill. 15)
Poser la fi che avec le câble dans
la pince à sertir PZK3 (Pos.10),
positionne r le siffl et de soudure vers
le haut, puis sertir jusqu‘en butée.
Attention à la dernière dent de sapin
de la fi che.
(ill. 15)
Crimp the plug and cable in Pos.10
of the PZK3 crimping pliers, paying
attention that the solder cup is facing
up-wards and that the crimp is posi-
tioned behind the last captive taper
edge.