Multi-Contact MA129 Manuel d'utilisation
Page 4
Advanced Contact Technology
4 / 8
www.multi-contact.com
7
9
8
10
6
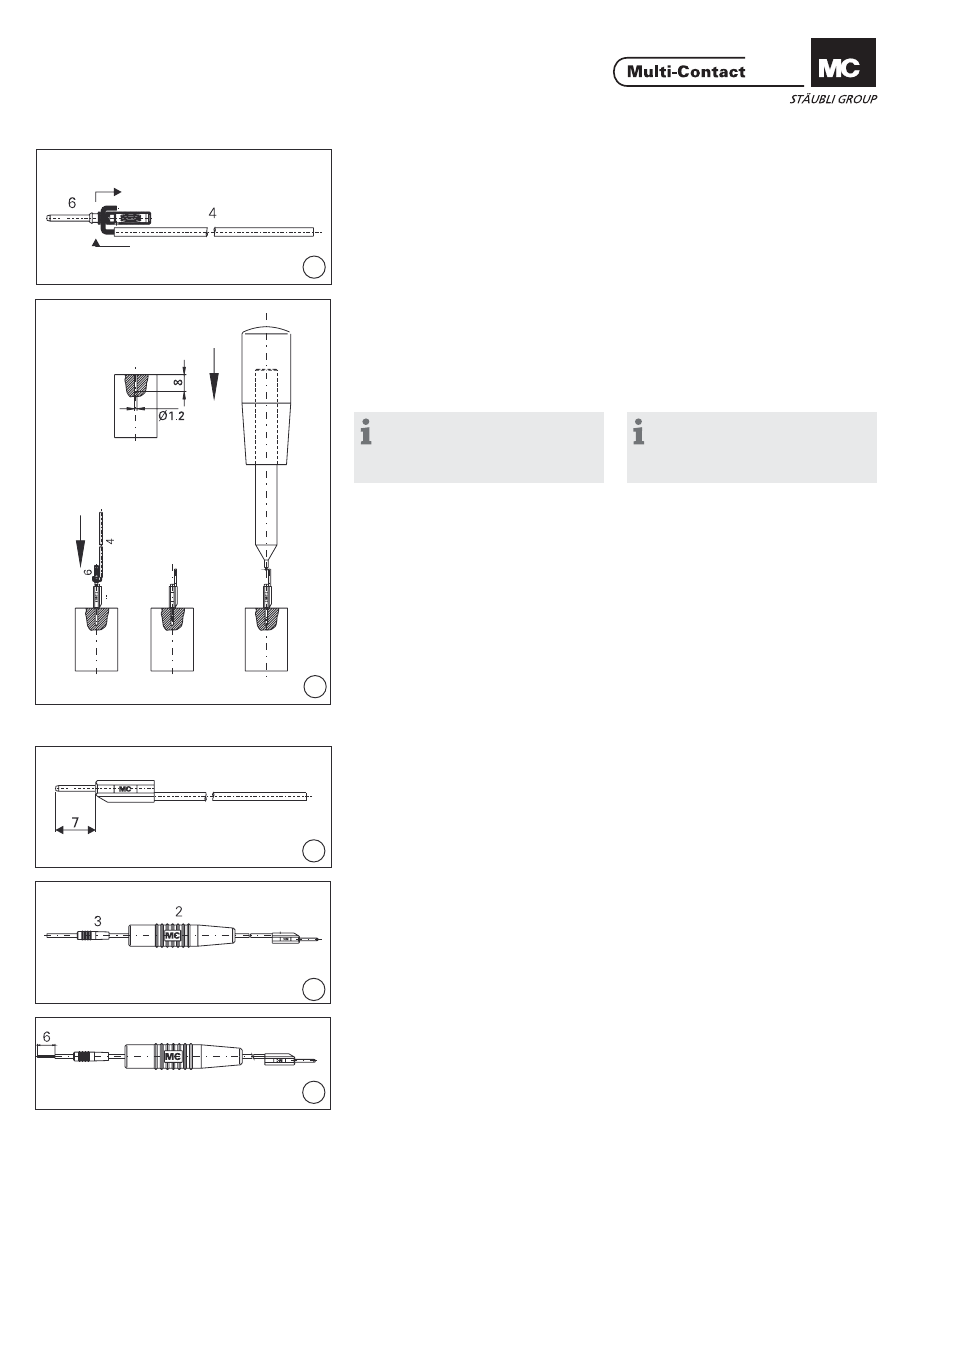
Montage
Assembly
(ill. 6)
Insérer l’extrémité dénudée du câble 4
dans le perçage de la douille 6 et la
replier conformément au dessin.
(ill. 6)
Insert the stripped cable 4 into the
hole of plug 6 and bend accordingly.
(ill. 7)
Introduire dans la bonne direction
(conformément au dessin) la fi che 6
(avec câble 4) dans l’isolant 5. A l’aide
de l’outil auxiliaire A-LK1-A presser
l’isolant jusqu’à encliquetage.
(ill. 7)
Push plug 6 (with cable 4) into the
insulator 5 and press in until it can be
heard engaging using auxiliary tool
A-LK1-A.
Remarque:
Un support muni d’un perçage
Ø 1.2mm permet de maintenir la
fi che.
Note:
A block with a drilled hole
Ø 1.2mm should be used to hold the
plug in position.
(ill. 8)
Contrôler la longueur de la fi che (7mm).
(ill. 8)
Control plug length (7mm)
(ill. 9)
Glisser l’isolant 2 et l’isolant 3 sur
l’autre extrémité du câble.
(ill. 9)
Slide insulation 2 and insulation 3 onto
the other end of cable.
(ill. 10)
Dénuder à l’aide de la pince à dénuder
l’extrémité KT410-BK sur la longueur
L=6mm.
(ill. 10)
Strip KT410-BK end of the cable to
length L=6mm with cable stripper.