Cle an in g – Napoleon 700 Series 38 Inch Built-In Gas Grill Owner's Manual Manuel d'utilisation
Page 19
Napoleon.com
| BUILT-IN Series
Cleaning |
19
Cle
an
in
g
WARNING
! It is very important the valve/orifice enters the burner tube when reinstalling the burner after cleaning
and before lighting your grill, or a fire or explosion could occur.
WARNING
! Avoid unprotected contact with hot surfaces.
WARNING
! Do not use abrasive cleaners or steel wool on any painted, porcelain, or stainless steel parts of your
grill because it will scratch the finish.
!
SAFETY
FIRST!
Always wear protective
gloves and safety
glasses when servicing
your grill.
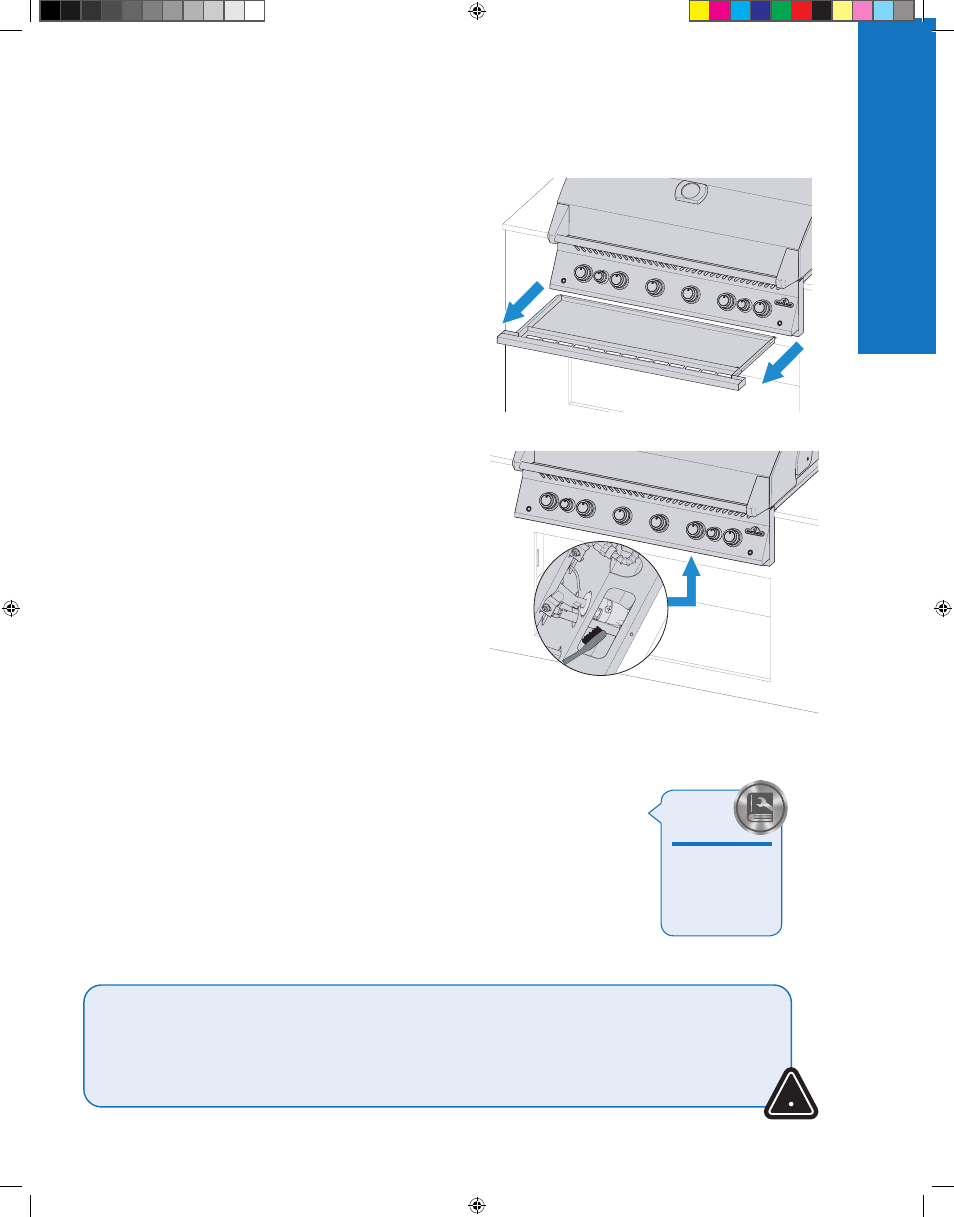
Insect Screen and Burner Ports
Spiders and insects are attracted to small enclosed spaces.
Napoleon has equipped the burner with an insect screen on the air
shutter. This reduces the likelihood of insects building nests inside
the burner, but doesn’t eliminate the problem.
A nest or web can cause the burner flame to burn a soft yellow or
orange and cause a fire or flashback at the air shutter underneath
the control panel.
1. Remove the screw (s) that attaches the burner to the back
wall of the grill. Slide the burner back and upwards to remove.
2. Use a flexible venturi tube brush to clean the inside of the
burner.
3. Shake loose debris from the burner through the gas inlet.
4. Check the burner ports and valve orifices for blockages:
burner ports can close over time because of cooking debris
and corrosion.
5. Use an opened paper clip, or the supplied port maintenance
bit to clean burner ports.
6. Drill out blocked ports using the supplied drill bit in a small
cordless drill: this can be done with the burner attached to
the grill, but it’s easier if removed from the grill.
7. Do not flex the drill bit when drilling the ports because the
drill bit will break.
8. This drill bit is for burner ports NOT for brass orifices that
regulate the gas flow to the burner.
9. Do not enlarge the holes
10. Ensure the insect screen is clean, tight, and free of any lint
or other debris.
11. Reverse the procedure to reinstall the burner.
12. Ensure the valve enters the burner when installing.
13. Replace sear plate mount and tighten screws to complete
re-installation.
Cle
an
in
g
- 700 Series 44 Inch Built-In Gas Grill Owner's Manual Freestyle Series 52 Inch Freestanding Gas Grill Owner's Manual Freestyle Series 49 Inch Freestanding Gas Grill Owner's Manual Built-In Series 500 Series 34 Inch Built-In Gas Grill Manual 700 Series 44 Inch Built-In Propane Grill Owner's Manual 700 Series 38 Inch Built- In Liquid Propane Gas Grill Owner's Manual 700 Series 32 Inch Built-In Liquid Propane Grill Owner's Manual