English – Louisiana Grills Black Label Series 19 Inch Smart Table Top Wood Pellet Grill Assembly Guide Manuel d'utilisation
Page 4
LOUISIANA GRILLS
4
ENGLISH
ENGLISH
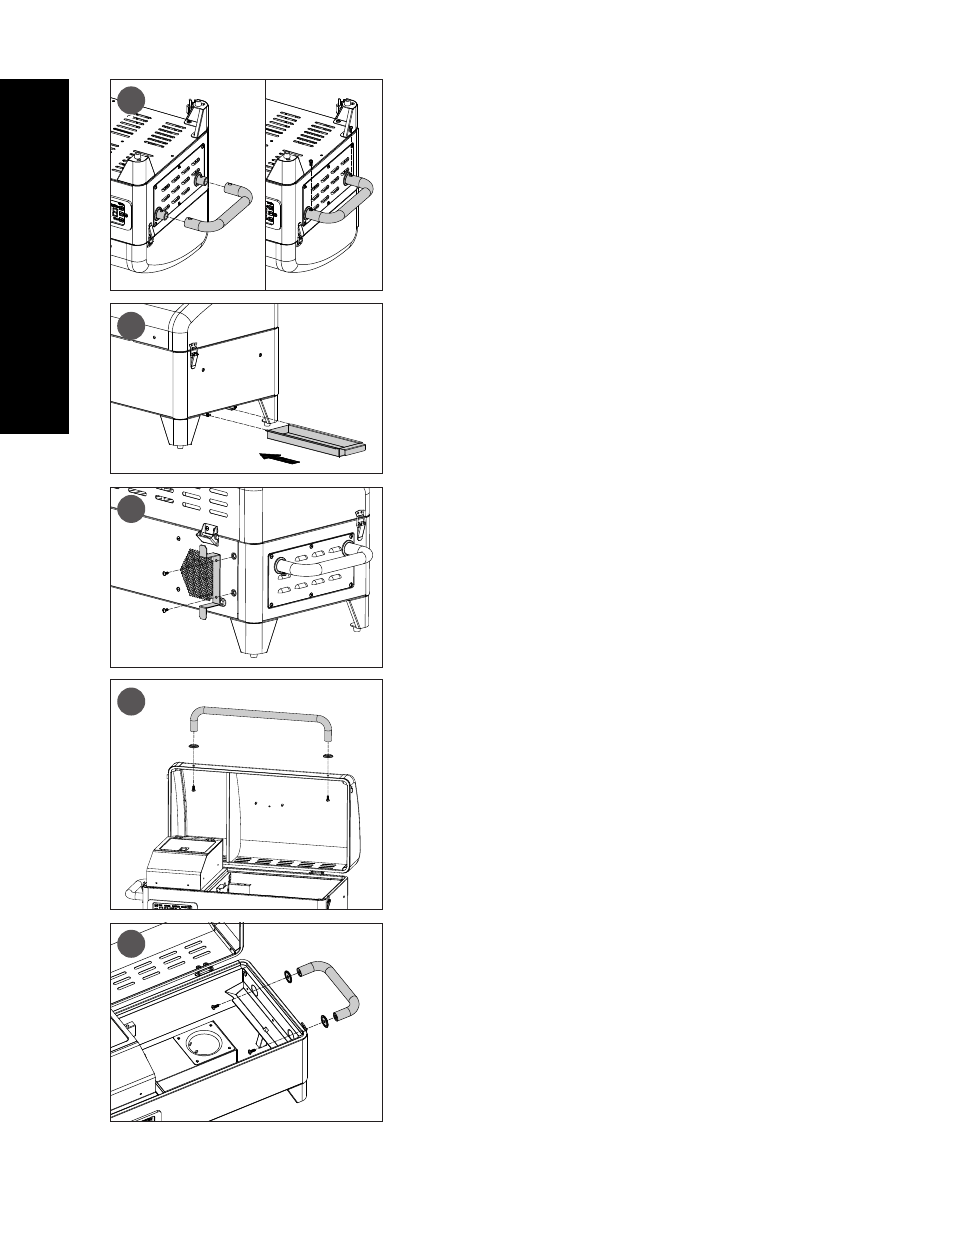
INSTALLING THE LEFT SIDE HANDLE
PARTS REQUIRED:
1
x
Left Side Handle (#7)
INSTALLATION:
•
Remove the two pre-installed screws from the two side handle bases on the
side of the unit.
•
Place the Left Side Handle overtop of the two side handle bases, securing with
the two screws previously.
•
Once the Left Side Handle is secure, carefully turn the grill into an upright
position.
PLACING THE GREASE TRAY
PARTS REQUIRED:
1
x
Grease Tray (#13)
INSTALLATION:
•
Place the Grease Tray into the rails of the Grease Tray Brackets on the right
side of the unit. Push in until the edge of the Grease Tray is flush with the side
of the unit to ensure it is in proper position.
NOTE: HAVING THE GREASE TRAY IN PROPER POSITION WILL AVOID GREASE
SPILLS.
INSTALLING THE POWER CORD BRACKET
PARTS REQUIRED:
1
x
Power Cord Bracket (#10)
INSTALLATION:
•
Remove the two pre-installed screws from the back panel of the unit.
•
Secure the Power Cord Bracket to the corner of the unit by using the two
screws previously removed.
INSTALLING THE LID HANDLE
PARTS REQUIRED:
2
x
Handle Bezel (#5)
1
x
Lid Handle (#6)
INSTALLATION:
•
Remove the two pre-installed screws from the Lid Handle.
•
Take one screw and, from inside the lid, protrude the screw to the outside. Add
a bezel on the screw, then hand-tighten the screw (from the inside) into the
Lid Handle. Repeat the same installation for the other end of the Lid Handle.
NOTE: DO NOT OVER-TIGHTEN THE SCREWS. ONLY A SNUG FIT IS NECESSARY.
INSTALLING THE RIGHT SIDE HANDLE
PARTS REQUIRED:
2
x
Handle Bezel (#5)
1
x
Right Side Handle (#8)
INSTALLATION:
•
Remove the two pre-installed screws from the Right Side Handle.
•
Take one screw and, from inside the Main Grill Body, protrude the screw to
the outside. Add a bezel on the screw, then hand-tighten the screw (from the
inside) into the Right Side Handle. Repeat the same installation for the other
end of the Right Side Handle.
NOTE: DO NOT OVER-TIGHTEN THE SCREWS. ONLY A SNUG FIT IS NECESSARY.
7
3
7
4
13
5
10
6
5
5
6
8
5
5