Installation instructions, Install l-brackets, Prepare upper cabinet – Whirlpool 24 Inch Over-the-Range Microwave Hood Combo Installation Guide Manuel d'utilisation
Page 6: Install stainless steel panel kit (optional steps)
6
INSTALLATION INSTRUCTIONS
Install L-Brackets
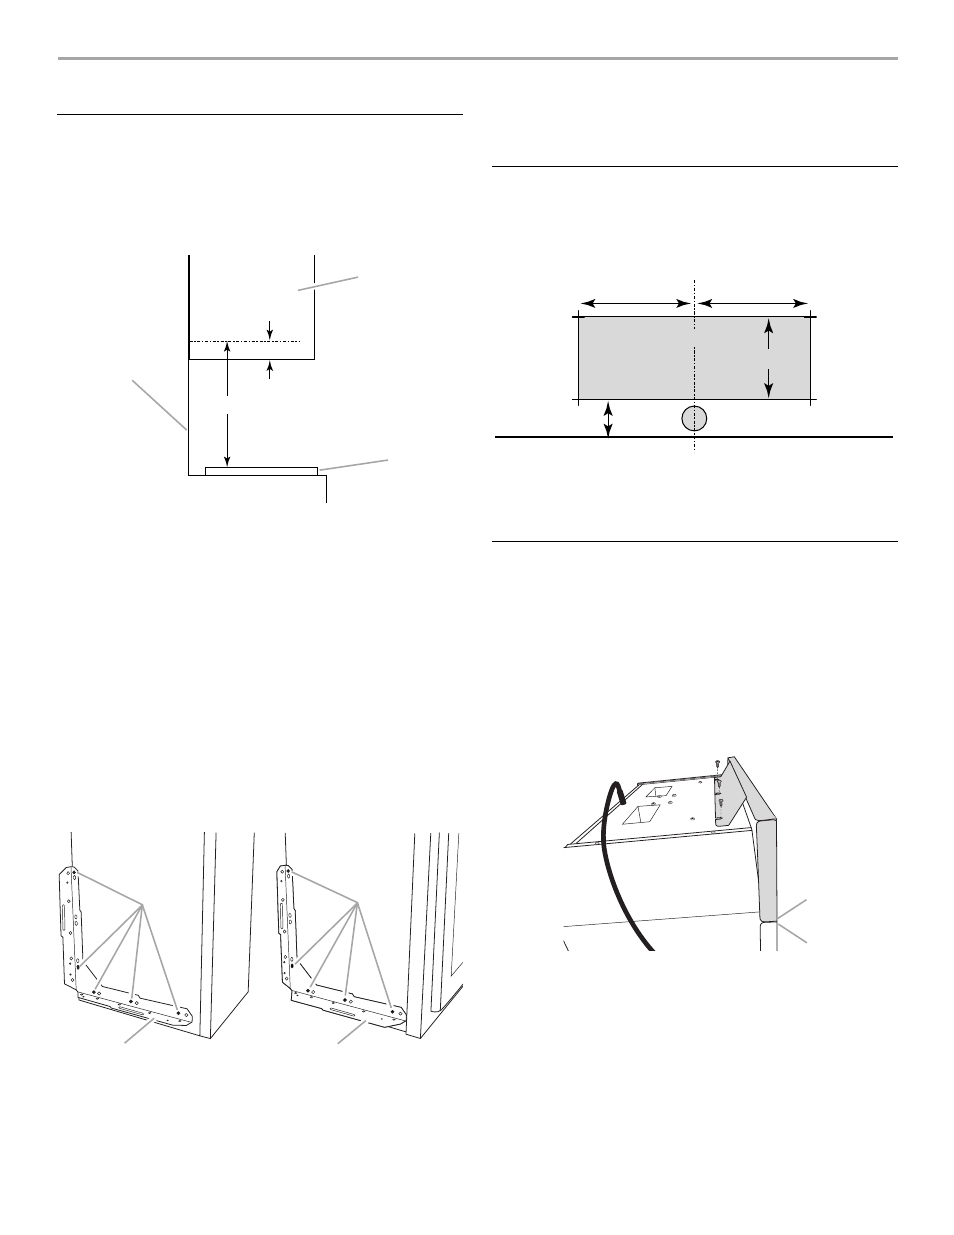
1. Measure and mark a line on each of the side cabinets at least
18
¹⁄₈
" (46.0 cm) above the surface of the cooktop. See
“Installation Dimensions” in the “Location Requirements”
section.
Make sure each line is level front to back, and that the lines
are level to each other.
2. Hold L-bracket against the side cabinet, with the bottom of
the horizontal arm aligning with the line drawn in Step 1, and
the vertical arm against the rear wall.
NOTES:
■
If installing into frameless or flush face-frame cabinetry (no
front face or protruding trim), position each bracket so that
the narrow arm is horizontal, and the wide arm is against
the rear wall.
■
If installing into face-frame cabinetry, position each
bracket so that the wide arm is horizontal, and the narrow
arm is against the rear wall.
3. Mark 3 holes through the horizontal arm onto the side cabinet,
then mark 2 holes through the vertical arm onto the side
cabinet, 1 at the top and 1 at the bottom.
4. Using 2 mm drill, drill holes marked in Step 3.
5. Secure L-brackets to side cabinets with ten 16 mm wood
screws, 5 in each L-bracket.
Prepare Upper Cabinet
1. Find the centerline of the installation space. Mark the
centerline on the bottom of the upper cabinet.
2. Measure and mark the power cord and vent holes, as shown,
making sure they are centered on the centerline.
3. Cut the power cord hole using the 1
¹⁄₂
" (3.8 cm) hole drill bit.
4. Cut 3/4" (19 mm) hole at one corner of the vent hole marking.
5. Using a keyhole saw, cut out the rectangular vent area.
Install Stainless Steel Panel Kit
(optional steps)
If you decide to cover the upper component housing with the
stainless steel panel (not provided), you will need to order the
stainless steel panel kit. See “Assistance” section for information
on ordering.
The panel must be attached to the microwave oven before
installation.
1. Peel off adhesive strip covers on bottom edge of panel, and
place the panel on the top edge of the front facing of the
microwave oven.
2. Secure panel to upper component housing with 3 mounting
screws.
A. Rear wall
B. Side cabinet
C. Cooktop surface
Installation into frameless or
flush face-frame cabinetry
Installation into face-
frame cabinetry
A. Narrow arm
B. Wide arm
C. Mounting holes
18
¹⁄₈
" (46.0 cm) min.
A
B
C
¹¹⁄₁₆
" (1.8 cm) min.
A
B
C
C
A. Bottom edge of stainless steel panel
B. Top edge of microwave oven front facing
7" (17.8 cm)
7" (17.8 cm)
Rear wall
Centerline
Upper
cabinet
bottom
5" (12.7 cm)
2
¹⁄₄
"
(5.7 cm)
1
¹⁄₂
" (3.8 cm)
diam.
A
B