Multi-Contact MA161 Manuel d'utilisation
Page 4
Advanced Contact Technology
4 / 8
www.multi-contact.com
12
10
11
13
14
(ill. 10)
Pour retirer la fi che de l‘outil, extraire
d‘abord le câble de la rainure et sépa-
rer ensuite les deux parties de l‘outil.
(ill. 10)
To remove the plug from the auxiliary
tool, pull fi rst the cable out of the
groove and then separate the two
parts of the auxiliary tool.
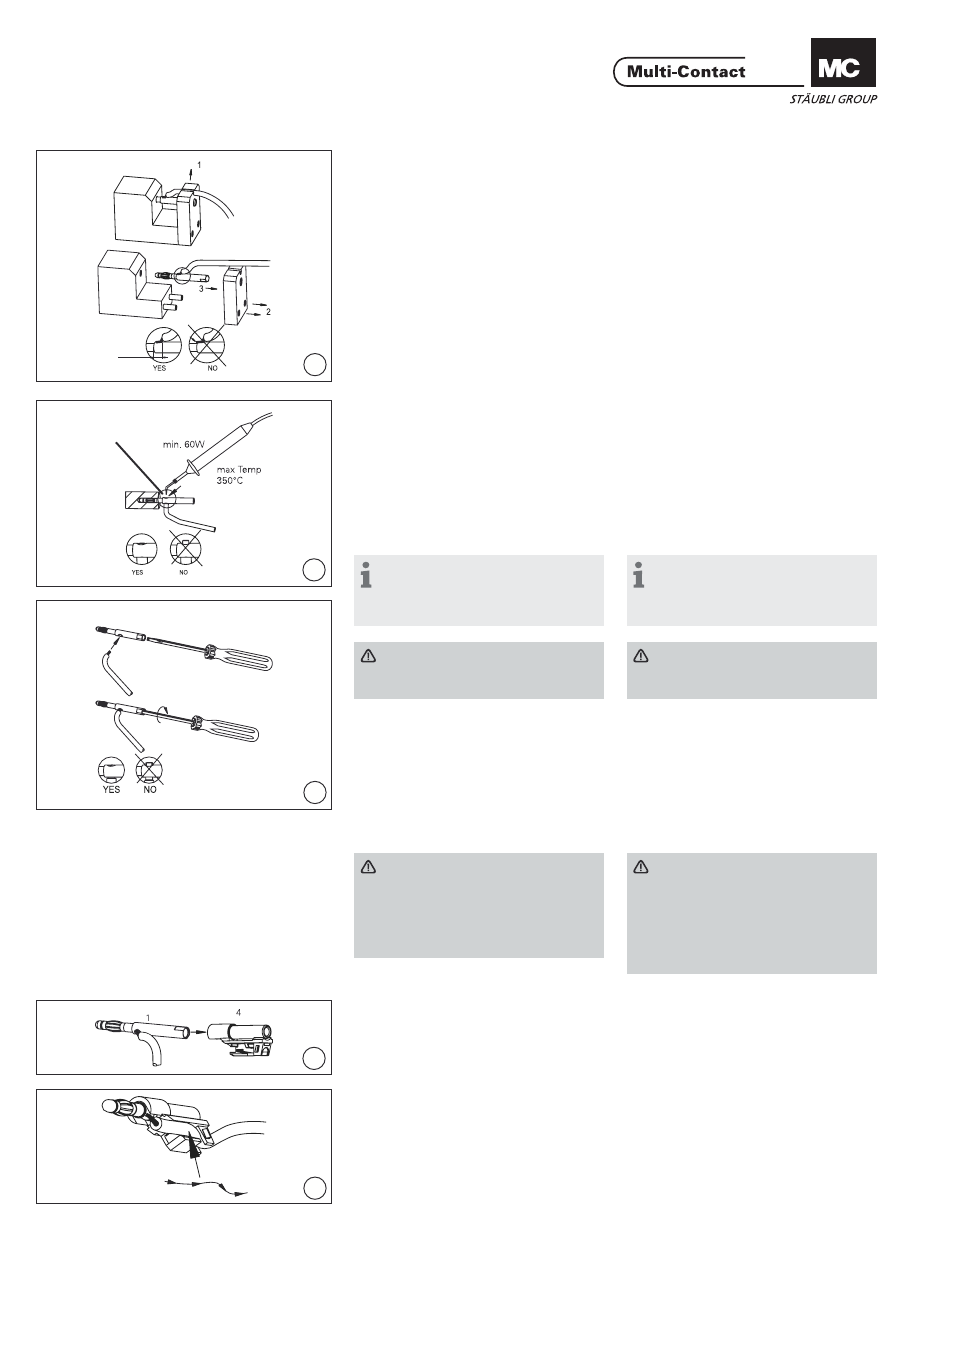
Souder le câble
(valable pour LS425-SE/Q et
LS425-SE/Q/N)
Solder the cable
(valid for LS425-SE/Q and
LS425-SE/Q/N
(ill. 11)
Introduire le câble dans le perçage et
souder. Lors de la soudure, veiller à ne
pas chauffer excessivement la fi che en
raison du téton isolant.
Température de soudure: max. +350°C.
La fi che et la zone de soudure doivent
être exemptes de coulures liées à la
soudure.
(ill. 11)
Insert the cable into the plug hole and
sold. When soldering, the plug should
not get too hot because of the plastic
head. Solder temperature: +350°C.
Plug and solder area should be free
from excess solder.
Remarque:
Lors de l’opération de soudure
maintenir la fi che dans un support
muni d’un perçage Ø 4,2mm.
Note:
For soldering purposes a block
with a drilled hole Ø4,2mm should
be used to hold the plug in position.
Attention
La soudure doit être à fl eur de la
fi che.
Attention
The soldering surface must be
fl ush with the plug body.
Visser le câble (valable pour
LS425-SE/M)
Screwing the cable (valid for
LS425-SE/M)
(ill. 12)
Introduire le câble dans le perçag e
radia l et le visser à l‘aide d‘un
tournevi s de taille 0. Couple de
serrag e: 0,5Nm
(ill. 12)
Insert the cable into the plug side hole
and screw tightly with a screwdriver
size 0. Tightening torque: 0,5Nm
Attention
Pour éviter d‘endom-mager
les brins du câble utilisez des
embouts de câble. Attention à la
longueur des embouts (doivent
être à fl eur de la fi che).
Attention
To prevent the Cu-wire from get-
ting damaged, wire end ferrules
must be used. When sellcting
the end ferrules pay attention to
length (must be fl ush with the
plug body).
Montage
Assembly
(ill. 13)
Introduire l‘isolant 4 sur la partie
arrièr e de la fi che 1 (côté douille)
jusqu’à la butée.
(ill. 13)
Insert plug 1 with the socket side
forward into the insulation part 4 until
it engages.
(ill. 14)
Pour assurer une parfaite r étention du
câble sur isolant, enfi ler soigneuse-
ment le câble dans l‘isolant (chicane).
(ill. 14)
Lay the cable over the strain relief and
shape like an „S“-form into the cable
outlet.