Multi-Contact MA118 Manuel d'utilisation
Page 3
Advanced Contact Technology
www.multi-contact.com
3 / 4
3
1
4
2
5
6
Outillage nécessaire
Tools required
(ill. 1)
Pince à dénuder „Stripax“
No. de Cde 25.0015
(ill. 1)
Cable stripper “Stripax”
Order No. 25.0015
(ill. 2)
- Fer à souder 60W
- Fil de soudure
p.e. fi l de soudure sans plomb Ø 1,5
#58/405 (SN95.8Ag3.5Cu.7)
ANSI/J-STD-004
Source d’approvisionnement:
www.kester-online.de
(ill. 2)
- Soldering iron 60W
- Solder
e.g. lead free solder Ø 1,5
#58/405 (SN95.8Ag3.5Cu.7)
ANSI/J-STD-004
Source of supply:
www.kester-online.de
Préparation du câble
Preparation of the cable
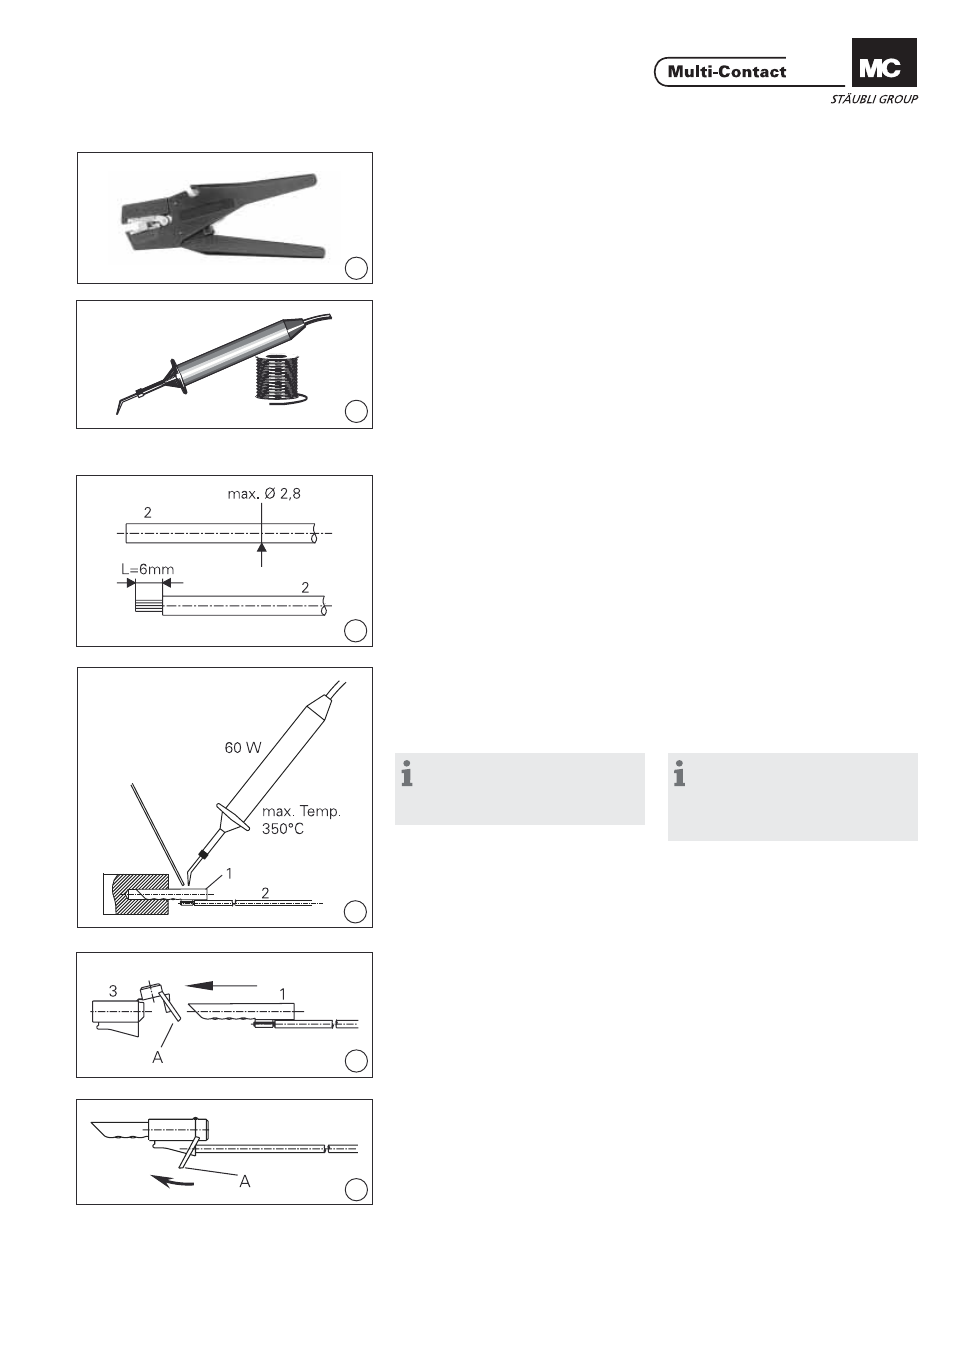
(ill. 3)
Couper le câble 2 à la longueur
prévue et dénuder le câble sur la
longueur L = 6mm avec la pince à
dénuder.
(ill. 3)
Cut the cable to the desired nominal
length and strip cable insulation to
length
L = 6mm with cable stripper.
Montage
Assembly
(ill. 4)
Souder le câble 2 dans la fi che 1.
Température de soudure max.: 350°C.
(ill. 4)
Solder cable 2 in plug 1.
Soldering temperature: 350°C max.
Remarque:
Utiliser un bloc avec un perçage
Ø 4,2mm pour maintenir la fi che 1
lors de la soudure
Note:
For soldering purposes a block
with a drilled hole Ø 4,2mm should
be used to hold the plug 1 in posi-
tion.
(ill. 5)
Introduire la fi che 1 à travers l‘anneau
de fermeture A dans le capuchon 3
jusqu‘en butée.
(ill. 5)
Feed plug 1 and cable through strap
A and push into insulator 3 to the end
position.
(ill. 6)
Fermer le volet arrière en veillant à
coincer la languette de retenue entre
le câble et la fi che. Puis accrocher
l‘anneau de fermeture à la partie avant
du capuchon.
(ill. 6)
Close the hinged fastening cap down
into position ensuring that the cable
strain relief tongue is between plug
and cable. Then hook strap A into
front part of insulator accordingly.