Warning, Installation, Install anti-tip device – Monogram 36 Inch Freestanding Professional Induction Smart Range Installation Instructions Manuel d'utilisation
Page 10
10
31-2001170 Rev 0
Installation
3
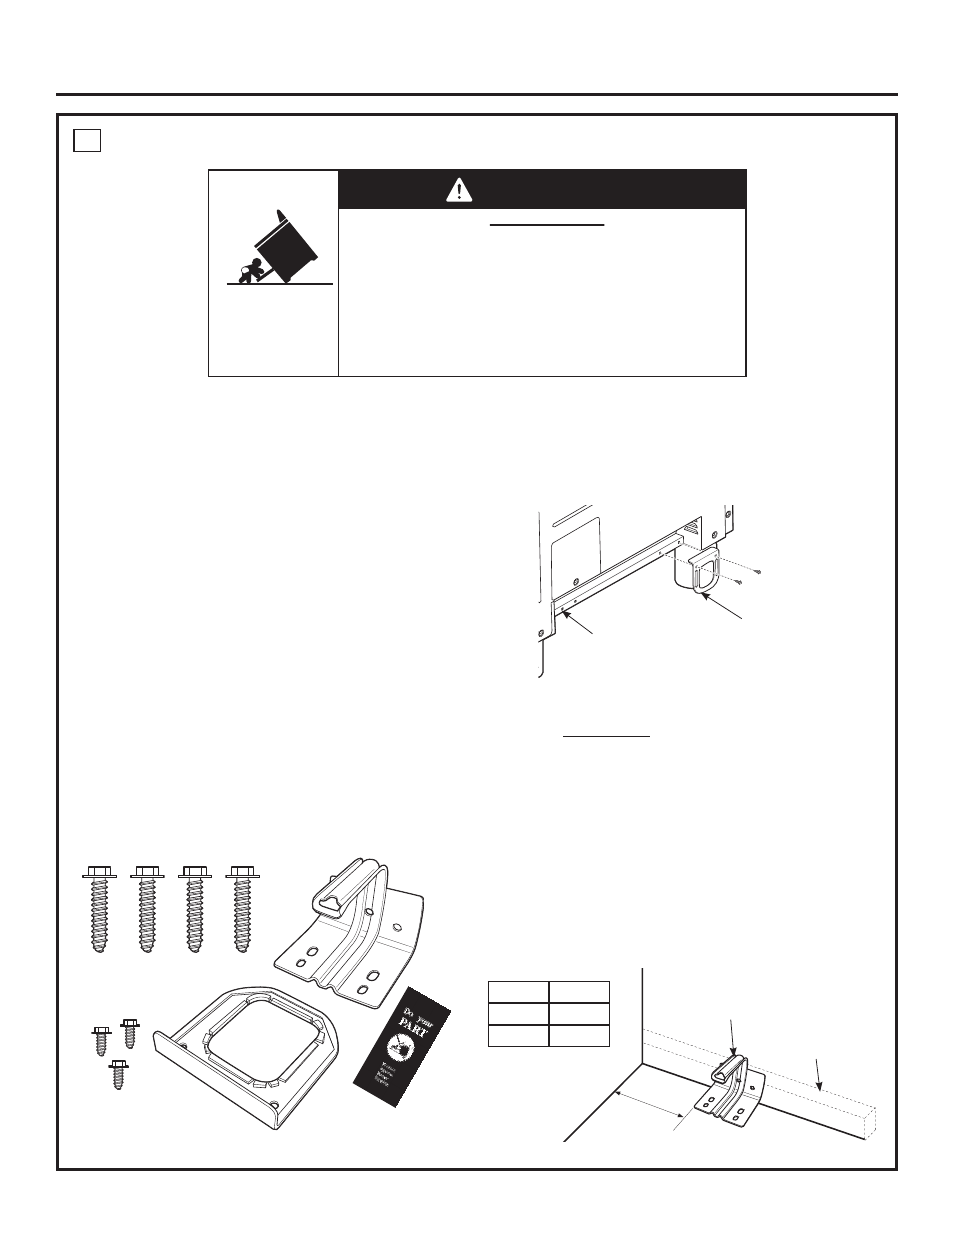
INSTALL ANTI-TIP DEVICE
To reduce the risk of tipping the range, the range must
be secured by a properly installed anti-tip bracket. See
installation instructions shipped with the bracket for
complete details before attempting to install.
To check if the bracket is installed and engaged
properly, look underneath the range. The anti-tip bracket
should be inserted into the opening on the anti-tip brace
on the range. If the bracket arm misses the brace to the
left or right, or the bracket arm is not protruding through
the brace opening, the bracket must be reinstalled.
If the range is pulled from the wall for any reason,
always repeat this procedure to verify the range is
properly secured by the anti-tip bracket.
If your range has no anti-tip bracket, call 1.800.626.8774
to receive one at no cost.
If the anti-tip device supplied with the range does not
fit this application, use the universal Anti-Tip Device
WB2X7909.
Read the AHAM Anti-Tip Safety Brochure packed with
the bracket.
Anti-Tip Parts Provided
Ŷ$WWDFKWKHDQWLWLSEUDFHRQWRWKHERWWRPRIWKHUDQJH
in the recessed area. Install 2 hex screws (provided)
through the brace and into the range.
NOTE:
This anti-tip device may be installed on the
opposite side of the range.
Ŷ0HDVXUHDQGPDUN'LPHQVLRQ$VHHWDEOHEHORZ
from the left (or right) side of the installation location.
If the countertop has an overhang, add that dimension
to Dimension A.
Ŷ3ODFHWKHDQWLWLSEUDFNHWDJDLQVWWKHIORRUDQGEDFNZDOO
at the marked location. Mark screw holes for fastening
the bracket to the wall sole plate and the floor.
Ŷ'ULOO´SLORWKROHVDWDDQJOH
Ŷ6HFXUHWKHEUDFNHWWRWKHZDOODQGRUIORRUZLWKDWOHDVW
2 wood screws (provided).
For Concrete or Cement Construction:
You must use
appropriate fastening hardware (not provided).
• A child or adult can tip the range and be killed.
• Install the anti-tip bracket to the wall or floor.
• Engage the range to the anti-tip bracket by sliding the
range back such that the foot is engaged.
• Re-engage the anti-tip bracket if the range is moved.
• Failure to do so can result in death or serious burns
to children or adults.
Tip-Over Hazard
WARNING
Anti-Tip Bracket
Anti-Tip Brace
4 Wood Screws
AHAM Anti-Tip
Safety Brochure
3 Hex Head Screws (2
required, 1 extra)
Alternate Brace
Position
Hex Screws
Anti-Tip Brace
Anti-Tip Bracket
A
Wall Sole Plate
Range
A
30”
5-1/16”
36”
5-1/16”