English – Louisiana Grills Black Label Series 57 Inch Freestanding Smart Wood Pellet Grill Assembly Guide Manuel d'utilisation
Page 5
www.louisiana-grills.com
5
ENGLISH
ENGLISH
2x
B
B
5.INSTALLING THE FRONT SHELF BRACKETS
1x Front Shelf (#8)
2x Screw (#B)
From underneath, insert the screw (from the outside) into the front shelf bracket and the front
shelf.
Repeat the installation for the other side of the front shelf.
2x
B
B
5.INSTALLING THE FRONT SHELF BRACKETS
1x Front Shelf (#8)
2x Screw (#B)
From underneath, insert the screw (from the outside) into the front shelf bracket and the front
shelf.
Repeat the installation for the other side of the front shelf.
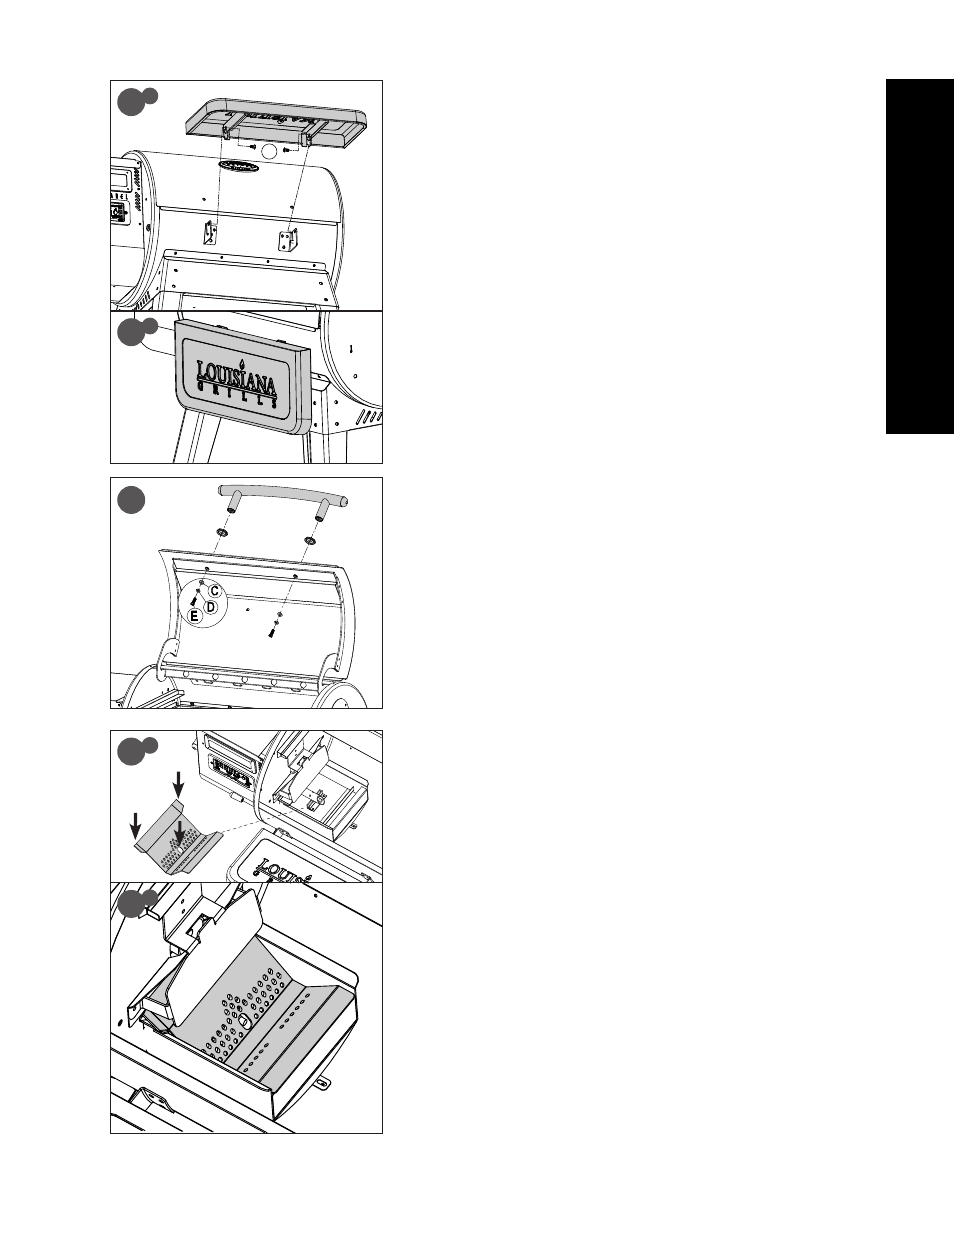
INSTALLING THE FRONT SHELF
PARTS REQUIRED:
1
x
Front Shelf (#14)
2
x
Screw (#B)
INSTALLATION:
•
From underneath, insert the Screw (from the inside) to fasten the Front Shelf
Brackets and the Front Shelf together. Note illustration 5A.
•
When the Front Shelf is not in use, it can be lowered. Note illustration 5B.
INSTALLING THE LID HANDLE
PARTS REQUIRED:
2
x
Lid Handle Bezel (#12)
1
x
Lid Handle (#13)
2
x
Washer (#C)
2
x
Locking Washer (#D)
2
x
Screw (#E)
INSTALLATION:
•
Take one screw, add a locking washer and a washer, then from inside the Main
Barrel lid, protrude the screw to the outside. Add a bezel on the screw, then
hand-tighten the screw (from the inside) into the Lid Handle.
NOTE: DO NOT OVER-TIGHTEN THE SCREWS. ONLY A SNUG FIT IS NECESSARY.
•
Repeat the same installation for the other end of the Lid Handle.
INSTALLING THE BURN GRATE
PARTS REQUIRED:
1
x
Burn Grate (#6)
INSTALLATION:
•
Insert the burn grate into the burn pot. The hole in the burn grate should align
and be open for the igniter to light the pellets. To verify proper positioning,
ensure the ledge-side of the burn grate is flush with the top of the burn pot,
and the winged-side should be flush under the fuel deflector. Note 7A and 7B.
IMPORTANT: PROPER PLACEMENT AND MAINTENANCE OF THE BURN GRATE IS
VITAL TO THE USE OF THE UNIT.
5
B
5
A
14
7
A
7
B
6
6
12
12
13