MAAX BANFF 60 Manuel d'utilisation
Page 6
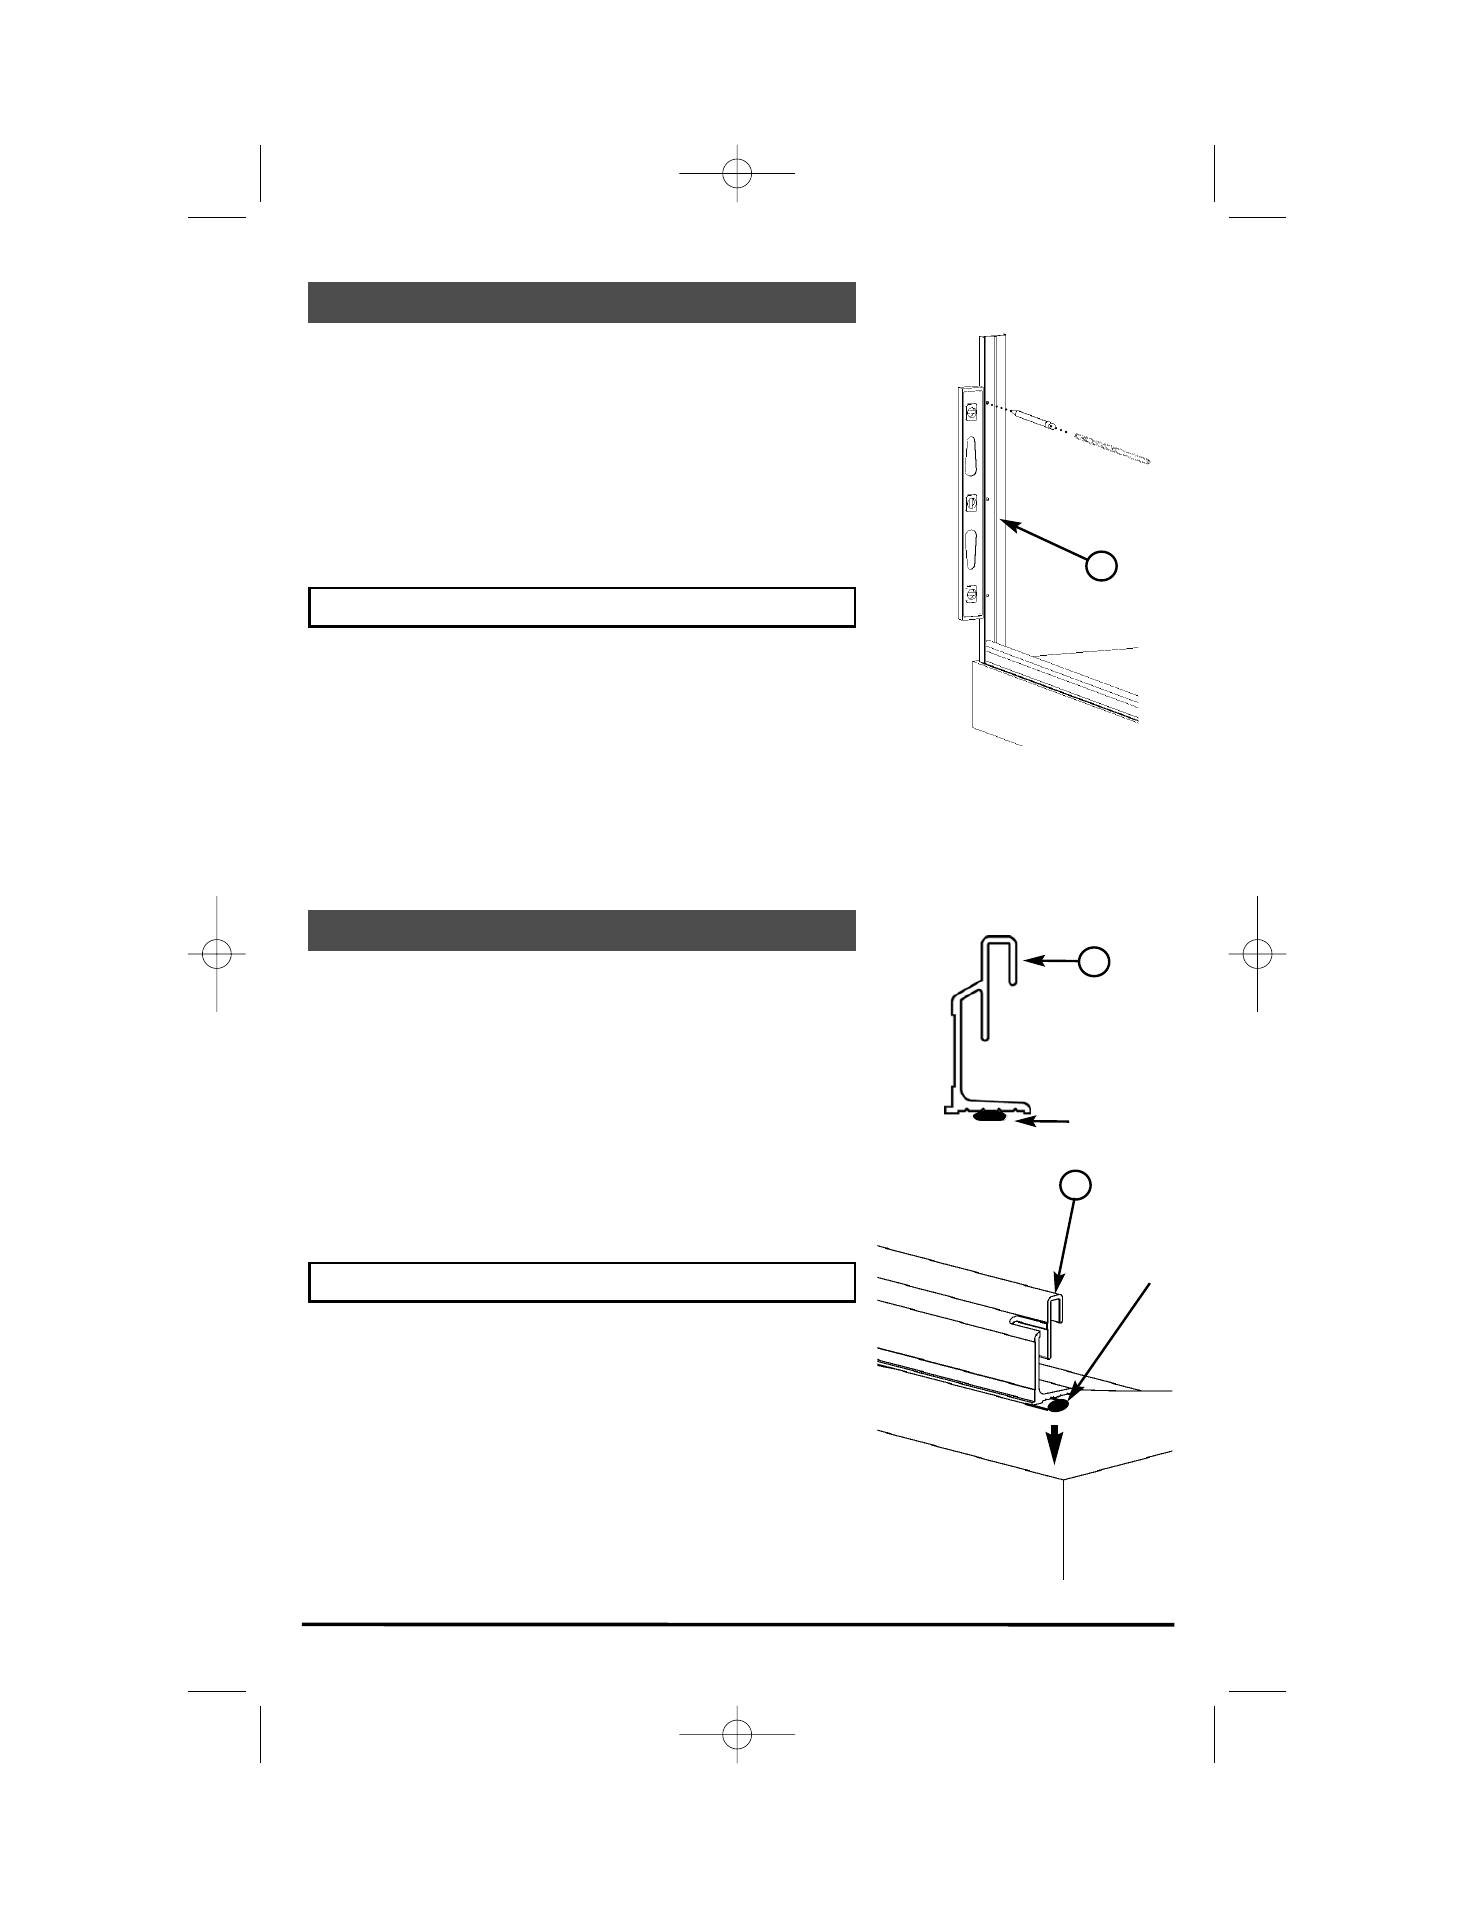
ÉTAPE 3 - Installation du montant mural
STEP 3 - Wall jamb installation
I.
Nivelez le montant mural (A).
II. Marquez sa position et percez les trous.
Mèches: - Pour céramique: 7/32” (5.5 mm) au carbure
- “Gypse”: 3/16” (4.8 mm)
- Plastique: 1/8’’ (3,2mm)
III. Répétez ces opérations pour l’autre montant mural.
ÉTAPE 4 - Application du silicone
STEP 4 - Silicone application
# 10049479-050323
6
I.
Level wall jamb (A).
II. Mark it’s position and drill the holes.
Drill bits: - Ceramic tile wall: 7/32’’ (5mm) carbite bit.
- Dry wall: 3/16” (4.8 mm)
- Plastic: 1/8’’ (3,2mm)
III. Repeat for other wall jamb.
I.
Appliquez du silicone sur toute la longueur sous la patte du
rail (C).
II. Replacez le rail sur le bain en vous référant aux marques
tracées à l’étape 2.
III. Appliquez du ruban à masquer pour retenir le rail pendant
que le silicone sèche.
IV. Essuyez l’excédant de silicone.
I.
Caulk the bottom track (C) along its full length under the
track.
II. Place track in its correct position, using the reference mark
made in step 2.
III. Apply masking tape to allow silicone to dry.
IV. Wipe away excess silicone.
A
Silicone
C
C
Silicone
copie10049479-050323 2 Panneaux Manhattan.qxd 3/28/2005 7:25 AM Page 6