MAAX APEX 108 9 FT Manuel d'utilisation
Page 4
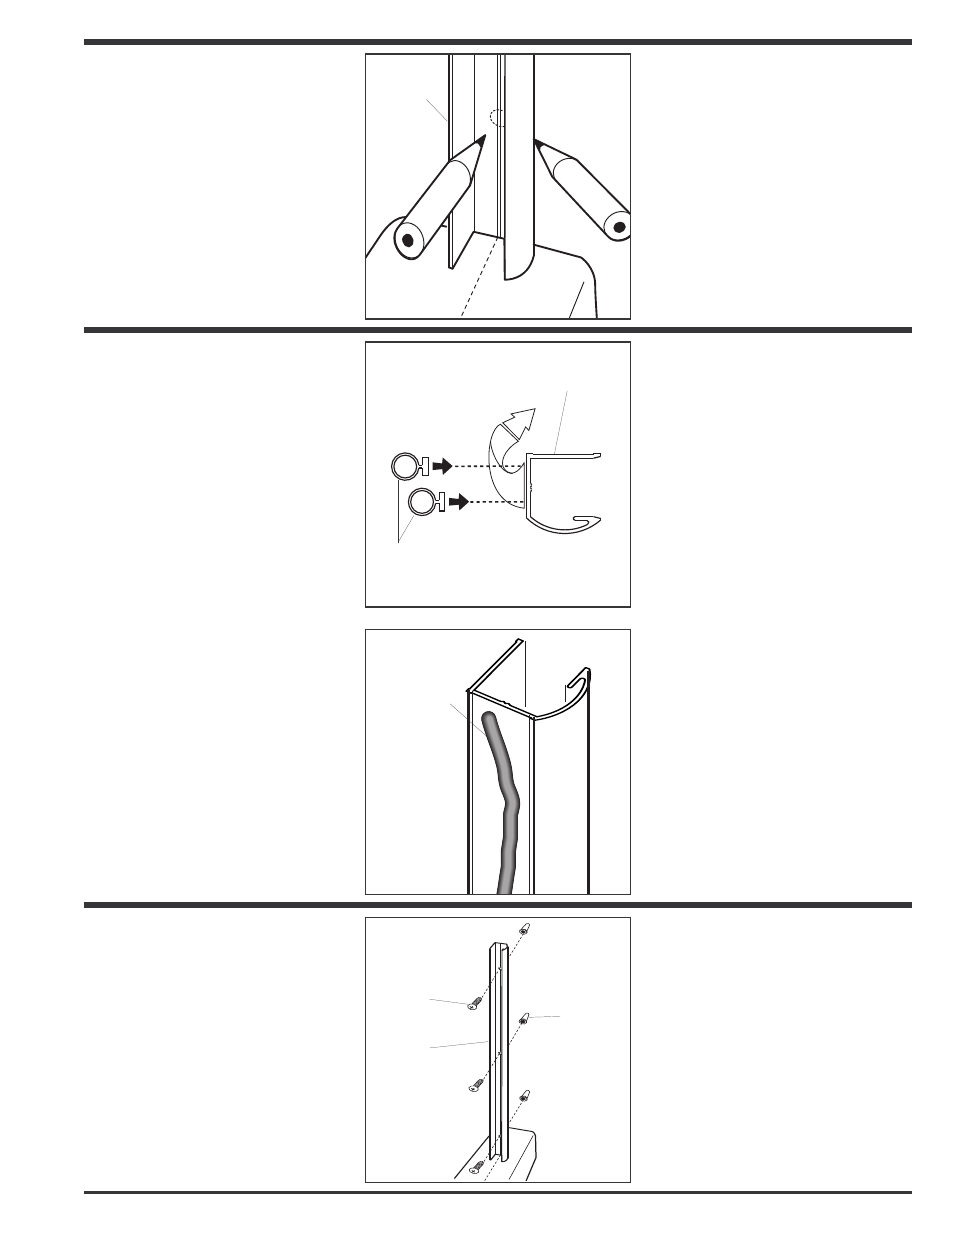
STEP 1
I
I Place center wall jamb (line
inside) (10041049) with the base
line.
I
I Level vertically, and position on
wall.
I
I Drill holes through wall jamb and
the wall at three locations (top,
middle, bottom).
Drill bit:
- Ceramic tile wall: 7/32” (5.5mm) car-
bide bit.
10041049
Round
on
outside
ÉTAPE 1
I Placez le montant mural
(10041049) en alignant son
centre (ligne à lʼintérieur) avec la
ligne de base.
I
Alignez verticalement à lʼaide
dʼun niveau, marquer sa position
sur le mur.
I Percez des trous à trois emplace-
ments au travers du montant et
du mur (haut, milieu, bas).
Mêches:
- Pour céramique: 7/32 (5.5mm) au
carbure.
Silicone
STEP 3
I
I Insert plastic plugs (10048201),
into walls if necessary.
I
I Fix wall jamb (10041049) with
screws (10047116).
I
I Repeat for other wall jamb.
10047116
10041049
10048201
ÉTAPE 3
I Insérez les chevilles de plastique
(10048201) dans les trous si
nécessaires.
I Fixez le montant mural
(10041049) avec les vis
(10047116).
I Répétez lʼopération pour lʼautre
montant mural.
STEP 2a
Do this step only if the bath lip
prevent the wall jamb from stand-
ing vertically on the shower wall:
I
Peal sticker behind the wall jamb
(10041049).
I
Place it both wall jamb gasket
(10048389).
I
Cut them at desired lenght.
ÉTAPE 2a
Faites cette étape seulement si la
lèvre du bain empêche le montant
dʼêtre vertical sur le mur.
I Pelez lʼautocollant derrière le
montant mural (10041049).
I Placez-y les deux joints
dʼétanchéité (10048389).
I Coupez-les à la longueur néces-
saire.
10048389
10041049
STEP 2b
If the bath lip is verticaly align with
your shower wall continue with
this step:
I
Apply silicone behind the wall
jamb (10041049).
ÉTAPE 2b
Si la lèvre du bain est alignée ver-
ticalement avec votre mur passez
directement à cette étape:
I Appliquez le silicone derrière le
montant (10041049)
.